The Ultimate Chocolate Cake Recipe: A Decadent Delight for Every Occasion

chocolate-cake-recipe

Introduction: A Slice of Happiness in Every Bite

Baking a chocolate cake from scratch is more than just about following a recipe—it’s about creating a warm, comforting experience that brings people together. The rich, velvety texture, the sweet aroma wafting through the house, and the joy of sharing a slice with loved ones make the effort all the more worthwhile. Whether you’re celebrating a milestone or indulging in a special treat, this chocolate cake recipe will guide you step-by-step to the most satisfying cake you’ll ever make. Ready to impress your family and friends? Let’s get started!


Ingredients for the Perfect Chocolate Cake

Chocolate Cake recipe

To make a truly irresistible chocolate cake, it’s essential to use high-quality ingredients that will result in a rich, moist texture and deep flavor. Below is the list of ingredients you’ll need for both the cake and frosting.

Ingredients for the Cake

IngredientQuantity
All-purpose flour1 and 3/4 cups (220g)
Granulated sugar1 and 1/2 cups (300g)
Unsweetened cocoa powder3/4 cup (65g)
Baking powder1 and 1/2 teaspoons
Baking soda1 and 1/2 teaspoons
Salt1 teaspoon
Eggs2 large
Whole milk1 cup (240ml)
Vegetable oil1/2 cup (120ml)
Vanilla extract2 teaspoons
Boiling water1 cup (240ml)
Hot coffee (optional)1/2 cup (120ml)

Ingredients for the Frosting

IngredientQuantity
Unsalted butter, softened1 cup (230g)
Powdered sugar3 and 1/2 cups (440g)
Unsweetened cocoa powder1/2 cup (50g)
Vanilla extract1 teaspoon
Milk1/2 cup (120ml)
Pinch of salt

How to Make the Perfect Chocolate Cake

Creating the perfect chocolate cake is easier than you think! Follow these steps to bake a cake that will leave everyone craving more.

Step 1: Preheat Your Oven

Before you begin, make sure your oven is set to 350°F (175°C). Prepare your cake pans by greasing them with butter or non-stick spray and then lightly flouring them, or line them with parchment paper for easy removal later.

Step 2: Combine the Dry Ingredients

In a large mixing bowl, sift together the following dry ingredients:

  • All-purpose flour
  • Granulated sugar
  • Cocoa powder
  • Baking powder
  • Baking soda
  • Salt

Mixing the dry ingredients first ensures that everything is evenly distributed, which helps the cake rise uniformly and results in a lighter, fluffier texture.

Step 3: Add the Wet Ingredients

Add the eggs, milk, vegetable oil, and vanilla extract to the dry mixture. Beat everything together using a stand mixer or a hand mixer on medium speed for 2-3 minutes. The batter should be smooth and slightly thick.

Step 4: Add the Boiling Water

Now, carefully stir in the boiling water (and hot coffee, if you’re using it). The batter will thin out, but don’t worry—this is what makes the cake incredibly moist.

Step 5: Bake the Cake

Evenly distribute the batter into the prepared cake pans. Bake for 30-35 minutes, or until a toothpick inserted into the center comes out clean. Let the cakes cool in their pans for about 10 minutes, then transfer them to a wire rack to cool completely.


Chocolate Frosting: The Finishing Touch

The frosting is what truly makes this chocolate cake stand out. It’s rich, creamy, and perfectly complements the moist cake. Here’s how to make it:

Step 1: Beat the Butter

In a medium-sized bowl, beat the softened butter with an electric mixer until it’s smooth and creamy (about 2 minutes).

Step 2: Add the Cocoa Powder and Sugar

Gradually add the unsweetened cocoa powder and powdered sugar in batches. Mix until everything is well combined. This helps avoid any messy splashes.

Step 3: Add the Milk and Vanilla

Pour in the milk and vanilla extract, then beat the frosting on medium speed for 3-4 minutes, until it becomes light and fluffy. If the frosting is too thick, add more milk, one tablespoon at a time, until it reaches the right consistency.

Step 4: Frost the Cake

Once your cakes are completely cooled, spread a layer of frosting over the first cake. Place the second layer on top, then continue to frost the top and sides until fully covered.


Tips for the Perfect Chocolate Cake

  • Use high-quality cocoa powder: The cocoa powder you use impacts the overall flavor of your cake. Invest in a good-quality unsweetened cocoa powder for the best results.
  • Don’t skip the boiling water: This step adds moisture and ensures a soft, tender crumb.
  • Chill the frosting: If the frosting becomes too soft while decorating, refrigerate it for a few minutes to firm it up.
  • Add a pinch of espresso powder: If you love deep, rich chocolate flavor, add a pinch of espresso powder to the batter—it brings out the chocolate’s richness.

Serving Suggestions

  • Classic Serving: Serve the cake with a scoop of vanilla ice cream for a simple yet indulgent treat.
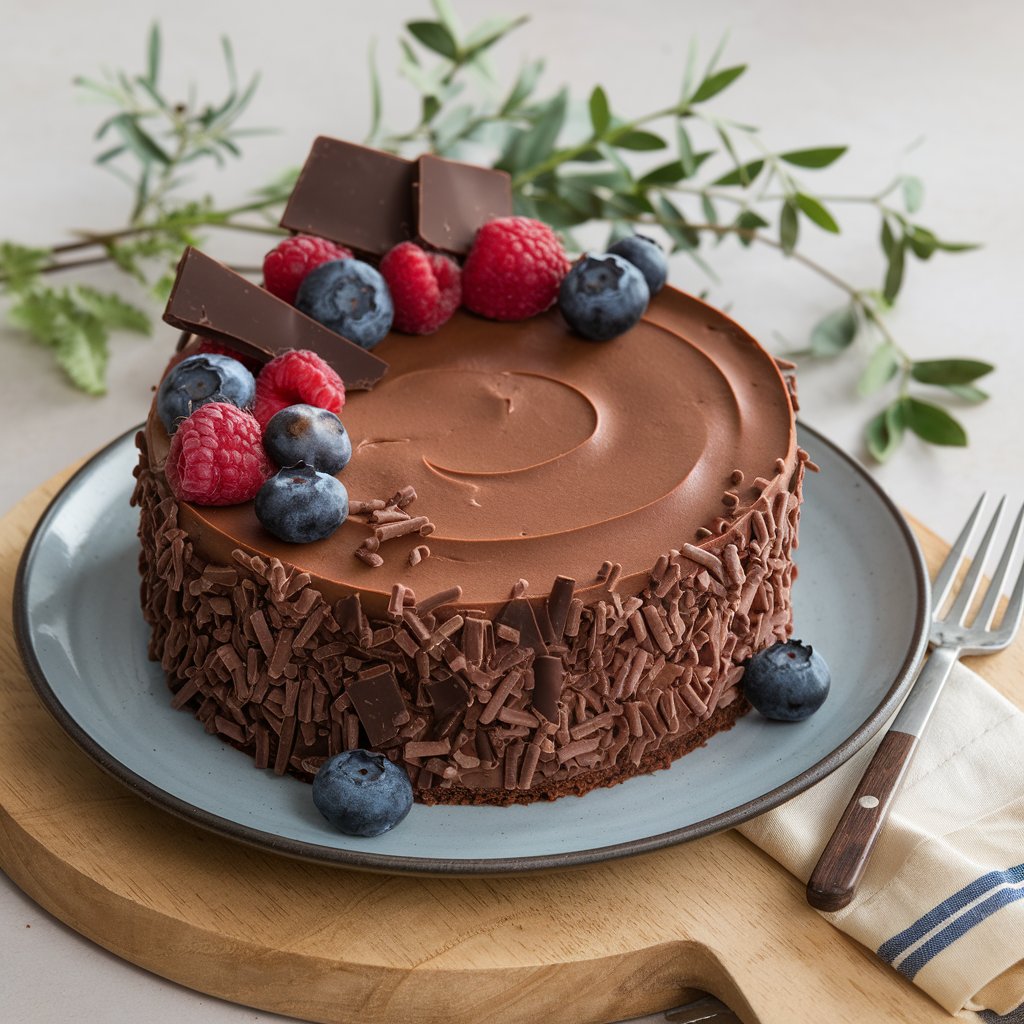
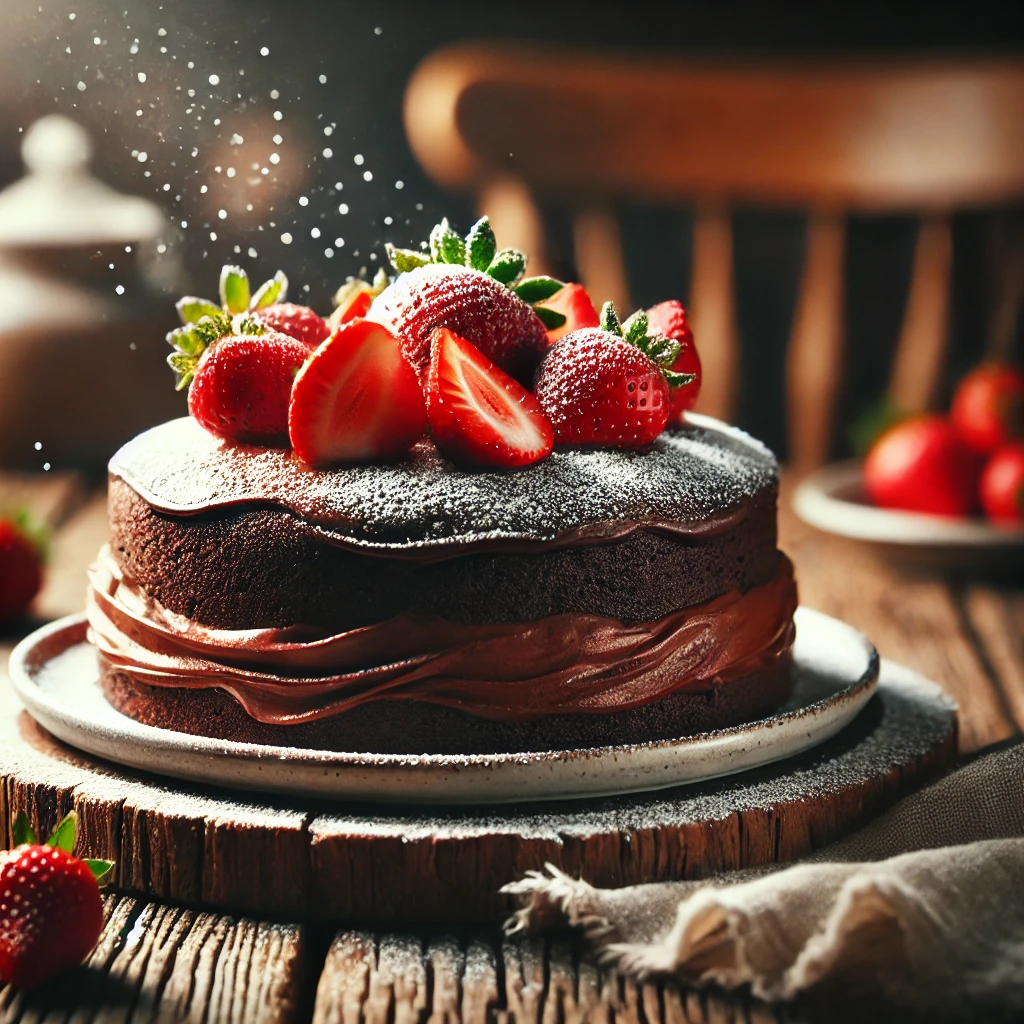
  • Fruit Topping: Add fresh raspberries or strawberries to enhance the chocolate flavor with a touch of brightness.
  • Decadent Add-ons: Drizzle the cake with warm chocolate ganache for an extra layer of chocolate heaven.

FAQ: Common Questions About Chocolate Cake

1. Can I make this cake ahead of time?

Yes! You can bake the cake up to 2 days in advance and store it in an airtight container. Frost it the day you plan to serve it for the best results.

2. Can I use a different type of flour?

For gluten-free options, try substituting the all-purpose flour with a gluten-free flour blend. Keep in mind, the texture may vary slightly.

3. How do I store leftover chocolate cake?

Store leftover cake in an airtight container at room temperature for up to 3 days. If you need to store it longer, place it in the refrigerator for up to 5 days.

4. Can I make cupcakes instead of a cake?

Absolutely! Divide the batter into a cupcake tin and bake at 350°F (175°C) for about 20-25 minutes. Keep an eye on them to avoid overbaking.


Conclusion: Ready to Bake Your Own Chocolate Cake?

There’s nothing quite as rewarding as the first bite of a homemade chocolate cake. With its rich flavor and moist texture, this recipe is sure to become your go-to for every occasion. Whether you’re celebrating a birthday, a family gathering, or simply treating yourself to a sweet indulgence, this chocolate cake recipe will never disappoint.

The Ultimate Vanilla Cake Recipe: Soft, Moist & Buttery

Introduction

There’s nothing quite like a classic vanilla cake recipe—soft, buttery, and bursting with rich vanilla flavor. Whether you’re celebrating a birthday, an anniversary, or just craving something sweet, this homemade vanilla cake is the perfect go-to dessert. Unlike store-bought cakes, this recipe delivers a moist and tender crumb with a delightful homemade taste.

In this comprehensive guide, you’ll learn step-by-step instructions, expert baking tips, ingredient substitutions, and creative decorating ideas. Plus, we’ve included a FAQ section to address common concerns and troubleshooting tips.


Ingredients for Vanilla Cake Recipe

To ensure the perfect balance of flavor and texture, use high-quality ingredients. Here’s what you’ll need:

Cake Ingredients

IngredientQuantity
All-purpose flour2 ½ cups (310g)
Baking powder2 ½ tsp
Salt½ tsp
Unsalted butter1 cup (226g)
Sugar2 cups (400g)
Eggs4 large
Vanilla extract1 tbsp
Whole milk1 cup (240ml)

Buttercream Frosting Ingredients

IngredientQuantity
Unsalted butter1 cup (226g)
Powdered sugar4 cups (480g)
Heavy cream/milk2 tbsp
Vanilla extract1 tbsp
Food coloring (optional)As needed

How to Make Vanilla Cake Recipe from Scratch

vanilla cake recipe

Step 1: Preheat & Prepare

  • Set your oven to 175°C (350°F).
  • Grease and line two 8-inch cake pans with parchment paper.

Step 2: Mix the Dry Ingredients

  • In a mixing bowl, whisk together:
  • Flour
  • Baking powder
  • Salt

Step 3: Cream the Butter and Sugar

  • Beat the butter and sugar using a hand or stand mixer until light and fluffy (about 3 minutes).

Step 4: Add the Eggs and Vanilla

  • Add eggs one at a time, beating after each addition.
  • Mix in the vanilla extract.

Step 5: Alternate Dry Ingredients and Milk

  • Gradually mix in the flour mixture and milk, starting and ending with flour.
  • Be careful not to overmix to maintain a soft texture.

Step 6: Bake the Cake

  • Divide batter evenly between the prepared pans.
  • Bake for 30-35 minutes, or until a toothpick inserted in the center comes out clean.
  • Let cakes cool for 10 minutes, then transfer to a wire rack.

How to Make Vanilla cake recipe Buttercream Frosting

Step 1: Beat the Butter

  • Using a mixer, whip butter for about 3 minutes until creamy.

Step 2: Add Powdered Sugar Gradually

  • Add powdered sugar one cup at a time, mixing on low speed.

Step 3: Add Liquid Ingredients

  • Stir in vanilla extract and heavy cream to achieve a fluffy texture.

Step 4: Add Color (Optional)

  • Mix in food coloring for a decorative touch.

Cake Assembly & Decorating Ideas

How to Frost Your Cake

  1. Place the first cake layer on a stand.
  2. Spread a generous layer of buttercream.
  3. Add the second layer and frost the entire cake.
  4. Smooth out using a spatula or piping bag.

Creative Decorating Ideas

  • Ombre Buttercream – Blend different shades for a gradient effect.
  • Drip Cake – Drizzle chocolate or caramel for an elegant finish.
  • Fresh Flowers – Decorate with edible flowers.
  • Sprinkles & Pearls – Add extra texture and color.

Expert Baking Tips & Troubleshooting

Common Mistakes to Avoid

Overmixing: Leads to a dense cake.
Using Cold Ingredients: Always use room-temperature eggs, butter, and milk.
Opening the Oven Too Soon: Can cause the cake to sink.

Storage Tips

  • Store in an airtight container at room temperature for 3 days.
  • Refrigerate for up to 5 days or freeze for 3 months.

Frequently Asked Questions (FAQ)

1. Can I use cake flour instead of all-purpose flour?

Yes! Substitute 2 ½ cups of cake flour for a lighter texture.

2. How do I make this cake eggless?

Use ½ cup unsweetened applesauce or ¼ cup Greek yogurt per egg.

3. Can I make this cake ahead of time?

Yes! Bake the cake 1 day in advance and store it wrapped in plastic.

4. What’s the best way to make a moist cake?

  • Avoid overbaking.
  • Use whole milk for richness.
  • Add a bit of sour cream or yogurt to enhance moisture.

5. Can I use a different frosting?

Yes! Try cream cheese frosting, chocolate ganache, or whipped cream.


Conclusion

This homemade vanilla cake recipe is soft, buttery, and bursting with rich vanilla flavor. Perfect for birthdays, celebrations, or an everyday treat, it’s a classic that never disappoints. Follow our simple steps, get creative with decorations, and enjoy a delicious homemade cake that’s better than any bakery!

Try this recipe today and let us know how it turns out! 🎂✨

vanilla cake recipe

Fluffy Pancakes: The Ultimate Guide to Light and Airy Perfection

Introduction: The Secret to Irresistibly Fluffy Pancakes

Few things can compare to the joy of a warm, pillowy stack of pancakes in the morning. Whether you’re craving a cozy weekend treat or a delightful breakfast indulgence, mastering the art of making fluffy pancakes can elevate your mornings. But why settle for flat, dense pancakes when you can achieve cloud-like perfection? This guide will walk you through the secrets, techniques, and pro tips to ensure that your pancakes turn out irresistibly light and airy every single time.


📝 Ingredients Table for Fluffy Pancakes

IngredientQuantityNotes
All-purpose flour1 ½ cupsProvides structure
Baking powder2 ½ tspKey to fluffiness
Sugar2 tbspAdds a touch of sweetness
Salt½ tspEnhances flavor
Milk1 ¼ cupsRoom temperature for better texture
Egg1 largeHelps with binding and fluffiness
Butter (melted)2 tbspAdds richness
Vanilla extract1 tspBoosts flavor
Optional: ButtermilkSubstitute for milkAdds extra fluffiness

The Science Behind Fluffy Pancakes

Why Baking Powder Matters

Baking powder is the driving force behind fluffy pancakes. It releases carbon dioxide when mixed with liquid, creating air pockets that expand as the batter cooks. Always use fresh baking powder for optimal results.

The Perfect Batter Consistency

The key to achieving airy pancakes is maintaining the right batter consistency. Overmixing can activate the gluten, leading to a tough texture. Aim for a lumpy batter with minimal stirring to keep the pancakes soft and light.

Cooking at the Right Temperature

A preheated pan set to medium heat is essential. If the pan is too hot, the pancakes may burn on the outside while remaining raw inside. If it’s too cool, they won’t rise properly. Test by dropping a small amount of batter into the pan—if it sizzles gently, you’re good to go.


Step-by-Step Guide to Making Fluffy Pancakes

Step 1 – Preparing the Batter

  1. Sift the dry ingredients (flour, baking powder, sugar, and salt) into a mixing bowl.
  2. In a separate bowl, whisk the egg, milk, vanilla extract, and melted butter together.
  3. Gently combine the wet and dry ingredients, stirring just until incorporated. The batter should be slightly lumpy—this is the secret to extra fluffiness!

Step 2 – Cooking Techniques for Extra Height

  1. Preheat a non-stick pan or griddle over medium heat and lightly grease with butter.
  2. Use a ¼ cup measuring cup to pour the batter onto the pan, ensuring evenly sized pancakes.
  3. Wait until bubbles appear on the surface (about 2 minutes), then flip gently and cook for another 1-2 minutes until golden brown.

Step 3 – Serving Suggestions

  • Classic Toppings: Maple syrup, fresh berries, and butter.
  • Creative Twists: Whipped cream, chocolate chips, nut butter, or caramel drizzle.
  • Savory Options: Add bacon crumbles or cheese for a unique twist.

Pro Tips to Make Pancakes Extra Fluffy

Use buttermilk instead of regular milk – The acidity reacts with baking powder, creating an extra lift.
Let the batter rest for 5-10 minutes – This allows the gluten to relax, leading to a softer texture.
Whip egg whites separately and fold them in – This method, commonly used in soufflé pancakes, creates an ultra-light consistency.
Do not press down on pancakes while cooking – This can flatten the air pockets inside, making them dense.


Variations of Fluffy Pancakes

Classic Buttermilk Pancakes

A tangy twist on traditional pancakes, perfect for those who love an extra soft texture.

Banana Fluffy Pancakes

Mash a ripe banana into the batter for natural sweetness and added moisture.

Japanese Soufflé Pancakes

These extra-thick, jiggly pancakes require whipped egg whites for their signature height and airy texture.


Common Mistakes to Avoid

🚫 Overmixing the batter – Makes the pancakes chewy instead of light.
🚫 Using expired baking powder – Results in flat, dense pancakes.
🚫 Cooking on the wrong heat – Too high burns them, too low makes them dry.
🚫 Flipping too early – Wait for visible bubbles before turning.


FAQ – Your Pancake Questions Answered

Why aren’t my pancakes fluffy?

  • You may have overmixed the batter or used old baking powder.

Can I make the batter ahead of time?

  • It’s best to make fresh batter, but if necessary, store it in the fridge for up to 24 hours.

What’s the best way to store pancakes?

  • Store in an airtight container in the fridge for up to 3 days or freeze for longer storage.

Can I use whole wheat flour instead of all-purpose flour?

  • Yes, but it may make the pancakes denser. To keep them light, try a mix of whole wheat and all-purpose flour.

Conclusion: Your Perfect Pancake Journey Starts Here

Mastering fluffy pancakes is easier than you think. By following the right techniques, using quality ingredients, and avoiding common mistakes, you can create the ultimate stack of golden, airy pancakes every time. Whether you stick to the classic recipe or experiment with exciting variations, you now have all the tools to make breakfast truly special.

Fluffy Pancakes Recipe

The Ultimate dessert Oreo Lava Cake Recipe – Gooey, Decadent & Irresistible!

Introduction: Why You’ll Love This dessert Oreo Lava Cake

Imagine cutting into a warm, soft chocolate cake and discovering a molten Oreo cream center oozing out. The combination of rich chocolate and the classic cookies-and-cream flavor makes this dessert absolutely irresistible. Whether you’re craving a quick indulgence or planning a special treat for friends and family, this dessert Oreo Lava Cake recipe is a guaranteed crowd-pleaser.

In this article, you will learn how to make a foolproof dessert Oreo Lava Cake with simple ingredients and step-by-step instructions. Plus, we’ll explore tips, variations, and frequently asked questions to ensure your lava cakes turn out perfectly every time.


Ingredients & Substitutions

To make this decadent dessert Oreo Lava Cake, you’ll need the following ingredients. Here’s a breakdown, along with some substitute options in case you need alternatives.

Essential Ingredients

IngredientQuantitySubstitute Options
Dark chocolate200gMilk or white chocolate
Unsalted butter100gCoconut oil
Powdered sugar½ cupBrown sugar
Eggs2Flaxseed + water (vegan option)
Flour¼ cupAlmond flour (gluten-free)
Crushed Oreos6Any chocolate sandwich cookie

These ingredients work together to create the perfect balance of richness and texture.


Step-by-Step Instructions

How to Make dessert Oreo Lava Cake

dessert Oreo Lava Cake

Step 1: Prepping the Batter

  1. Preheat your oven to 200°C (400°F).
  2. Melt the dark chocolate and butter together in a microwave or over a double boiler.
  3. Stir in the powdered sugar until fully combined.
  4. Add the eggs, one at a time, whisking continuously.
  5. Fold in the flour until smooth and well incorporated.

Step 2: Assembling the Cakes

  1. Grease your ramekins with butter or non-stick spray.
  2. Fill each ramekin halfway with the batter.
  3. Place a whole Oreo in the center of each ramekin.
  4. Pour the remaining batter on top, fully covering the Oreo.

Step 3: Baking for the Perfect Lava Texture

  1. Place the ramekins on a baking tray and bake for 10-12 minutes.
  2. The edges should be set, while the center remains soft and gooey.
  3. Let the cakes sit for 1-2 minutes before unmolding them.

Step 4: Serving Suggestions

  1. Gently run a knife around the edges and invert the cake onto a plate.
  2. Serve warm with a scoop of vanilla ice cream, whipped cream, or a drizzle of chocolate sauce.
  3. Garnish with crushed Oreos for extra crunch.

Tips for Success

  • Do not overbake! The lava effect happens when the center stays slightly undercooked.
  • Use high-quality chocolate for a rich and deep flavor.
  • Grease your ramekins well to ensure easy release.
  • Let the cakes rest for 1-2 minutes before unmolding to prevent breaking.

Variations to Try

Looking to experiment? Here are some delicious twists on the classic Oreo Lava Cake:

White Chocolate dessert Oreo Lava Cake

  • Swap dark chocolate for white chocolate to create a creamy, vanilla-flavored version.

Peanut Butter Lava Cake

  • Add a teaspoon of peanut butter in the center instead of an Oreo for a nutty, gooey surprise.

Vegan dessert Oreo Lava Cake

  • Use coconut oil instead of butter and flax eggs instead of regular eggs for a dairy-free and plant-based version.

Nutella Lava Cake

  • Replace the Oreo filling with a generous spoonful of Nutella for a hazelnut-chocolate lava explosion.

Frequently Asked Questions (FAQ)

Can I make Oreo Lava Cake in the microwave?

Yes! You can prepare an easy microwave version by using a microwave-safe mug:

  1. Mix all the ingredients in a mug, adding a crushed Oreo in the center.
  2. Microwave on high for 45-60 seconds.
  3. Let it sit for a few seconds before digging in.

How do I store and reheat lava cakes?

  • Store in an airtight container for up to 2 days.
  • Reheat in the microwave for 15-20 seconds to restore its gooey center.

What’s the best way to serve dessert Oreo Lava Cake?

For the best experience, serve warm with:

  • Vanilla ice cream
  • Drizzled chocolate or caramel sauce
  • Fresh berries for a tangy contrast

Can I make these lava cakes in advance?

Yes! Prepare the batter and assemble the cakes ahead of time. Refrigerate until ready to bake. When needed, bake directly from the fridge, adding an extra 1-2 minutes to the baking time.


Conclusion: Indulge in dessert Oreo Lava Goodness!

This dessert Oreo Lava Cake is everything a dessert should be: rich, gooey, and bursting with cookies-and-cream flavor. Whether you’re making it for a party, a romantic dinner, or just a cozy night in, it’s a surefire way to satisfy your sweet tooth.

Ready to give it a try? Make this decadent treat and share your results! Don’t forget to snap a photo and tag us on social media. 🍪🔥

Enjoy baking and indulging in this irresistible dessert Oreo Lava Cake!

dessert Oreo Lava Cake

The Ultimate Caramelized Banana Cheesecake Bars Recipe

Introduction

Imagine sinking your teeth into a buttery, crunchy crust, followed by a rich, creamy cheesecake filling bursting with banana flavor. As if that wasn’t enough, it’s topped with perfectly caramelized bananas, adding a deep, golden sweetness to every bite. If you’re a fan of indulgent yet easy-to-make desserts, these Caramelized Banana Cheesecake Bars will become your new favorite treat.

Not only do they deliver a perfect balance of texture and flavor, but they also make a stunning dessert for parties, special occasions, or simply when you crave something sweet. Let’s dive into this irresistible recipe!

Caramelized Banana Cheesecake Bars

Why You’ll Love These Caramelized Banana Cheesecake Bars

  • Perfect Texture – A crunchy biscuit crust, creamy banana cheesecake, and soft caramelized topping.
  • Easy to Make – Simple steps with common ingredients.
  • Great for Any Occasion – Perfect for desserts, snacks, or entertaining guests.
  • Make-Ahead Friendly – These bars taste even better after chilling overnight.

Ingredients

For the Crust:

IngredientQuantity
Crushed digestive biscuits (or graham crackers)1 ½ cups (180g)
Unsalted butter, melted½ cup (115g)
Brown sugar2 tbsp

For the Cheesecake Filling:

IngredientQuantity
Cream cheese, softened2 blocks (225g each)
Granulated sugar½ cup (100g)
Ripe bananas, mashed2
Eggs2
Vanilla extract1 tsp
Heavy cream½ cup (120ml)

For the Caramelized Banana Topping:

IngredientQuantity
Butter2 tbsp
Bananas, sliced2
Brown sugar¼ cup (50g)
Cinnamon1 tsp

Step-by-Step Instructions

1️⃣ Prepare the Crust:

  • Preheat your oven to 175°C (350°F).
  • In a bowl, mix crushed biscuits, melted butter, and brown sugar.
  • Press the mixture into a lined baking pan, spreading evenly.
  • Bake for 10 minutes and set aside to cool.

2️⃣ Make the Cheesecake Filling:

  • In a mixing bowl, beat cream cheese and sugar until smooth.
  • Add mashed bananas, eggs, vanilla extract, and heavy cream.
  • Blend until fully combined.
  • Pour the cheesecake mixture over the cooled crust, spreading it evenly.
  • Bake for 25-30 minutes or until set.

3️⃣ Prepare the Caramelized Banana Topping:

  • Melt butter in a pan over medium heat.
  • Add sliced bananas, brown sugar, and cinnamon.
  • Stir gently and cook for 2-3 minutes, allowing the bananas to caramelize.

4️⃣ Assemble & Serve:

  • Let the cheesecake cool completely.
  • Top with the caramelized bananas.
  • Refrigerate for at least 2 hours before slicing into bars.

Pro Tips for the Best Banana Cheesecake Bars

Use very ripe bananas for maximum sweetness and natural flavor.
Don’t overmix the cheesecake filling to keep it light and creamy.
Let it chill overnight for the best texture.
Enhance the flavor with a drizzle of caramel sauce or sea salt flakes.


How to Store & Make Ahead

  • Refrigerator: Store in an airtight container for up to 5 days.
  • Freezer: Wrap individual bars in plastic wrap and freeze for up to 2 months.
  • Make Ahead: Bake a day before and refrigerate overnight for best results.

Frequently Asked Questions (FAQs)

1️⃣ Can I use a different crust?

Yes! You can use Oreo crumbs, shortbread cookies, or vanilla wafers instead of digestive biscuits.

2️⃣ What if I don’t have heavy cream?

You can substitute Greek yogurt or sour cream for a similar creamy texture.

3️⃣ How do I make the topping even richer?

Drizzle with honey, maple syrup, or caramel sauce for extra decadence.

4️⃣ Can I make this gluten-free?

Absolutely! Use gluten-free biscuits for the crust, and ensure all other ingredients are gluten-free.


Conclusion

These Caramelized Banana Cheesecake Bars are the perfect blend of rich, creamy, and indulgent flavors. Whether you’re making them for a party, a family dessert, or just a treat for yourself, they’re guaranteed to impress. Give this recipe a try and enjoy the sweet, caramelized banana goodness!

👉 Did you love this recipe? Share your experience in the comments below!

Caramelized Banana Cheesecake Bars

Shadow Lemon Poppy Seed Cookies ✨ – Zesty, Soft & Irresistible!


Shadow Lemon Poppy Seed Cookies

Introduction

Imagine biting into a soft, slightly crisp cookie bursting with zesty lemon flavor and the delightful crunch of poppy seeds. ShadowLemon Poppy Seed Cookies are the perfect treat for any occasion, offering a refreshing twist on traditional cookies. Whether you’re baking for a special event or simply craving something sweet and citrusy, this recipe delivers the ideal balance of tangy lemon and satisfying texture. Read on to discover how to make these irresistible cookies and why they should be your next baking project!


Ingredients for Shadow Lemon Poppy Seed Cookies

To create these vibrant cookies, you only need a few simple ingredients. Check out the list below for the quantities needed:

IngredientQuantity
Unsalted butter (room temperature)1 cup (225g)
Granulated sugar1 cup (200g)
Eggs2
Vanilla extract1 tsp
Fresh lemon juice2 tbsp
Lemon zest2 tsp
All-purpose flour2 ½ cups (310g)
Baking powder1 tsp
Poppy seeds1 ½ tbsp

How to MakeShadow Lemon Poppy Seed Cookies

Shadow Lemon Poppy Seed Cookies 🍋✨ – Zesty, Soft & Irresistible!

Follow these step-by-step instructions to bake the most zesty and delicious cookies you’ll ever taste:

1️⃣ Preparing the Dough

Start by preheating your oven to 350°F (175°C) and lining two baking sheets with parchment paper. This will ensure your cookies bake evenly and don’t stick to the tray.

In a large mixing bowl, cream the unsalted butter and granulated sugar together until the mixture is light and fluffy. This process is essential for achieving the perfect texture. Next, beat in the eggs, one at a time, followed by the vanilla extract, lemon juice, and lemon zest. These ingredients will give your cookies a fresh, citrusy aroma and flavor.

2️⃣ Mixing the Dry Ingredients

In a separate bowl, whisk together the all-purpose flour, baking powder, and a pinch of salt. Once combined, gradually add the dry ingredients to your wet mixture and stir until just incorporated. Be careful not to overmix, as this can result in tough cookies. Once the dough comes together, fold in the poppy seeds, which will add a delightful crunch to each bite.

3️⃣ Shaping the Cookies

Using a tablespoon or cookie scoop, scoop out portions of dough and roll them into balls. Place them onto your prepared baking sheets, spacing them about 2 inches apart. Gently flatten each dough ball with the back of a spoon to give them a slightly rounded shape. This step helps the cookies bake evenly and gives them that perfect golden edge.

4️⃣ Baking the Cookies

Bake the cookies for about 10-12 minutes or until the edges are lightly golden. Be careful not to overbake them as you want the centers to remain soft and chewy. Let the cookies cool on the baking sheet for a few minutes before transferring them to a wire rack to cool completely.


Why You’ll Love These Shadow Lemon Poppy Seed Cookies

These cookies offer a delightful balance of flavors and textures that will keep you coming back for more. Here’s why you’ll love them:

  • Zesty and Refreshing Flavor: The fresh lemon juice and zest provide a bright, tangy flavor that’s perfect for spring and summer.
  • Crunchy Texture: The poppy seeds add a subtle crunch to each bite, making these cookies feel more exciting than your average cookie.
  • Soft, Chewy Centers: The interior of the cookies is soft and chewy, while the edges are lightly crisp, creating the perfect contrast.

Expert Tips for Perfect Shadow Lemon Poppy Seed Cookies

If you want to take your baking to the next level, here are a few expert tips:

  • Use Fresh Lemons: For the best flavor, always use fresh lemon juice and zest. Bottled lemon juice can be too acidic and may not give you the same brightness.
  • Chill the Dough: If you’re looking for thicker cookies, chill the dough in the fridge for about 30 minutes before baking. This will help prevent the cookies from spreading too much during baking.
  • Don’t Overmix the Dough: Overmixing can result in dense cookies. Stir the dough until just combined to keep your cookies light and airy.

Frequently Asked Questions (FAQs)

1️⃣ Can I make Shadow Lemon Poppy Seed Cookies in advance?

Yes! You can prepare the dough up to 3 days in advance and store it in the refrigerator. Simply scoop the dough into balls, cover them tightly, and chill. When you’re ready to bake, just place the chilled dough onto a baking sheet and bake as usual.

2️⃣ How should I store these cookies?

Store your Lemon Poppy Seed Cookies in an airtight container at room temperature for up to 1 week. If you want to keep them fresher for longer, store them in the fridge for up to 10 days.

3️⃣ Can I make these cookies gluten-free?

Yes! Swap the all-purpose flour for a gluten-free flour blend that works cup for cup. Be sure to check that your poppy seeds are also certified gluten-free.

4️⃣ Can I add a glaze to these cookies?

Absolutely! A light glaze made with powdered sugar and lemon juice can add a little extra sweetness and shine. Simply whisk together 1 cup of powdered sugar and 1-2 tsp of lemon juice until smooth, then drizzle it over the cooled cookies.


Conclusion

There’s no doubt that these ShadowLemon Poppy Seed Cookies will be a hit at your next gathering or as a delightful treat for yourself. Their zesty lemon flavor, crunchy texture, and soft, chewy centers make them irresistible. With this easy-to-follow recipe, you can enjoy these cookies fresh out of the oven in no time.

If you’ve enjoyed this recipe, don’t forget to share it with friends and family, or leave a comment below to let us know how yours turned out! Ready to bake? Grab your ingredients and get started on these flavorful cookies today!


Let me know if you’d like to make any changes or if you’d like further optimization for SEO! 😊

Shadow Lemon Poppy Seed Cookies 🍋✨ – Zesty, Soft & Irresistible!

The Ultimate Brownie Lava Cookies Recipe – Gooey & Irresistible!


Brownie Lava Cookies Recipe

Introduction

Brownie Lava Cookies are the perfect fusion of chewy cookies and molten brownies, creating a dessert that is both decadent and satisfying. If you’re a chocolate lover, these cookies will quickly become your go-to treat! In this guide, you’ll learn how to make these irresistible cookies, along with expert baking tips to achieve the perfect lava center.


Ingredients & Measurements

IngredientQuantity
Unsalted butter (melted)1 cup (225g)
Dark brown sugar1 cup (200g)
Granulated sugar½ cup (100g)
Eggs2
Vanilla extract2 tsp
All-purpose flour2 cups (250g)
Cocoa powder½ cup (60g)
Baking soda1 tsp
Salt½ tsp
Semi-sweet chocolate chips1 cup (175g)
Lava Filling8 small brownie pieces or chocolate truffles

Brownie Lava Cookies Recipe

Step-by-Step Instructions

1️⃣ Preparing the Dough

  • Preheat oven to 175°C (350°F) and line a baking sheet with parchment paper.
  • In a large bowl, mix melted butter with brown sugar and granulated sugar until smooth.
  • Add eggs one at a time, then stir in vanilla extract.

2️⃣ Mixing the Dry Ingredients

  • In a separate bowl, whisk together flour, cocoa powder, baking soda, and salt.
  • Gradually add the dry ingredients into the wet mixture and stir until combined.
  • Fold in semi-sweet chocolate chips.

3️⃣ Stuffing the Lava Center

  • Scoop cookie dough (about 2 tablespoons per cookie) and slightly flatten.
  • Place a brownie piece or chocolate truffle in the center and seal the dough around it.

4️⃣ Baking to Perfection

  • Arrange cookies on the baking sheet, leaving space for spreading.
  • Bake for 10-12 minutes, until the edges are set but the centers remain soft.
  • Let cool for 5 minutes before enjoying the molten lava effect!

Expert Tips for the Best Brownie Lava Cookies

✔️ Choose the Right Chocolate

  • Use high-quality cocoa powder and chocolate chips for a richer taste.
  • For a more intense lava center, opt for dark chocolate truffles.

✔️ Avoid Overbaking

  • The secret to gooey lava cookies is slightly underbaking them. The centers will continue cooking as they cool.

✔️ Freezing for Later

  • You can freeze unbaked cookie dough balls with their lava centers and bake straight from frozen – just add 1-2 extra minutes to the baking time.

Serving Suggestions

  • With Ice Cream 🍨: Pair with vanilla or caramel ice cream for a restaurant-style dessert.
  • With Coffee ☕: Enjoy alongside your morning espresso for a delightful chocolate boost.
  • With Berries 🍓: Add fresh strawberries or raspberries for a touch of freshness.

Frequently Asked Questions (FAQs)

1️⃣ Can I use store-bought brownies for the lava filling?

Yes! Store-bought brownies work well as a filling. Just cut them into small pieces before stuffing them into the cookie dough.

2️⃣ How do I store Brownie Lava Cookies?

Store them in an airtight container at room temperature for up to 4 days or refrigerate for a week. Warm them in the microwave for a molten effect.

3️⃣ Can I make these cookies gluten-free?

Absolutely! Replace all-purpose flour with a gluten-free 1:1 baking blend for a delicious gluten-free version.

4️⃣ What’s the best way to melt the butter?

Melt butter in a microwave-safe bowl in 20-second intervals, stirring between each until fully melted.


Final Thoughts

Brownie Lava Cookies are a dream for any chocolate lover—crispy on the outside and irresistibly gooey on the inside! Whether for a cozy night in or a special occasion, these cookies will always impress. Try them today and share your results using #LavaCookies #BrownieStuffed #MoltenChocolate!


Let me know if you want any adjustments! 😊🍫🔥

Brownie Lava Cookies Recipe

Banana Cheesecake: The Ultimate Creamy and Decadent Recipe

Introduction: A Slice of Comfort in Every Bite

Imagine biting into a smooth, velvety cheesecake infused with the natural sweetness of ripe bananas. It’s the perfect blend of richness and fruitiness, wrapped in a buttery crust that crumbles just right with every bite. If you love desserts that balance indulgence with fresh flavors, this banana cheesecake recipe is a must-try.

In this guide, you’ll discover everything you need to create a flawless banana cheesecake, from the best ingredients to expert baking tips. Whether you’re an experienced baker or just starting, this recipe will soon become a favorite in your kitchen. Let’s dive in!


🍌 What Makes Banana Cheesecake Special?

Why You’ll Love This Banana Cheesecake

  • Incredibly creamy texture that melts in your mouth.
  • The natural sweetness of bananas eliminates the need for excessive sugar.
  • Versatile – you can bake it or try a no-bake version.
  • Perfect for any occasion, from birthdays to casual gatherings.

A Brief History of Cheesecake with a Banana Twist

Cheesecake dates back to ancient Greece, where it was served as a high-energy treat. Over time, the classic recipe evolved, incorporating ingredients from different cultures. Adding bananas to cheesecake is a modern take, bringing a tropical, slightly caramelized sweetness that complements the tanginess of the cream cheese.


🍽️ Ingredients for the Best Banana Cheesecake

Key Ingredients for a Creamy Banana Cheesecake

IngredientQuantityNotes
Crushed Graham Crackers (or Oreos)1 ½ cupsForms a firm crust
Melted Butter5 tbspBinds the crust
Cream Cheese16 oz (450g)Full-fat for a rich texture
Ripe Bananas2 largeMashed for natural sweetness
Sugar½ cupAdjust according to taste
Honey or Maple Syrup2 tbspOptional, for extra depth
Eggs2Helps set the cheesecake
Heavy Cream¼ cupAdds richness
Cornstarch1 tbspPrevents cracks
Vanilla Extract1 tspEnhances flavor

Optional Toppings:

  • Whipped cream
  • Banana slices
  • Caramel drizzle
  • Chocolate shavings

👩‍🍳 Step-by-Step Instructions

1. Preparing the Crust

✅ Crush graham crackers or Oreos into fine crumbs.
✅ Mix with melted butter and press into a springform pan.
✅ Bake at 175°C (350°F) for 8 minutes, then let cool.

2. Making the Cheesecake Filling

✅ Blend cream cheese and sugar until smooth.
✅ Add mashed bananas, vanilla, and cornstarch.
✅ Incorporate eggs one at a time, mixing gently.
✅ Pour over the cooled crust.

3. Baking the Cheesecake

✅ Bake at 160°C (325°F) for 50-60 minutes.
✅ Let cool inside the oven with the door slightly open to prevent cracks.

4. Chilling & Serving

✅ Refrigerate for at least 4 hours or overnight.
✅ Decorate with whipped cream, caramel, or banana slices.


🛠️ Expert Tips for a Perfect Cheesecake

Use ripe bananas for the best natural sweetness.
Avoid overmixing to prevent air bubbles and cracks.
Bake in a water bath to ensure even cooking.
Chill overnight for the ultimate creamy texture.


🍰 Variations & Customization Ideas

Different Ways to Enjoy Banana Cheesecake

"Banana Cheesecake - A Creamy and Delicious Homemade Dessert Recipe"

No-Bake Banana Cheesecake

  • Use gelatin for structure.
  • Refrigerate instead of baking.

Vegan Banana Cheesecake

  • Swap cream cheese for cashew-based alternatives.
  • Use a flax egg instead of regular eggs.

Chocolate Banana Cheesecake

  • Add melted dark chocolate to the batter.
  • Use an Oreo crust for extra chocolate flavor.

🍽️ Serving & Pairing Suggestions

Best Ways to Serve Banana Cheesecake

  • Best served chilled, topped with fresh banana slices.
  • Pairs well with:
  • Hot coffee or espresso
  • A drizzle of caramel or chocolate sauce
  • Crushed nuts for extra crunch

❄️ Storage & Make-Ahead Tips

Refrigerator: Store in an airtight container for up to 5 days.
Freezer: Wrap slices individually and freeze for up to 3 months.
Make-Ahead: Prepare a day in advance for the best texture.


❓ Frequently Asked Questions (FAQs)

Can I make banana cheesecake without baking?

Yes! Use a no-bake recipe with gelatin for structure and chill overnight.

Why did my banana cheesecake crack?

Common reasons include:

  • Overmixing the batter.
  • Not using a water bath.
  • Cooling too quickly.

Can I use overripe bananas?

Yes! Overripe bananas add natural sweetness and enhance the flavor.

What’s the best crust for banana cheesecake?

  • Graham cracker crust for a classic taste.
  • Oreo crust for a chocolatey contrast.
  • Vanilla wafer crust for extra banana flavor.

🎨 Conclusion: Your Next Favorite Cheesecake Recipe!

Banana cheesecake is the perfect balance of creamy, sweet, and tangy flavors. Whether you stick to the classic recipe or try a fun variation, this dessert will be a crowd-pleaser. Try this recipe and let us know how it turned out!


👉 Call to Action:

If you loved this recipe, subscribe to our newsletter for more delicious and easy dessert ideas! 🍰✨

"Banana Cheesecake - A Creamy and Delicious Homemade Dessert Recipe"

Shadow Milk Cookie Recipe: A Dark & Creamy Delight

Introduction

Have you ever craved a cookie that combines rich, dark flavors with a creamy, milky twist? Shadow Milk Cookies offer a unique balance of deep cocoa richness and smooth, velvety texture that melts in your mouth. Whether you are a fan of gothic aesthetics, fantasy-inspired treats, or simply love decadent cookies, this recipe is the perfect choice.

In this guide, you will discover how to make Shadow Milk Cookies from scratch, with expert tips to ensure they turn out perfect every time. By the end of this article, you’ll not only master the recipe but also learn how to customize it to suit your taste preferences. Let’s dive into this dark and delicious dessert adventure!

What Are Shadow Milk Cookies?

Shadow Milk Cookies are a unique twist on classic chocolate cookies, featuring deep black cocoa powder for an intense, almost mystical look. The addition of milk enhances the softness, giving the cookies a rich yet tender texture. These cookies are not just about aesthetics; they deliver a taste experience that combines depth, sweetness, and a hint of mystery.

Why You’ll Love This Recipe

  • Rich and Dark Flavor – The deep cocoa taste is irresistible.
  • Soft and Chewy Texture – Thanks to the perfect balance of butter and milk.
  • Visually Stunning – The dark color makes them a great choice for themed parties, Halloween, or gothic dessert spreads.
  • Easy to Make – Simple ingredients and step-by-step guidance ensure success.

Ingredients You’ll Need

To achieve the signature flavor and texture of Shadow Milk Cookies, gather these ingredients:

Dry Ingredients:

  • 1 ¾ cups all-purpose flour
  • ½ cup black cocoa powder (for deep color and rich taste)
  • 1 tsp baking soda
  • ½ tsp salt

Wet Ingredients:

  • 1 cup unsalted butter (softened)
  • 1 cup granulated sugar
  • ½ cup brown sugar
  • 2 large eggs
  • 2 tbsp whole milk
  • 2 tsp vanilla extract

Optional Add-Ins:

  • ½ cup dark chocolate chunks (for extra richness)
  • ½ cup white chocolate chips (for contrast)
  • A sprinkle of flaky sea salt on top

Step-By-Step Instructions

1. Prepare the Dough

Begin by preheating your oven to 350°F (175°C). Line a baking sheet with parchment paper to prevent sticking.

In a medium bowl, whisk together the flour, black cocoa powder, baking soda, and salt. This ensures even distribution of ingredients.

2. Cream the Butter and Sugars

In a large mixing bowl, use a hand or stand mixer to beat the butter, granulated sugar, and brown sugar until light and fluffy. This process takes about 2-3 minutes and is essential for creating the perfect cookie texture.

3. Add Wet Ingredients

Mix in the eggs, one at a time, ensuring each is fully incorporated. Then, pour in the milk and vanilla extract, blending until smooth.

4. Combine Wet and Dry Ingredients

Gradually add the dry mixture to the wet ingredients, stirring until a dark, thick cookie dough forms. If using chocolate chunks or white chocolate chips, fold them in gently at this stage.

5. Shape and Bake

Using a cookie scoop or spoon, drop portions of dough onto the prepared baking sheet, leaving space between each for spreading. Bake for 10-12 minutes, or until the edges are firm but the centers remain slightly soft.

6. Cool and Enjoy

Allow the cookies to cool on the baking sheet for 5 minutes before transferring them to a wire rack. Enjoy them warm, or store them in an airtight container for up to a week.

Pro Tips for Perfect Shadow Milk Cookies

  • Use Black Cocoa Powder – This enhances the deep color and flavor. Regular cocoa powder won’t give the same effect.
  • Chill the Dough – If you have time, refrigerate the dough for 30 minutes before baking to enhance the texture.
  • Experiment with Flavors – Add a pinch of cinnamon, espresso powder, or chili flakes for an extra kick.
  • Don’t Overbake – These cookies should remain soft in the center for the best texture.

Creative Variations

Want to put your own spin on Shadow Milk Cookies? Here are some fun variations:

1. Stuffed Shadow Milk Cookies

Press a small piece of white chocolate or caramel into the center of each dough ball before baking.

2. Vegan Shadow Cookies

Replace butter with coconut oil, eggs with flaxseed eggs, and milk with almond or oat milk.

3. Keto-Friendly Version

Swap regular flour for almond flour and use a sugar substitute like erythritol.

Pairing Ideas: What Goes Well with Shadow Milk Cookies?

  • Hot Drinks: Enjoy them with a cup of dark roast coffee, matcha latte, or spiced chai.
  • Ice Cream: Serve them with vanilla, salted caramel, or cookies and cream ice cream.
  • Milkshakes: Blend them into a rich chocolate milkshake for an indulgent treat.

Frequently Asked Questions

Can I Freeze the Dough?

Yes! Freeze portioned dough balls on a baking sheet, then transfer them to a sealed bag. Bake straight from frozen, adding an extra minute to the bake time.

How Do I Store These Cookies?

Keep them in an airtight container at room temperature for up to one week. You can also refrigerate them for extra freshness.

Can I Make Them Gluten-Free?

Absolutely! Use a 1:1 gluten-free flour blend in place of regular flour.

Conclusion & Call-to-Action

Now that you have the ultimate guide to Shadow Milk Cookies, it’s time to bake your own batch! Whether you’re making them for a themed party, a cozy night in, or just to satisfy your sweet tooth, these cookies are sure to impress.

shadow_milk_cookies

Create the Perfect Kuromi and My Melody Cake Design: A Step-by-Step Guide

When it comes to creating an unforgettable cake, there’s no better way than combining the iconic Kuromi and My Melody characters. These two adorable Sanrio characters are beloved worldwide, and designing a cake around them not only lets your creativity shine but also delights party guests. Whether you’re planning a themed birthday or a special celebration, this guide will help you craft a Kuromi and My Melody cake design that steals the show.


Why Choose Kuromi and My Melody for Your Cake Design?

If you’ve ever seen Kuromi with her punk rock vibe or My Melody with her soft and sweet personality, you know why they’re a perfect cake duo. Kuromi, the mischievous character, and My Melody, the sweet bunny, offer contrasting yet complementary designs that can be fun to incorporate into a cake. The colors, shapes, and elements that define these characters are versatile and easy to work with.

  • Kuromi’s Edgy Look: Darker tones like black, purple, and edgy accents like skulls make her design bold and eye-catching.
  • My Melody’s Gentle Appeal: Soft pastels like pink, white, and lavender evoke a sense of warmth and innocence.

Together, they create a perfect balance for a visually appealing and fun cake.


Kuromi and My Melody cake design

Step 1: Choose the Right Cake Base

Before you get to the decorations, you’ll need a solid foundation. The cake base should reflect the overall theme of Kuromi and My Melody, so choose a flavor and texture that complements your frosting and design.

  • Flavor Options: Classic vanilla, chocolate, strawberry, or even fun variations like red velvet or matcha.
  • Size: Decide if you want a single-layer cake or a multi-tier cake depending on the number of guests. You can also choose to make cupcakes for a more personal touch.

Tip: Keep in mind the color of your cake layers. A chocolate cake works great for Kuromi designs, while a light vanilla cake is perfect for My Melody.


Step 2: Frosting and Color Scheme

Now, let’s talk about the fun part: the frosting! The colors of your Kuromi and My Melody cake design should set the tone.

  • Kuromi’s Frosting: For her, you’ll want to use black, purple, and white frosting. You can either go with a buttercream frosting or fondant for a smoother, professional look.
  • Black Fondant can be used as a base, while purple accents can help highlight Kuromi’s personality.
  • Purple Buttercream can be piped around the edges or used for decorative borders.
  • My Melody’s Frosting: For My Melody, soft pink buttercream works best. Cover the base with a smooth layer and use white fondant for the bunny ears and hood.

Step 3: Bring the Characters to Life

It’s time to add the personality to your Kuromi and My Melody cake design! Using fondant, edible markers, and other decorating tools, you’ll be able to replicate their adorable faces.

  • Kuromi Face Design:
  • Create Kuromi’s hood with black fondant.
  • Add a skull motif in white fondant and decorate it with a purple bow on top.
  • My Melody Face Design:
  • Use white fondant for her bunny ears and pink fondant for her hood.
  • You can draw on her eyes, nose, and blush using edible markers or pipe them with buttercream.

Step 4: Add Cute Edible Accessories

Now for the details! Accessories are what really bring the cake to life. Here are some ideas to make your Kuromi and My Melody cake stand out:

  • Kuromi Accessories:
  • A mini skull topper or fondant decorations like spikes.
  • Purple flowers, bows, or mini punk-themed decorations.
  • My Melody Accessories:
  • Sweet fondant flowers, hearts, or stars to add a cute touch.
  • Pink ribbon accents can be placed around the base of the cake to complete the design.

Step 5: Assembly and Final Touches

Once your cake base is frosted and your characters’ faces are ready, it’s time to assemble the design. Here’s how:

  1. Layer the Cake: Start by layering your cake with frosting. Apply a thin, even layer of frosting between the cake layers.
  2. Smooth the Frosting: Use a cake scraper or offset spatula to smooth out the frosting for a clean, professional finish.
  3. Position the Character Faces: Place Kuromi and My Melody on the sides or top of the cake, making sure they’re visible and balanced.
  4. Decorate with Accessories: Carefully place any fondant accessories or edible decorations.

Tip: Use a small fondant rolling pin to create clean, smooth shapes for your accessories, and don’t rush the process—patience is key to achieving the perfect cake!


Conclusion: Your Perfect Kuromi and My Melody Cake Is Ready!

Creating a Kuromi and My Melody cake design is a fun and creative way to celebrate any occasion. By combining bold, edgy elements with soft, sweet touches, you’ll have a cake that’s not only visually appealing but also brings the characters to life. Whether you’re a beginner or an experienced baker, this cake will be a hit at any party.

So, are you ready to start baking your very own Kuromi and My Melody cake design? With these simple steps, you’ll be able to craft a cake that’s as sweet and fun as the characters themselves. Don’t forget to share your cake pictures and let us know how it turned out!


FAQs

Q: What are some flavor combinations for a Kuromi and My Melody cake?
For a balanced cake, you can pair chocolate (for Kuromi) with vanilla or strawberry (for My Melody). Adding a touch of fruit or spice, like raspberry or cinnamon, can also elevate the flavor profile.

Q: Can I use fondant for the entire cake design?
Yes! Fondant is perfect for creating smooth, polished surfaces, especially for intricate details like the characters’ faces and accessories. If you prefer a softer texture, you can also use buttercream for the base and fondant for the details.

Q: How do I make Kuromi’s skull design?
To create the skull, roll out white fondant and cut out a skull shape. Use edible markers to draw the eyes and nose, or create a small bow with pink fondant for added flair.


By following these tips, your Kuromi and My Melody cake design will be a showstopper. Get creative, have fun, and let these two Sanrio characters take your baking to the next level!

Kuromi and My Melody cake design