🍰 Irresistible no-Bake cakes – The Ultimate Easy Dessert for Every Occasion

✨ The Joy of Effortless Desserts

no-bake cakes

You know those warm afternoons when you crave something sweet, but turning on the oven feels like a chore? That’s exactly where no-bake cakes come to the rescue. These delightful desserts deliver all the indulgence of traditional cakes without the fuss of baking. Whether you’re in a rush, lack baking experience, or just don’t want to heat up your kitchen, no-bake cakes give you that sweet fix with minimal effort.

They’re ideal for busy parents, dorm-room dwellers, and anyone living life on the go. With a few simple ingredients and your fridge doing the heavy lifting, you can whip up an eye-catching, crowd-pleasing dessert that looks like it came from a bakery.


🍰 What Are no-Bake cakes?

No-bake cakes are desserts that don’t require oven time. Instead, they rely on refrigeration or freezing to set and hold their structure. Think cheesecake without the cracks, or tiramisu without the water bath. These cakes are smooth, creamy, and often layered—delivering incredible textures with half the effort.

Common Ingredients in no-Bake cakes

  • Crust base: Graham crackers, Oreos, or digestive biscuits
  • Binding agents: Melted butter, condensed milk
  • Creamy elements: Cream cheese, mascarpone, whipped cream, yogurt
  • Sweeteners: Powdered sugar, honey, maple syrup
  • Add-ins: Fruits, chocolate, nuts, or jams

You can even tweak the ingredients for dietary preferences—vegan, gluten-free, or keto variations are all possible.


Top Reasons for Popularity

  1. Time-saving – Most recipes take under 30 minutes to prepare
  2. Kid-friendly – No ovens mean safer baking for little helpers
  3. Versatile – Easy to adapt for food allergies or preferences
  4. Minimal equipment – No need for stand mixers or baking trays
  5. Chill factor – Ideal for warmer climates and summer parties

Social Media & Culture Shift

TikTok, Instagram, and Pinterest are packed with creative spins on no-bake cakes—from mason jar cheesecakes to viral no-bake tiramisu cups. In 2025, the theme is clear: convenience meets aesthetic.

Popular hashtags include:

  • #NoBakeDessert
  • #FridgeCakeMagic
  • #EasySweets

🥒 Top 5 Must-Try no-Bake cake Recipes

These recipes blend simplicity and flavor to help you impress without stress. Each comes with an ingredient table and tips.

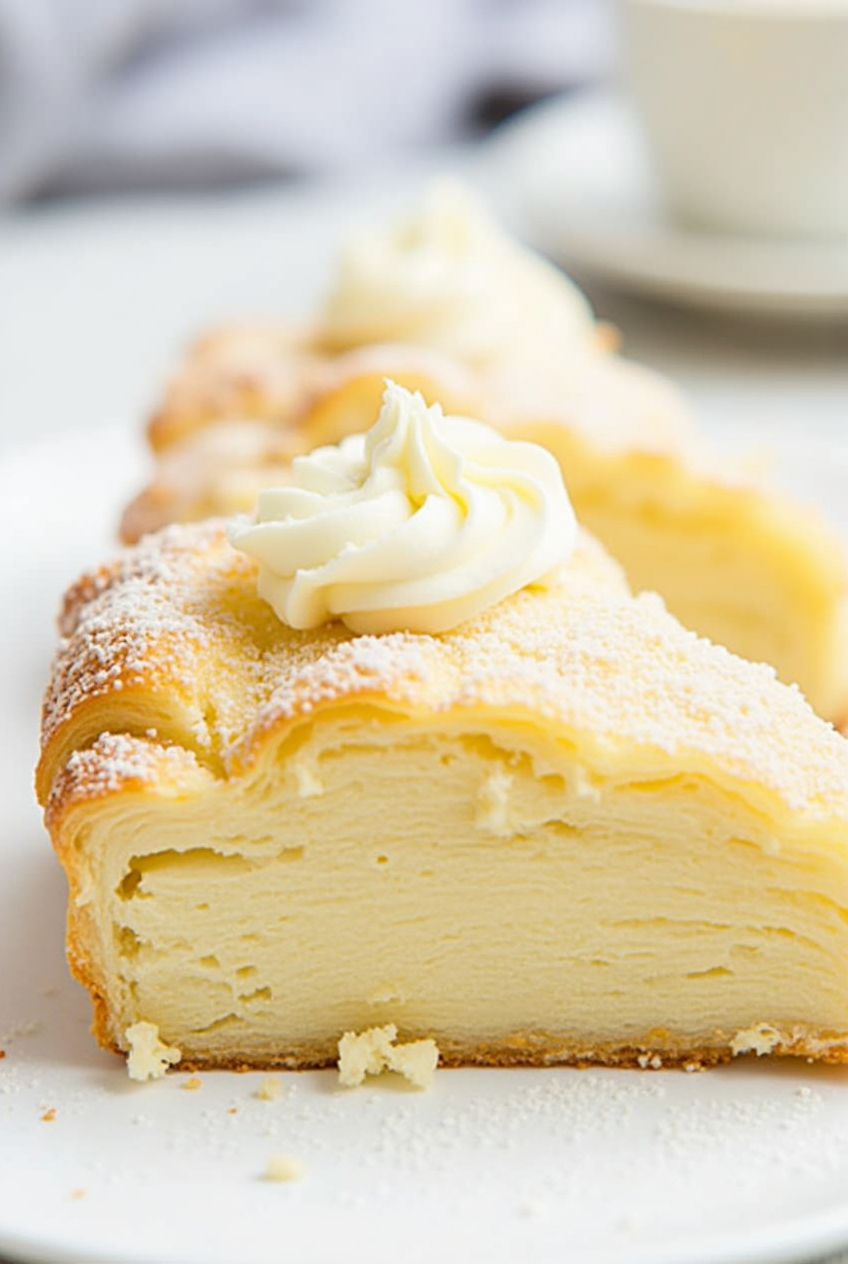
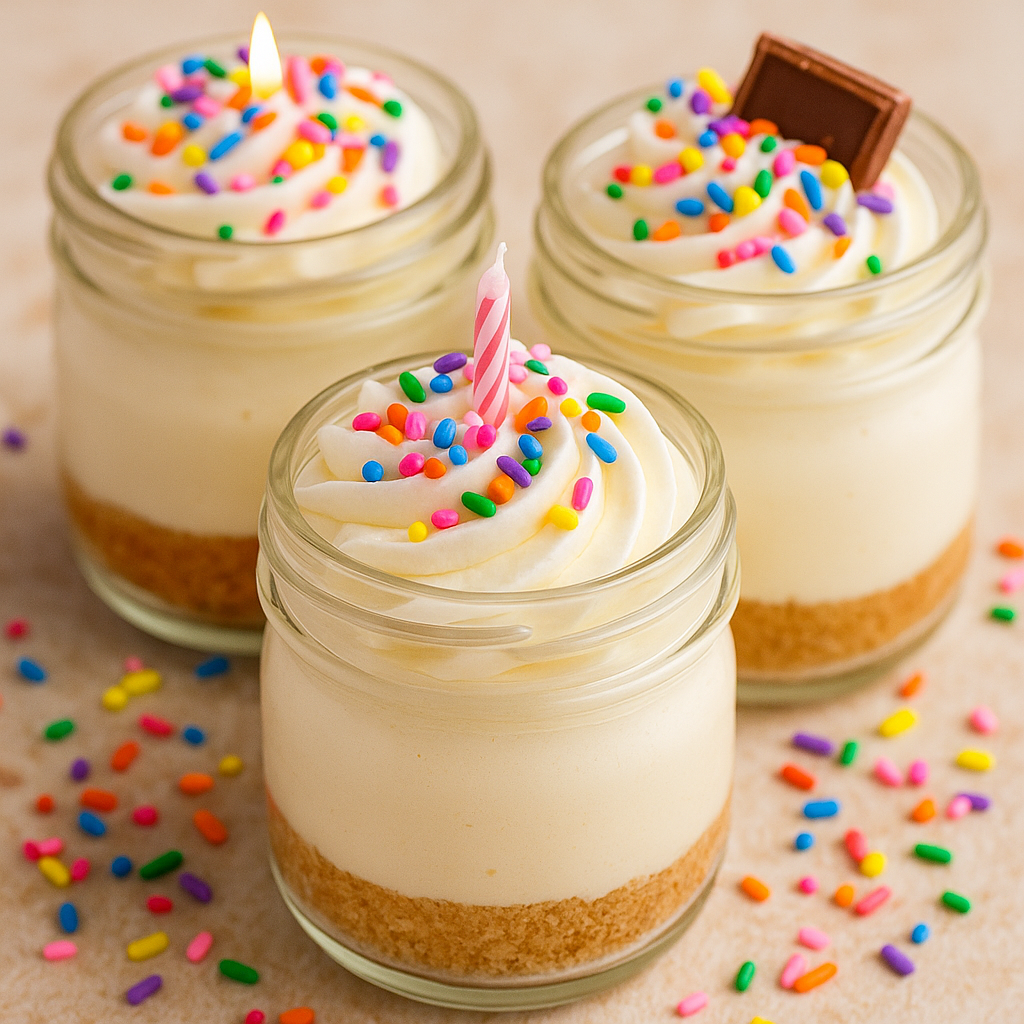
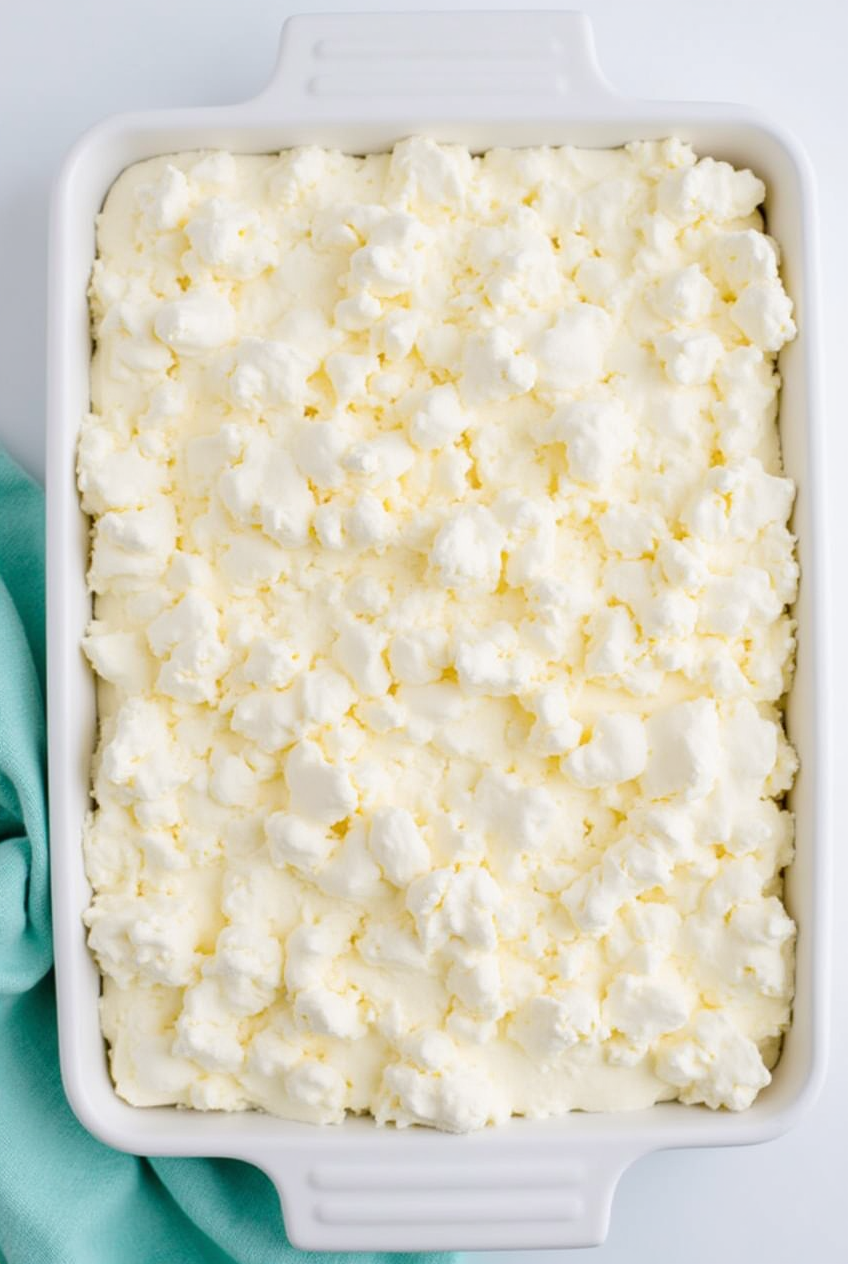
1. No-Bake Cheesecake

IngredientQuantity
Cream cheese2 cups
Graham cracker crumbs1.5 cups
Butter (melted)½ cup
Powdered sugar¾ cup
Vanilla extract1 tsp
Whipping cream1 cup
  • Mix crumbs and butter for the base, press into a pan, and chill.
  • Whip cream cheese, sugar, and vanilla; fold in whipped cream.
  • Spread over crust and refrigerate overnight.

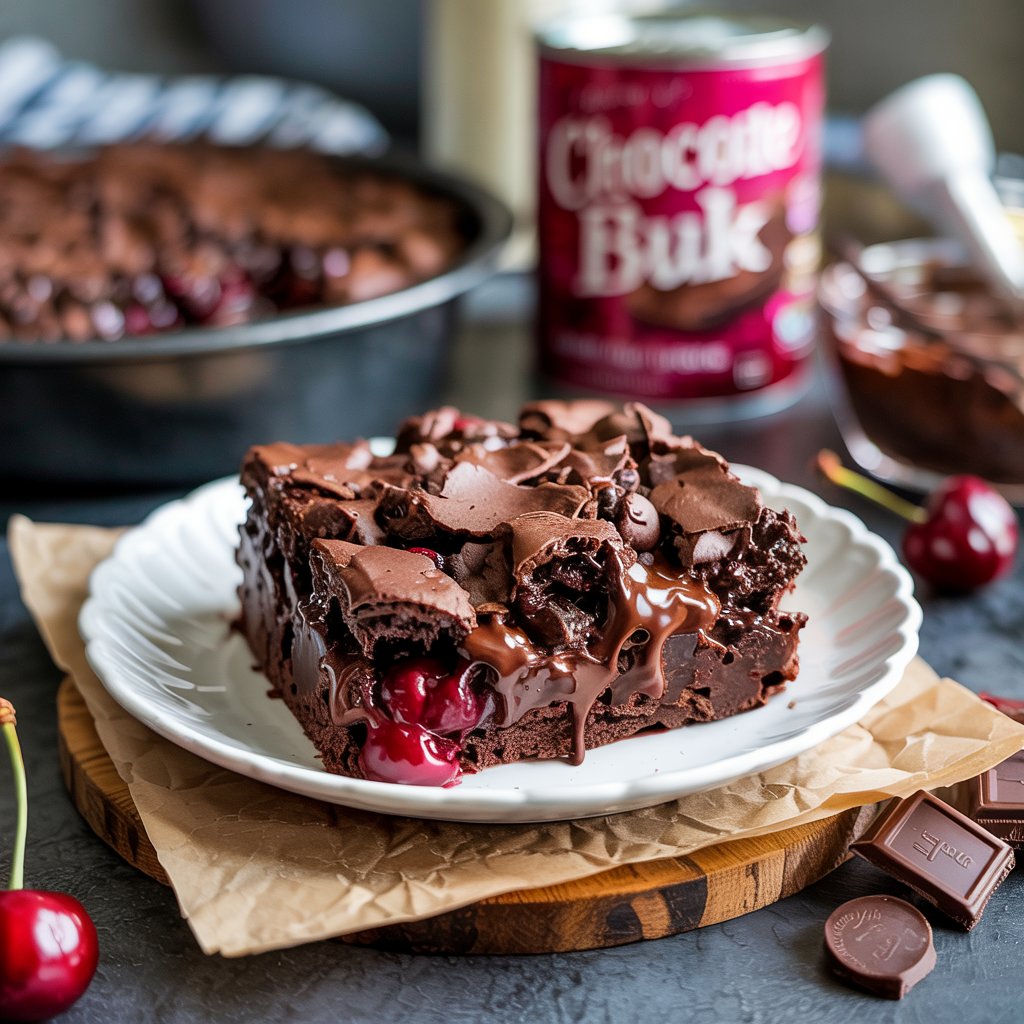
2. Chocolate Biscuit Cake

  • Digestive biscuits
  • Melted dark chocolate
  • Butter and golden syrup
  • Optional: dried fruits, chopped nuts

Break biscuits, mix with warm chocolate mixture, pour into mold, refrigerate.

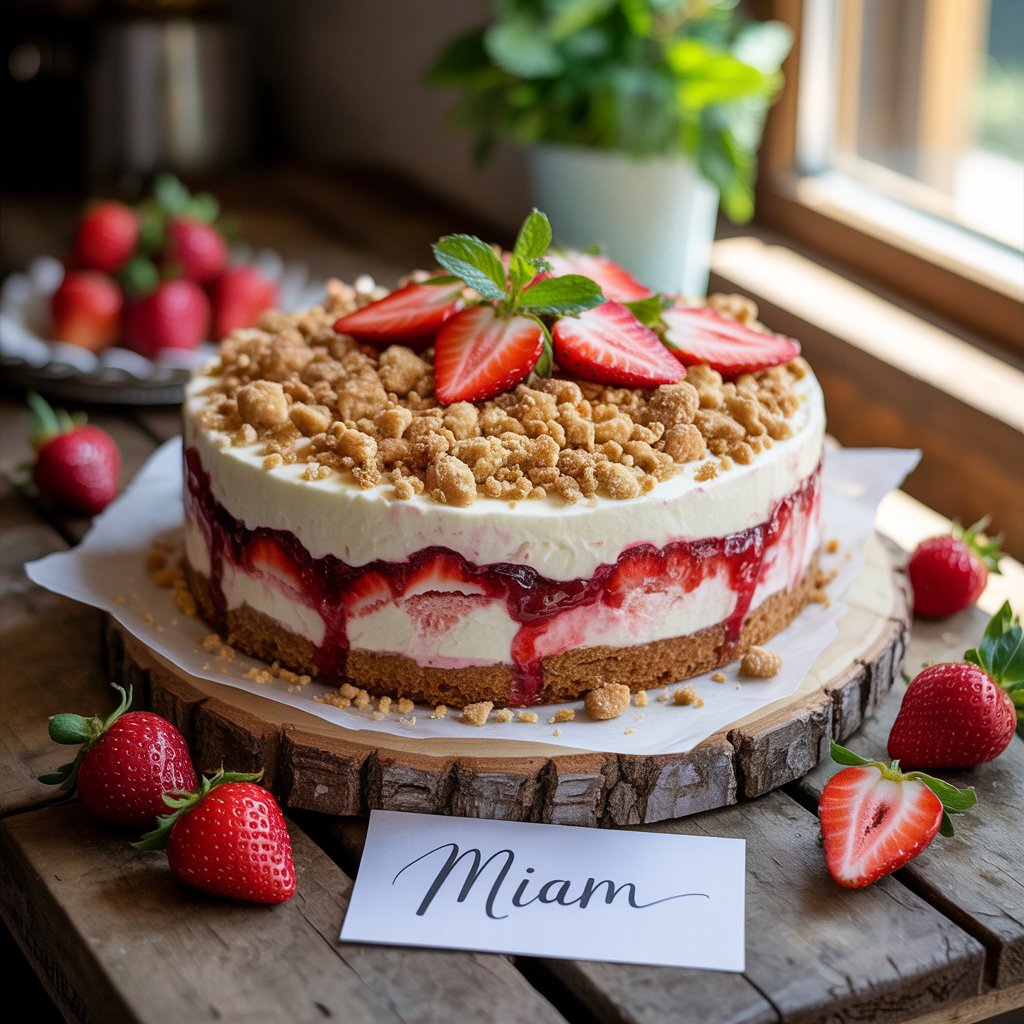
3. Strawberry Icebox Cake

  • Graham crackers, whipped cream, sliced strawberries
  • Layer: crackers, cream, berries
  • Refrigerate 8 hours

4. Oreo No-Bake Cake

  • Whole Oreos
  • Milk
  • Whipped cream or pudding mix
  • Layer and freeze; slice like an ice cream cake

5. Vegan Mango Coconut Cake

  • Cashew cream, coconut milk, mango puree
  • Crust: dates and almonds blended
  • Chill for 6 hours minimum

🎂 Tips for Perfect no-Bake cakes

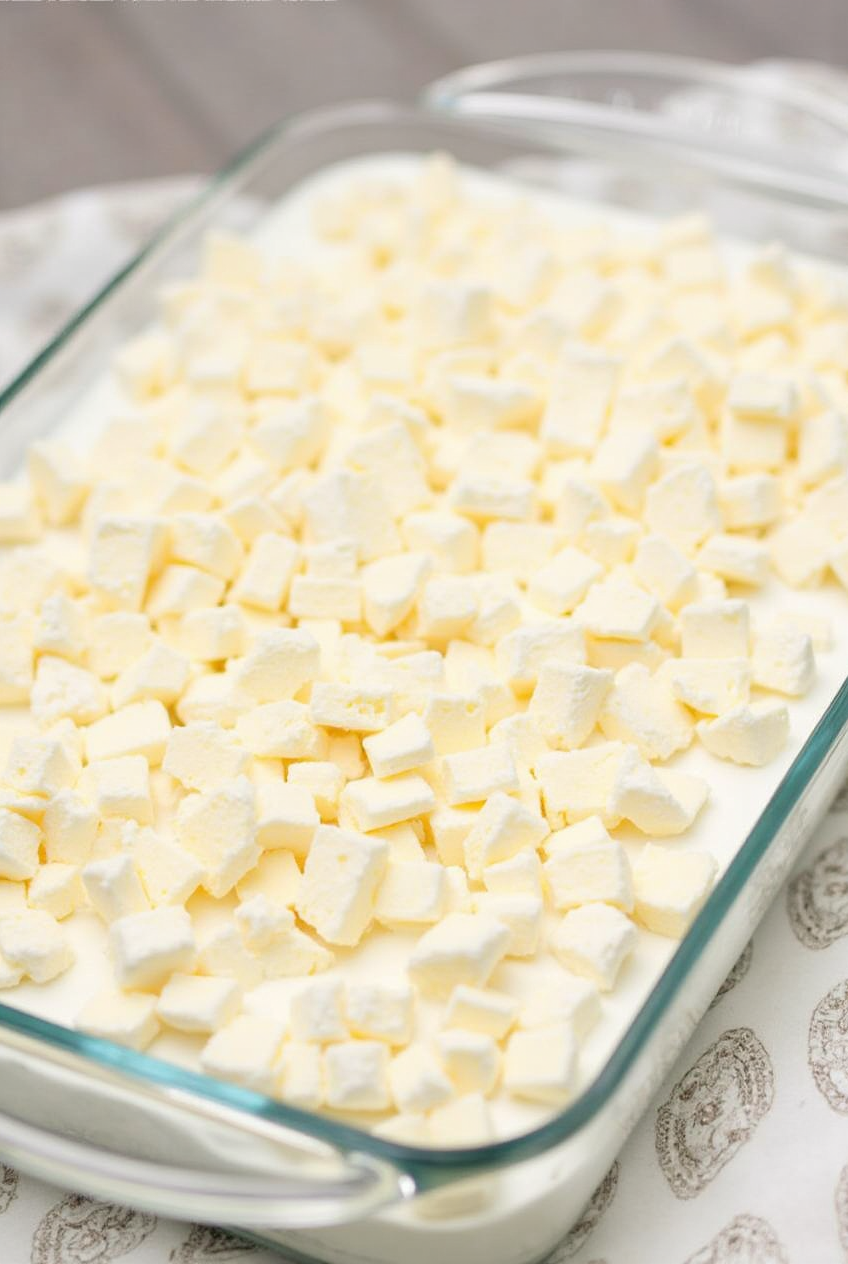
1. Full-Fat Ingredients Work Best

Using full-fat cream cheese or coconut milk ensures a richer texture that holds up better.

2. Don’t Rush the Chill Time

Refrigerate for at least 6 hours or overnight to allow flavors to meld and layers to firm.

3. Layer with Intention

Add crunch with nuts or cookie bits between creamy layers.

4. Presentation Matters

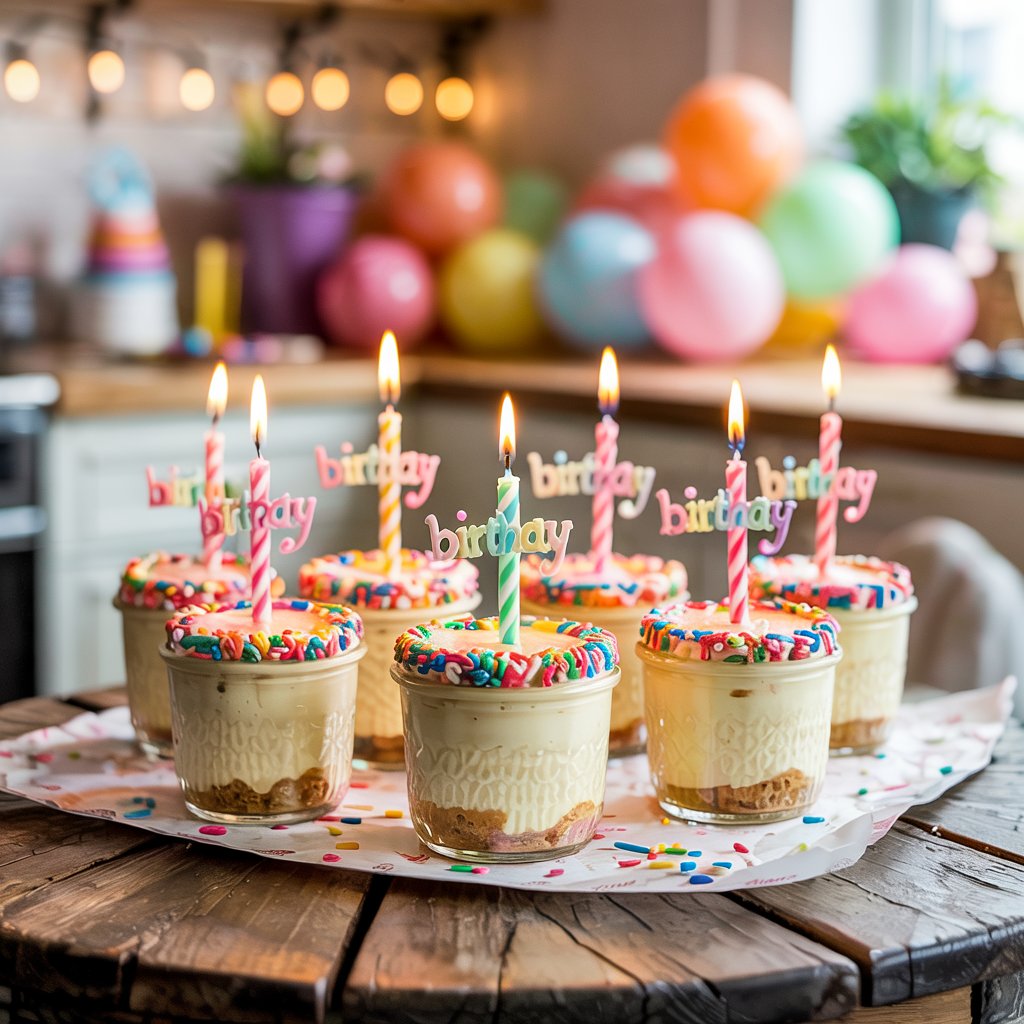
Use transparent dishes or glasses for visual appeal, especially if you’re posting on social media.


🎁 no-Bake cakes for Every Occasion

No-bake cakes aren’t just for summer. You can tweak them year-round:

  • Birthdays: Add funfetti to cheesecake filling
  • Summer BBQs: Lemon blueberry or strawberry themes
  • Ramadan or Eid: Date and pistachio with rose water
  • Valentine’s Day: Raspberry and white chocolate

❓ FAQ: Everything You Need to Know About No-Bake Cakes

Can you freeze no-bake cakes?

Yes. Wrap them well and store for up to 2 weeks. Thaw in the fridge before serving.

Are no-bake cakes safe?

Absolutely. Most recipes skip eggs entirely, and the chilled ingredients stay fresh for days.

Can I make them vegan or gluten-free?

Yes! Use plant-based dairy and gluten-free cookies or oats.

How do I prevent a runny filling?

Chill longer, use gelatin or agar if needed, and go for thicker cream bases.


📅 Final Thoughts: Your Sweet Shortcut to Joy

You don’t need a mixer, oven, or culinary school degree to make a stunning dessert. No-bake cakes offer you simplicity, flexibility, and a whole lot of joy. Perfect for any celebration or an indulgent weekend treat, these cakes are a trend that’s here to stay.

Why not try one today and treat yourself to effortless sweetness?


📢 Call to Action

Tried a recipe? Share your masterpiece using the hashtag #ChillCakeChallenge and tag us for a chance to be featured!

Subscribe to our newsletter for more no-bake ideas, and never miss the latest dessert trend!

no-bake cakes

no-bake cakes

Best Puff Pastry Cream Cake: A Light & Flaky Dessert You’ll Fall in Love With

There’s something unforgettable about a dessert that blends delicate crunch with smooth, cloud-like cream. Maybe it reminds you of childhood birthdays, your first dinner party success, or just a quiet weekend when you needed comfort. The best puff pastry cream cake delivers all that nostalgia and luxury in one bite. And the best part? You don’t need a culinary degree to make it.

best puff pastry cream cake

Whether you’re hosting friends or treating yourself, this recipe is a foolproof way to create something truly impressive. Let’s explore everything you need to master this delicious dessert—from ingredients and assembly tips to creative variations and expert hacks.


What Is a Puff Pastry Cream Cake?

A Flaky Classic with a Creamy Twist

The puff pastry cream cake is exactly what its name promises—a beautiful stack of golden, flaky pastry sheets layered with rich, lightly sweetened cream. It’s often topped with fruit, dusted with powdered sugar, or drizzled with chocolate. The texture contrast is what makes it irresistible.

Why Everyone’s Obsessed

This cake is trending for a reason:

  • Minimal ingredients with maximum impact
  • Elegant presentation without complicated steps
  • Endlessly customizable to fit your taste or dietary needs

Instagram-worthy? Definitely. Effort-heavy? Not at all.


Why You’ll Love This Puff Pastry Cream Cake Recipe

Perfect for Any Occasion

Whether you’re planning a dinner party or looking to upgrade your weekend dessert lineup, this cake fits every scene. It’s light enough to serve after a heavy meal, yet impressive enough to steal the spotlight.

Beginner-Friendly

You don’t need fancy equipment or advanced baking knowledge. If you can handle a whisk and an oven, you’re already halfway there.

Easily Customizable

Love strawberries? Prefer chocolate? You can switch up the filling, toppings, or even the shape of the cake to match the season or your mood.


Ingredients You’ll Need

Here’s everything you need to create the best puff pastry cream cake:

IngredientQuantityNotes
Puff pastry sheets2 sheetsStore-bought or homemade
Heavy cream1 cupChilled, for whipping
Powdered sugar1/3 cupAdjust for sweetness
Vanilla extract1 tspOptional but flavorful
Cornstarch1 tbspHelps stabilize the cream
Fresh berries1/2 cupOptional topping

Optional Additions:

  • Lemon zest
  • Melted chocolate
  • Edible flowers

Step-by-Step Instructions

Preparing the Puff Pastry

  1. Preheat your oven to 400°F (200°C).
  2. Roll out the puff pastry on a lightly floured surface.
  3. Dock the dough (prick with a fork) to prevent excessive puffing.
  4. Place on parchment-lined baking trays.
  5. Bake for 15-18 minutes or until golden and crisp.
  6. Let cool completely before layering.

Making the Cream Filling

  1. In a chilled bowl, pour the cold heavy cream.
  2. Add powdered sugar and vanilla extract.
  3. Sprinkle in the cornstarch.
  4. Whip until soft peaks form.
  5. Chill in the refrigerator for at least 15 minutes.

Assembling the Cake

  1. Cut each pastry sheet into equal rectangular pieces.
  2. Start with one pastry layer on your serving tray.
  3. Pipe or spread a thick layer of whipped cream.
  4. Repeat with additional layers (2-3 is ideal).
  5. Top with fresh berries or a dusting of powdered sugar.

Tip: Use a serrated knife when slicing for clean edges.


Variations to Try

Fruit-Filled Puff Pastry Cream Cake

Add sliced strawberries, blueberries, or peaches between the layers.

Chocolate Hazelnut Delight

Mix a spoonful of Nutella into the whipped cream.

Vegan Adaptation

  • Use plant-based puff pastry.
  • Substitute coconut cream for the filling.
  • Sweeten with maple syrup or agave.

Expert Tips for Success

  • Chill everything: Cream whips better when cold.
  • Use parchment paper to prevent sticking.
  • Layer quickly before the cream warms.
  • Decorate just before serving for best visual appeal.
  • Don’t skip docking—it keeps your pastry layers flat and crispy.

Storing and Serving

How to Store

  • Store leftovers in an airtight container in the fridge.
  • Best enjoyed within 2–3 days.
  • Avoid freezing; cream doesn’t thaw well.

Serving Suggestions

  • Pair with a hot espresso.
  • Serve chilled or at room temperature.
  • Garnish with mint leaves or edible flowers.

FAQ: Best Puff Pastry Cream Cake

Can I freeze the puff pastry cream cake?

It’s not recommended. Freezing will affect the texture of both the pastry and the cream.

What’s the best cream to use?

Cold heavy whipping cream with a bit of cornstarch works best. You can also use pastry cream for a richer taste.

Can I use store-bought puff pastry?

Absolutely. Just make sure to follow baking instructions and dock the dough.

How do I keep the pastry from getting soggy?

Let pastry cool before adding cream, and only assemble shortly before serving.

Is this recipe kid-friendly?

Yes! It’s light, sweet, and simple. Plus, kids will enjoy helping with layering and decorating.


Conclusion: Your New Go-To Dessert

You don’t need to visit a bakery or flip through a French cookbook to make something this delightful. The best puff pastry cream cake is just a few ingredients and simple steps away. It’s a treat that feels luxurious, but fits perfectly into your everyday kitchen.

So why not impress your family, wow your friends, or simply treat yourself? This dessert checks every box—light, creamy, flaky, and full of flavor.


Call to Action

Have you made this puff pastry cream cake? Share your masterpiece with us on Instagram using #PuffPastryBliss. Or leave a comment below telling us how you personalized it. Hungry for more? Subscribe to get weekly dessert inspiration straight to your inbo

best puff pastry cream cake

Strawberry Crunch Cake

Strawberry Crunch Cake: The Viral Dessert You Need to Try This Weekend

Why Strawberry Crunch Cake Brings Back Sweet Summer Memories

Strawberry Crunch Cake

There’s something deeply nostalgic about strawberries and cream. Maybe it’s the memory of enjoying a frozen strawberry bar during a hot summer day, or perhaps the way strawberry desserts always seemed to appear at the best family gatherings. If you’re looking for a dessert that brings that same joyful feeling to your kitchen—and tastes like pure happiness—you’ve found it. Strawberry Crunch Cake blends everything you loved as a kid with the ease and elegance you need as a home baker today.

This article will guide you through everything you need to know to recreate this trending dessert—from ingredients to storage, and even customization tips. Whether you’re new to baking or a kitchen pro, this recipe is designed with you in mind.


What Is Strawberry Crunch Cake?

Strawberry Crunch Cake is a delightful hybrid between a traditional strawberry shortcake and those nostalgic ice cream bars from your childhood. It features soft vanilla or strawberry cake layers, a luscious whipped cream or cream cheese frosting, and a crisp, buttery crumble made from crushed cookies and strawberry gelatin.

You’ve probably seen versions of it pop up all over social media—TikTok, Pinterest, and Instagram reels are filled with happy bakers showing off their vibrant pink-and-cream creations. It’s no surprise. This cake isn’t just gorgeous to look at; it’s also irresistibly delicious.

Key Features:

  • Soft, moist cake (vanilla or strawberry flavored)
  • Whipped topping or cream cheese frosting
  • Crunchy strawberry crumble topping
  • Perfect for birthdays, summer BBQs, brunches, or just because

Ingredients You’ll Need

Let’s break it down so you can prepare your shopping list.

Base Ingredients Table

ComponentIngredients
Cake LayerAll-purpose flour, baking powder, salt, granulated sugar, eggs, milk, vanilla, butter (or use a boxed cake mix)
Frosting LayerHeavy whipping cream or cream cheese, powdered sugar, vanilla extract
Crunch ToppingGolden Oreos or vanilla cookies, butter, strawberry gelatin powder, optional freeze-dried strawberries

Make sure to gather everything before you start. Having a well-organized prep space saves you time and stress.


How to Make Strawberry Crunch Cake: Step-by-Step

This is where the magic happens. Follow these steps closely, and you’ll have a show-stopping cake in no time.

Step 1: Prepare Your Cake Layer

If using a boxed mix:

  • Follow package instructions. Let cool completely before decorating.

For homemade:

  1. Preheat your oven to 350°F (175°C). Grease and flour your pan.
  2. In a bowl, whisk dry ingredients: flour, baking powder, salt.
  3. In another bowl, beat sugar and butter until creamy. Add eggs one at a time.
  4. Add milk and vanilla, then combine with dry ingredients.
  5. Pour batter into pan and bake for 30–35 minutes. Let cool fully.

Step 2: Make the Frosting

For a whipped version:

  • Beat cold heavy cream with powdered sugar and vanilla until stiff peaks form.

For a cream cheese version:

  • Beat softened cream cheese, powdered sugar, and vanilla until smooth. Fold in whipped cream.

Chill until ready to use.

Step 3: Prepare the Crunch Topping

  1. Crush cookies in a zip bag or food processor.
  2. Mix with strawberry gelatin powder.
  3. Add melted butter and stir until crumbly.
  4. Optional: Add crushed freeze-dried strawberries for color and flavor.
  5. Toast in the oven at 300°F for 5–8 minutes for extra crunch.

Step 4: Assemble Your Cake

  1. Place cake layer on a serving dish.
  2. Frost generously with your whipped topping.
  3. Sprinkle the strawberry crunch over the top.
  4. For two layers: repeat with another cake round.
  5. Chill for 1–2 hours before serving.

Pro Tips to Elevate Your Strawberry Crunch Cake

  • Add real strawberries: Thinly slice strawberries between layers.
  • No-bake version: Use pound cake and cool whip if you’re short on time.
  • Flavor twist: Add lemon zest or almond extract to your frosting.
  • Color control: Use natural pink food coloring if avoiding artificial dyes.

Storage & Serving Suggestions

Storage

  • Refrigerate cake in an airtight container.
  • Best eaten within 3 days.
  • Add topping right before serving to avoid sogginess.

Serving

  • Serve chilled for best flavor.
  • Pair with iced coffee or lemonade on warm days.
  • Perfect slice size: about 1.5 inches wide.

Nutritional Snapshot (Per Slice Estimate)

NutrientApproximate Amount
Calories350–450
Sugars28g
Fat22g
Protein4g

Note: Values vary based on ingredients used.


Why Strawberry Crunch Cake Deserves a Spot on Your Dessert Table

Think about it—how often do you find a dessert that’s:

  • Easy to make
  • Visually stunning
  • Full of nostalgic flavor
  • Flexible for all occasions

You’re not just baking a cake. You’re making a moment. Whether you post it online or serve it quietly at home, Strawberry Crunch Cake turns ordinary days into something memorable.


FAQ – Strawberry Crunch Cake

Can I make this in advance?

Yes, you can prepare the cake and frosting up to 2 days ahead. Just add the crunch topping fresh.

Can I freeze Strawberry Crunch Cake?

You can freeze the cake and frosting separately. Assembled cake is best fresh.

What if I don’t have strawberry gelatin?

Try using freeze-dried strawberries crushed with sugar as a natural substitute.

Can I make it gluten-free?

Yes, use gluten-free cake mix and cookies.


Final Thoughts: It’s Time to Bake!

You’ve got everything you need—from ingredients to inspiration—to create a Strawberry Crunch Cake that looks impressive and tastes even better. Now it’s your turn.

Call to Action:
Ready to bake this beautiful cake? Snap a picture and tag it with #StrawberryCrunchCakeMagic. Share your creation with your friends—or just savor every bite yourself. Either way, you’ve earned it.

🍰 French Yogurt Cake: The Secret to a Simple Yet Unforgettable Dessert

Introduction: A Taste of Childhood at Your Fingertips

Imagine a rainy afternoon where the sweet aroma of a warm cake fills your kitchen. You, standing on a stool, holding a pot of yogurt, ready to measure the ingredients. The French yogurt cake isn’t just a recipe — it’s a feeling, a family tradition that you can easily bring back into your home. No fancy scale needed, just your craving for something homemade and a simple yogurt container to guide you. Ready to relive this classic?


🥄 Why Yogurt Cake Is a French Family Classic

You might wonder why yogurt cake is so beloved in French households. Its beauty lies in its simplicity. Every family has a slightly different version, but the heart of it remains the same: a moist, flavorful cake that’s almost impossible to mess up.

This cake is often the first recipe French children learn because it teaches them that baking doesn’t have to be complicated. By using the yogurt container as a measuring cup, you free yourself from technical stress and let your creativity shine.

Key Points:

  • Quick and easy recipe — no scales needed
  • Perfect for beginners and family moments
  • A flexible base for endless variations

🧈 Essential Ingredients for an Authentic French Yogurt Cake

Before you roll up your sleeves, here’s what you’ll need:

IngredientQuantityNotes
Plain yogurt1 container (125 g)Use the container for measurements
All-purpose flour3 containersSift for a lighter texture
Sugar2 containersAdjust based on your sweetness preference
Vegetable oil1 containerSunflower or canola recommended
Eggs3Best at room temperature
Baking powder1 packet (10 g)Ensures a light, fluffy cake
Vanilla extract1 teaspoonOptional but adds great flavor
Lemon zest1Optional for a fresher taste

Chances are, you already have everything you need right in your pantry!


🥣 Easy Step-by-Step Instructions for a Perfect French Yogurt Cake

Ready to bake? Follow these simple steps:

🧁 Directions:

  1. Preheat your oven to 180°C (350°F).
  2. Empty the yogurt into a large bowl.
  3. Use the empty container to measure the sugar, and mix it in.
  4. Add the eggs one by one, beating well after each addition.
  5. Slowly pour in the oil, mixing thoroughly.
  6. Gradually add the flour and baking powder, stirring gently.
  7. Add vanilla extract and, if desired, lemon zest.
  8. Pour the batter into a greased and floured cake pan.
  9. Bake for about 30–35 minutes or until a toothpick inserted in the center comes out clean.

Pro Tips for Success:

  • Sift the flour to avoid lumps.
  • Don’t overmix once the flour is added — this keeps the cake soft and airy.

🍋 Delicious Variations of the Classic Yogurt Cake

Love customizing your desserts? This cake adapts beautifully:

  • Citrus Version: Add 2 tablespoons of fresh lemon juice and extra zest.
  • Chocolate Chip Version: Fold in 150g of chocolate chips.
  • Marble Cake: Divide the batter and add cocoa powder to one half. Layer the two batters for a marbled effect.
  • Fruit-Infused Version: Add chopped apples, pears, or berries for a fruity twist.

🧁 Creative Tips to Personalize Your French Yogurt Cake

Want to elevate your cake even further?

  • Swap the oil for melted butter for a richer flavor.
  • Spice it up with cinnamon, nutmeg, or cardamom.
  • Top with chopped nuts for a lovely crunch.
  • Drizzle a lemon or vanilla glaze for extra sweetness.

📋 FAQ Section: Everything You Need to Know About French Yogurt Cake

Can I use flavored yogurt?

Absolutely! Vanilla or coconut yogurt works beautifully and adds a subtle flavor twist. Feel free to experiment based on your mood.

How should I store the yogurt cake?

Once cooled, wrap your cake tightly in plastic wrap. It stays moist for 2 to 3 days at room temperature.

Can I freeze French yogurt cake?

Yes! Slice it into portions, wrap each piece well, and freeze. Let it thaw at room temperature before enjoying — it’ll still be deliciously soft.

Why is my cake dry?

Overbaking is usually the culprit. Keep a close eye on your oven and check doneness early. You can also add a tablespoon of crème fraîche to the batter to make it extra moist.


📝 Conclusion: Rediscover the Simple Joy of French Yogurt Cake

Now you’ve rediscovered a true culinary treasure: the French yogurt cake. Easy to make, customizable, and incredibly satisfying, it captures everything home baking should be — a moment of joy, simplicity, and connection.

So, what are you waiting for? Grab your yogurt container and start baking this beloved classic. Experiment with your favorite flavors, enjoy the process, and most of all, share it with your loved ones.

🍓 Homemade Strawberry Shortcake Ice Cream Bars Recipe

Introduction

Imagine biting into a cool, creamy strawberry shortcake ice cream bar on a hot summer day — just like the ones from your childhood!
These homemade Strawberry Shortcake Ice Cream Bars bring back all those memories, but even better because they’re made fresh in your kitchen.
If you love easy summer desserts, nostalgia, and crowd-pleasers, you’re going to absolutely adore this recipe.


Why You’ll Love These Strawberry Shortcake Ice Cream Bars

  • Nostalgic Flavor: Taste just like the ice cream truck favorites!
  • Super Easy: Only a few simple steps — no ice cream maker needed.
  • Fresh Ingredients: Strawberries, cream, and real vanilla.
  • Perfect for Parties: Kids and adults will love them.

Ingredients You’ll Need

IngredientAmount
Vanilla Ice Cream3 cups (softened)
Strawberry Ice Cream3 cups (softened)
Golden Oreos20 cookies (crushed)
Freeze-Dried Strawberries½ cup (crushed)
Butter (melted)3 tbsp
Optional: fresh strawberriesFor garnish

Step-by-Step Instructions

  1. Prepare the Crumb Coating
  • Crush the Golden Oreos and freeze-dried strawberries together.
  • Mix with melted butter until crumbly. Set aside.
  1. Layer the Ice Cream
  • Line a baking dish with parchment paper.
  • Spread the softened vanilla ice cream in an even layer. Freeze for 30 minutes.
  • Add a layer of softened strawberry ice cream on top. Freeze for another 30 minutes.
  1. Cut and Coat
  • Once firm, cut the layered ice cream into bars.
  • Quickly roll each bar in the crumb mixture until fully coated.
  1. Freeze Again
  • Freeze the coated bars for at least 1 hour before serving.

Tips for the Perfect Ice Cream Bars

  • Slightly soften the ice cream for easy layering, but don’t let it melt.
  • Use a hot knife (run under warm water) to slice clean bars.
  • Double the crumb coating if you like extra crunch!

Variations and Substitutions

  • Chocolate Lovers: Use chocolate ice cream instead of vanilla.
  • Vegan Option: Choose dairy-free ice cream and plant-based butter.
  • Other Berries: Try freeze-dried raspberries or blueberries for a twist.

Storage Tips

  • Store the bars in an airtight container with parchment between layers.
  • Best eaten within 2 weeks for maximum freshness.

FAQ About Strawberry Shortcake Ice Cream Bars

Can I make these ahead of time?

Yes! Prepare them up to a week ahead. Just keep them tightly sealed in the freezer.

Can I use fresh strawberries instead of freeze-dried?

Fresh strawberries will add moisture. It’s better to use freeze-dried for the crunch coating.

What if I don’t have Golden Oreos?

You can substitute with shortbread cookies or vanilla wafers.


Conclusion

There’s just something magical about recreating a childhood favorite in your own kitchen.
With these Homemade Strawberry Shortcake Ice Cream Bars, you’ll bring smiles to everyone around — and probably make some new memories too.
Don’t forget to share your creations on social media and tag us! We can’t wait to see your beautiful bars.

Chocolate Cherry Dump Cake: A Decadent, Effortless Dessert That Will Delight Your Taste Buds

There’s something special about desserts that don’t require hours of preparation but still manage to deliver a rich, indulgent flavor. Chocolate cherry dump cake is the epitome of a fuss-free, delicious treat that you can whip up in no time. Imagine the gooey sweetness of cherry filling combined with the richness of chocolate cake—what more could you want? Whether you’re hosting a family gathering or craving something sweet for yourself, this dump cake is sure to impress.

What Makes Chocolate Cherry Dump Cake So Irresistible? A Simple, Yet Delicious Dessert

If you’ve never made a dump cake before, you’re in for a treat. The term “dump cake” refers to a type of dessert that requires little to no preparation. You quite literally dump the ingredients into a baking dish, pop it in the oven, and voilà—your dessert is ready! The ease of making a chocolate cherry dump cake is one of the main reasons it’s so popular among home bakers. It’s the kind of dessert that anyone can make, even if you don’t consider yourself a skilled baker.

But what sets this dessert apart from others is its incredible flavor combination. The tartness of the cherry pie filling pairs perfectly with the richness of the chocolate cake mix, creating a dessert that is both comforting and satisfying. With just a few ingredients, you’re able to create something that feels like a special treat.

Key Ingredients That Make This Cake Perfect

The beauty of chocolate cherry dump cake lies in its simplicity. Here’s a breakdown of the key ingredients you’ll need:

  1. Cherry Pie Filling: The foundation of your dump cake. You’ll typically use a can of cherry pie filling, which gives the cake its fruity, tart flavor. The cherries also help to keep the cake moist as it bakes.
  2. Chocolate Cake Mix: This is where the magic happens. The cake mix gives the dessert its rich, chocolatey base. It’s an essential ingredient that helps bind the other components together.
  3. Butter: Melted butter is poured over the cake mix, creating a crisp, golden topping. It also helps the cake bake to perfection, ensuring a beautiful texture.

These ingredients come together to form a cake that is simple to make but delivers an incredible flavor payoff.

How to Make Chocolate Cherry Dump Cake

Step-By-Step Guide to Creating Your Own Chocolate Cherry Dump Cake

Making a chocolate cherry dump cake is incredibly easy, even for beginner bakers. Let’s walk through the process together.

Ingredients for Your Chocolate Cherry Dump Cake

IngredientAmount
Canned cherry pie filling1 can (21 oz)
Chocolate cake mix1 box (15.25 oz)
Unsalted butter (melted)1/2 cup (1 stick)
Chocolate chips (optional)1/2 cup

Step-By-Step Instructions

  1. Preheat your oven to 350°F (175°C). This ensures the cake bakes evenly from the moment you put it in the oven.
  2. Grease your baking dish (9×13-inch works great for this recipe). You can use butter or non-stick spray to prevent the cake from sticking.
  3. Spread the cherry pie filling evenly in the bottom of the prepared baking dish. Make sure to spread it out to the edges so that every bite has a bit of cherry flavor.
  4. Sprinkle the dry chocolate cake mix evenly over the cherries. Don’t stir it! You want the cake mix to sit on top of the filling, creating a crisp topping as it bakes.
  5. Drizzle the melted butter over the top of the cake mix. You don’t need to cover every inch; just pour it evenly over the top to ensure it melts and crisps up nicely.
  6. Optional: Sprinkle chocolate chips over the top for an extra chocolatey finish. This step is completely up to you, but it adds a nice touch of sweetness.
  7. Bake the cake for 40-45 minutes, or until the top is golden brown and bubbling. You’ll notice the cake begins to pull away from the sides of the dish when it’s done.
  8. Cool for a few minutes before serving. While it’s tempting to dive right in, letting the cake cool slightly will allow it to set up and make it easier to serve.

Serving Tips

Chocolate cherry dump cake is best served warm. You can top it with a scoop of vanilla ice cream or a dollop of whipped cream to elevate the experience. It’s the perfect dessert for sharing with friends and family, and it pairs wonderfully with a cup of coffee or hot chocolate.

Why Chocolate Cherry Dump Cake is Perfect for Every Occasion

The Versatility of Chocolate Cherry Dump Cake

This dessert is not only delicious but also incredibly versatile. Whether you’re baking for a special occasion or just need a quick treat, chocolate cherry dump cake fits the bill.

Ideal for Any Season

One of the best things about this dessert is that it works year-round. In the winter, it’s a comforting, warm treat after a long day. In the summer, you can serve it at barbecues or picnics. The rich chocolate and cherry flavor feels indulgent but still light enough for casual gatherings.

Kid-Friendly and Family Approved

Chocolate cherry dump cake is loved by all ages. Kids will enjoy the sweetness and the gooey texture, while adults will appreciate how easy it is to make. It’s a family favorite for a reason!

Perfect for Potlucks and Parties

Looking for a crowd-pleasing dessert for your next gathering? Chocolate cherry dump cake is perfect for potlucks, parties, and family dinners. It’s simple to prepare in advance, and you don’t have to worry about intricate decorating. Just bake and serve—everyone will love it.

Tips and Tricks for the Perfect Chocolate Cherry Dump Cake

Expert Tips to Elevate Your Dump Cake Experience

While this cake is already simple and delicious, there are a few tricks to help you make it even better.

Tip 1: Use High-Quality Cake Mix

Though any chocolate cake mix will work, a premium-quality mix will give your dump cake a richer flavor and better texture. Look for mixes that use high-quality cocoa powder and real sugar for the best results.Experiment with Add-Ins

Add your own spin to the classic recipe by incorporating other ingredients. Try adding nuts, coconut flakes, or mini marshmallows for an extra layer of flavor and texture. Don’t Overmix

The beauty of a dump cake is that you don’t have to mix the ingredients. Just dump and bake! Overmixing can lead to a denser, less fluffy cake, so resist the urge to stir everything together.

Tip 4: Customize with Frosting or Ice Cream

If you want to take this dessert to the next level, add a layer of frosting on top after baking, or serve it with a generous scoop of ice cream. Chocolate or cherry frosting pairs wonderfully with this cake.

Tip 5: Check for Doneness

To make sure your cake is perfect, check that the top is golden brown and the cherries are bubbling. If you notice the cake looks a little too soft, bake it for a few more minutes until it reaches the desired texture.

Healthier Variations of Chocolate Cherry Dump Cake

Healthier Versions for a Guilt-Free Treat

Although this dessert is rich and indulgent, you can make a few simple swaps to make it lighter or suitable for different dietary needs.

Lower Sugar Options

To reduce the sugar content, use a sugar-free chocolate cake mix and opt for a sugar-free cherry filling. This way, you can still enjoy the delicious flavors without the added sugar.

Dairy-Free or Vegan Options

If you’re following a dairy-free or vegan diet, you can substitute the butter with coconut oil or plant-based butter. Additionally, make sure the cake mix doesn’t contain dairy products if you want to keep it fully vegan.

Gluten-Free Chocolate Cherry Dump Cake

To make this dessert gluten-free, simply use a gluten-free chocolate cake mix. Most store-bought gluten-free cake mixes work just as well as regular ones, making it easy to adapt this recipe.

Frequently Asked Questions (FAQs)

Common Questions About Chocolate Cherry Dump Cake

Q1: Can I use fresh cherries instead of canned pie filling?
Yes! If you have fresh cherries on hand, simply cook them down with sugar and a little cornstarch to make a homemade cherry filling.

Q2: Can I make this cake in advance?
Yes, you can prepare the cake in advance, store it in the fridge, and bake it when you’re ready to serve. Just make sure to bake it fresh for the best texture.

Q3: How can I make this recipe lower in calories?
To reduce calories, use a reduced-fat cake mix and substitute butter with applesauce. You can also use a sugar-free cherry pie filling for a lighter option.

Q4: Can I add other fruits to the chocolate cherry dump cake?
Absolutely! You can mix in raspberries, blueberries, or even strawberries to create a mixed berry dump cake for a new twist.

Conclusion: Why You Should Try Chocolate Cherry Dump Cake Today

This chocolate cherry dump cake is the perfect combination of ease, flavor, and versatility. Whether you’re craving a quick dessert for yourself or looking to impress at a family gathering, this recipe has got you covered. The rich chocolate and sweet cherry filling make it a crowd favorite, and the best part is that it’s incredibly easy to make.

So, what are you waiting for? Grab your ingredients, preheat your oven, and make this indulgent dessert today. You’ll be amazed at how quickly it becomes a staple in your recipe collection!


Call to Action:

Loved this recipe? Share your own version of the chocolate cherry dump cake with us! Tag us on social media or leave a comment below to let us know how you customized your cake. For more easy and delicious dessert ideas, be sure to subscribe to our newsletter!

Chocolate Cherry Dump Cake

🍰 Old-School Dump Cakes Are Back – The Easiest Dessert Trend You Didn’t Know You Missed!

A Sweet Trip Down Memory Lane

You might not remember the first time you smelled one baking, but your senses do. That warm, sweet, buttery scent drifting from the kitchen? That was an old-school dump cake AreBack, doing its thing. These desserts were your grandma’s secret weapon – comforting, crowd-pleasing, and surprisingly effortless. Now, they’re back in full force, trending across social media and modern kitchens. And guess what? It’s your turn to rediscover them.

What Is a Dump Cake? – Understanding the Classic Dessert

Dump cakes are the definition of simplicity. You don’t need mixing bowls or fancy baking tools. Just layer the ingredients right in the pan and let your oven work its magic. Typically made with a box of cake mix, canned fruit, and butter, they land somewhere between a cobbler and a crisp.

Why They Work

  • No-mix, no-fuss baking
  • Affordable and accessible ingredients
  • Consistently delicious with minimal effort
Old-School Dump Cakes Are Back

Dump cakes first rose to fame in mid-century American kitchens, where convenience and comfort were culinary goals. Fast forward to today, and the formula still delivers.

TikTok & Pinterest Revival

Modern-day bakers, especially Gen Z and Millennials, are obsessed with revamping retro recipes. Hashtags like #DumpCake and #VintageBaking rack up millions of views. Short, satisfying videos show just how easy and rewarding these desserts are.

Comfort Food Appeal

In uncertain times, people turn to the familiar. Dump cakes check every box: they’re warm, rich, and nostalgic. Whether you’re baking for yourself, your family, or a party, these cakes are a guaranteed hit.

The Dump Cake Formula: Basic But Brilliant

Essential Pantry Ingredients

IngredientRole
Boxed cake mixForms the crispy topping
Canned fruit/pie fillingAdds sweetness and moisture
Butter (melted/sliced)Helps bake and brown the top

Optional add-ons: nuts, coconut, oats, chocolate chips

How to Make a Dump Cake

  1. Preheat your oven to 350°F (175°C)
  2. Grease a 9×13 baking dish
  3. Layer your canned fruit or pie filling
  4. Sprinkle dry cake mix evenly on top
  5. Drizzle melted butter over everything (or dot with sliced butter)
  6. Bake for 40-45 minutes until golden and bubbly

No stirring required. Just layer, bake, and enjoy.

Must-Try Old-School Dump Cake Recipes

🍑 Peach Dump Cake

  • 1 can sliced peaches in syrup
  • 1 box yellow cake mix
  • 1/2 cup melted butter
  • Optional: cinnamon, pecans

🍒 Cherry Pineapple Dump Cake

  • 1 can cherry pie filling
  • 1 can crushed pineapple
  • 1 box yellow cake mix
  • 1/2 cup melted butter

🍫 Chocolate Cherry Dump Cake

  • 1 can cherry pie filling
  • 1 box chocolate fudge cake mix
  • 1/2 cup melted butter
  • Optional: dark chocolate chunks

Tips to Perfect Your Dump Cake Game

  • Don’t mix the layers!
  • Use parchment for easy cleanup
  • Add texture with chopped nuts or coconut
  • Bake until the top is browned and edges bubble
  • Serve warm with vanilla ice cream or whipped cream

Modern Takes on a Classic Dessert

Gluten-Free or Vegan Adaptations

  • Gluten-free cake mix works perfectly
  • Replace butter with vegan margarine or coconut oil

Individual Servings

Use mason jars, ramekins, or muffin tins for personal portions. Great for parties or gifts.

Mix and Match Flavors

  • Blueberry + lemon cake mix
  • Pumpkin puree + spice cake mix
  • Apple pie filling + caramel drizzle

How to Store and Serve Dump Cake

  • Best served warm, fresh out of the oven
  • Keeps in the fridge for 3-4 days
  • Reheat in microwave or oven
  • Freeze up to 3 months (wrap tightly)

FAQ: Old-School Dump Cakes Are Back

Can I use fresh fruit?

Yes! Add sugar or juice to mimic the syrup in canned fruit.

Is it okay to stir the ingredients?

No. Dump cakes rely on layering, not mixing.

Can I make it ahead of time?

Yes. Assemble ahead and bake when ready. Best served warm.

What if I don’t have cake mix?

Try pancake mix, biscuit mix, or homemade mix with flour, sugar, and baking powder.

Conclusion: Your Turn to Bring It Back

Dump cakes aren’t just a sweet memory; they’re your new go-to for easy, heartfelt baking. Whether you’re craving that nostalgic flavor or just need a foolproof dessert for your next gathering, these cakes deliver every time.

So grab your favorite cake mix, open a can of fruit, and preheat your oven. You’re just minutes away from dessert magic.

📢 Call to Action

Try an old-school dump cake this week and share your creation on social media using #DumpCakeRevival. Let’s bake up some nostalgia together!

🧁 Mini Cheesecake Jar Recipe: The Sweetest Way to Celebrate Life’s Moments

✨ Tiny Jars, Big Joy — A Dessert That Feels Like a Hug

You know those desserts that make you pause for a second, smile, and remember a moment? That’s what mini cheesecake jars recipe do. These little treats aren’t just about flavor—they’re a whole experience. Whether you’re prepping for a birthday bash, surprising someone special, or just treating yourself (because yes, you deserve it), these creamy, no-bake cheesecake jars check all the boxes: simple, adorable, delicious.

Mini Cheesecake Jar Recipe

And the best part? You don’t need to turn on the oven.


🧁 Why You’ll Love Mini Cheesecake Jars RECIP

🎉 Elegant, Easy, and Loved by Everyone

  • These jars require no baking—less time, less cleanup.
  • They’re individually portioned, making them perfect for parties or gifting.
  • Kid-friendly, adult-approved, and completely customizable.

Right now, mini desserts are making waves on Pinterest and TikTok. From rustic weddings to birthday brunches, these mini cheesecake jars are stealing the spotlight. With search interest for “cheesecake in a jar” up over 40%, you’re not just making a dessert—you’re joining a sweet trend.


🍰 Your No-Bake Mini Cheesecake Jar Recipe

✨ Ingredients at a Glance

IngredientAmountNotes
Graham crackers1 ½ cupsFinely crushed
Butter (melted)⅓ cupSalted or unsalted
Cream cheese1 ½ cupsRoom temperature
Powdered sugar½ cupSifted
Vanilla extract1 tspPure, not imitation
Heavy cream1 cupVery cold
Whipped creamOptionalFor topping
Rainbow sprinklesOptionalFor flair

🍝 Step-by-Step Assembly

  1. Start with the crust
  • Mix your crushed graham crackers with melted butter.
  • Spoon 2 tablespoons into each jar and press down to form the crust.
  • Chill in the fridge while you prep the filling.
  1. Whip it good
  • Whip the cold heavy cream until stiff peaks form. Set aside.
  1. Creamy base magic
  • Beat cream cheese until smooth.
  • Add powdered sugar and vanilla extract. Mix until creamy.
  • Gently fold in the whipped cream to keep the mixture airy.
  1. Jar it up
  • Pipe or spoon the filling over the crust layer in each jar.
  • Top with whipped cream and sprinkles.
  1. Chill to set
  • Refrigerate for at least 2 hours before serving.
  • These stay perfect for up to 3 days.

😍 Insider Tips for Flawless Results

✔️ Storage Tips

  • Use 4 oz or 6 oz jars with lids for freshness and portability.
  • Best enjoyed within 48-72 hours.

🍒 Flavor Twists to Try

  • Berry swirl: Add fresh jam between layers.
  • Cookies & cream: Use crushed Oreos instead of graham crackers.
  • Citrus burst: Add lemon zest to the filling.

☕ Occasions That Deserve Cheesecake Jars

  • Birthday parties
  • Baby showers
  • Dessert tables
  • Corporate events or gift boxes

❓ Frequently Asked Questions (FAQs)

Can I make this mini cheesecake jar recipe in advance?

Absolutely! These jars can be made a day or two in advance and stored in the fridge. Just add the whipped topping and decorations before serving to keep them fresh.

Are these jars freezer-friendly?

Yes—freeze them without the toppings. When ready, thaw in the fridge for a few hours.

How do I make this recipe dairy-free?

You can use plant-based cream cheese and coconut cream. Double-check that your crust ingredients are also dairy-free.

What jar sizes work best?

We recommend 4 oz to 6 oz jars. They’re easy to fill, serve, and stack in the fridge.

Is this recipe good for kids to help make?

Absolutely! Crushing crackers, spooning layers, and decorating with sprinkles make this a fun and safe kitchen activity.


📍 Final Thought: Your Spoonful of Celebration

Every once in a while, a dessert comes along that feels a little magical. These mini cheesecake jars are exactly that. They’re cute, creamy, endlessly customizable, and totally unforgettable.

Whether you’re a pro in the kitchen or a beginner just testing the waters, you can pull these off with ease. So go ahead, mix up some love, chill a few jars, and serve joy by the sp

Mini Cheesecake Jar Recipe

Old-Fashioned Banana Cake That Tastes Like Grandma’s Kitchen

old-fashioned banana cake

You know that comforting feeling you get when you walk into a room and catch the scent of something sweet and nostalgic baking in the oven? That scent might just be a homemade old-fashioned banana cake—a timeless dessert that never fails to bring back memories. Whether you’re reminiscing about your childhood kitchen or simply craving something classic, this recipe brings the warmth of tradition right into your home.

Let’s dive into how you can recreate this delicious throwback that tastes just as good as you remember.


What Makes an Old-Fashioned Banana Recipe So Special?

What sets an old-fashioned banana cake apart from modern versions? It’s not just the simplicity of the ingredients, but the intention behind every bite. This cake is all about using ripe bananas at their sweetest stage, real butter, and no fancy tricks—just pure, homemade goodness.

The tradition of banana cake dates back to the early 20th century when home bakers started using overripe bananas to avoid waste. Its popularity only grew as families passed down their favorite versions, making it a treasured dessert in countless households.


Ingredients for the Perfect Old-Fashioned Banana Cake

Getting your ingredients right is the key to nailing this nostalgic treat. Use fresh, whole ingredients whenever possible for the most authentic flavor.

Classic Banana Cake Ingredients Table

IngredientQuantityNotes
Ripe bananas3 mediumThe spottier, the better
All-purpose flour2 cupsSifted for a lighter texture
Baking soda1 tspHelps with rise
Salt1/2 tspBalances sweetness
Unsalted butter1/2 cupRoom temperature
Sugar1 cupCan substitute brown sugar
Eggs2 largeRoom temperature
Vanilla extract1 tspAdds depth of flavor
Buttermilk or yogurt1/2 cupFor moisture and tang

How to Make an Old-Fashioned Banana Cake Step by Step

You don’t need fancy equipment or culinary school techniques. Just follow these simple instructions and you’ll be savoring a slice of homemade bliss in no time.

Instructions

  1. Preheat your oven to 350°F (175°C).
  2. Grease and lightly flour an 8-inch round or square baking pan.
  3. Mash the ripe bananas in a small bowl and set aside.
  4. In a large bowl, cream the butter and sugar until light and fluffy.
  5. Add eggs one at a time, mixing well after each addition. Stir in vanilla.
  6. In a separate bowl, whisk together the flour, baking soda, and salt.
  7. Gradually add the dry ingredients to the creamed mixture, alternating with buttermilk.
  8. Gently fold in the mashed bananas.
  9. Pour the batter into your prepared pan and smooth the top.
  10. Bake for 35–40 minutes, or until a toothpick inserted into the center comes out clean.
  11. Cool for at least 10 minutes before removing from the pan. Let it cool completely on a wire rack before frosting.

Optional Add-ins

  • 🥜 Chopped walnuts
  • 🍫 Dark chocolate chips
  • ☕ A pinch of cinnamon or nutmeg

Frosting Options for Your Banana Cake

The beauty of this cake is its versatility. You can enjoy it plain, or add a frosting that complements its flavor.

  • Cream Cheese Frosting: A tangy and smooth choice that pairs beautifully with the sweetness.
  • Brown Butter Icing: Adds a rich, nutty flavor that elevates the entire cake.
  • Classic Buttercream: A simple vanilla buttercream for that extra touch of sweetness.

Frosting Tips

  • Always let the cake cool completely before frosting.
  • Store frosted cake in the fridge to maintain freshness.

Storage and Make-Ahead Tips

Life gets busy, but that doesn’t mean you can’t plan ahead. Here’s how you can store your cake for later enjoyment:

  • ☕ Store the cake at room temperature (unfrosted) for 2 days in an airtight container.
  • ❄️ Refrigerate frosted cake for up to 5 days.
  • 🌧️ Freeze unfrosted cake layers for up to 3 months. Wrap in parchment and then foil.

Variations of Old-Fashioned Banana Desserts

Feeling inspired? There are many delicious ways to give the classic banana flavor a fresh twist:

  • 🍪 Banana Cream Pie with a buttery graham cracker crust and whipped topping.
  • Banana Bread Pudding using leftover banana bread.
  • 🍬 Mini Banana Cupcakes with chocolate or caramel drizzle.

Healthier Swaps for a Guilt-Free Banana Cake

Looking to lighten things up? You can tweak this recipe without sacrificing flavor:

  • Replace butter with Greek yogurt or mashed avocado.
  • Swap sugar with honey or maple syrup.
  • Use whole wheat flour or oat flour.

These changes make it easier to enjoy your favorite treat while sticking to your health goals.


FAQ – Old-Fashioned Banana Recipes

Can I use frozen bananas in old-fashioned banana cake?

Absolutely! Thawed frozen bananas work perfectly. Just drain any excess liquid before mashing.

What’s the difference between banana bread and banana cake?

Banana bread is denser and usually not frosted, while banana cake is lighter, fluffier, and often topped with frosting.

How ripe should bananas be for old-fashioned banana cake?

The riper, the better. You want bananas that are heavily spotted or even blackened on the outside.

Can I make this cake gluten-free?

Yes, by using a 1:1 gluten-free flour blend and ensuring other ingredients are certified gluten-free.


Perfect Pairings – What to Serve with Old-Fashioned Banana Cake

This cake is delicious on its own, but these sides can elevate your dessert experience:

  • ☕ A hot cup of tea or coffee
  • 🍦 A scoop of vanilla or cinnamon ice cream
  • 🍇 Fresh berries or caramel drizzle

Reader Tips & Memories – Share Yours!

Have your own version of this cake? Maybe a family story behind it? Share your memories in the comments or on social media. Your twist could inspire someone else!


Conclusion – Why You’ll Always Come Back to This Old-Fashioned Favorite

There’s something timeless about an old-fashioned banana cake. It’s more than just dessert—it’s a reminder of the joy in simplicity. Whether you’re baking for a special occasion or a cozy night in, this cake delivers the comfort you didn’t know you needed.

So go ahead, let those bananas ripen on the counter, gather your ingredients, and bring a piece of the past into your present.


Call to Action

Ready to turn your ripe bananas into something unforgettable? Bake this old-fashioned banana cake today and tag your creation on Instagram using #HeltRecipes. We can’t wait to see your version of this sweet classic!

Irresistible Nutella Swirl Banana Bread – A Guilt-Free Treat You’ll Love

Introduction – Why You’ll Fall in Love With Nutella Swirl Banana Bread

There’s something about the comforting aroma of banana bread baking in the oven that takes you back to warm, familiar moments. Now, imagine elevating that classic recipe with swirls of rich, velvety Nutella. That’s what this guide is all about—helping you make the ultimate Nutella Swirl Banana Bread, naturally sweetened, perfectly moist, and entirely irresistible. Whether you’re baking for your family, impressing guests, or just treating yourself, this recipe brings together comfort and indulgence in every bite.

What Makes Nutella Swirl Banana Bread So Special?

You may be wondering, what’s the big deal about adding Nutella to banana bread? Here’s why this recipe is so beloved:

  • Naturally Sweetened: Thanks to ripe bananas, you won’t need to add refined sugar.
  • Rich Flavor: The chocolate-hazelnut swirl enhances the banana flavor without overpowering it.
  • Soft and Moist Texture: Yogurt helps achieve that perfectly tender crumb.
  • Visual Appeal: The Nutella swirl gives it a bakery-style look right at home.

Whether you enjoy it as breakfast, a snack, or dessert, this bread suits any time of day.

Ingredients Breakdown – What You Need to Make Nutella Swirl Banana Bread

Table of Ingredients

IngredientQuantity
Ripe bananas (mashed)3 medium
Eggs2
Greek yogurt (plain)1/3 cup
Vanilla extract1 tsp
Whole wheat flour1 1/2 cups
Baking soda1 tsp
Ground cinnamon (optional)1/2 tsp
Salt1/4 tsp
Nutella (slightly warmed)1/4 cup

Ingredient Notes

  • Overripe bananas give maximum sweetness and flavor.
  • You can swap Greek yogurt for unsweetened applesauce for a dairy-free version.
  • Want a healthier twist? Opt for sugar-free hazelnut spread instead of Nutella.

Step-by-Step Instructions for the Perfect Nutella Swirl Banana Bread

Nutella Swirl Banana Bread

Preparation Method

Follow these easy steps and you’ll have a gorgeous, delicious loaf in under an hour.

  1. Preheat your oven to 350°F (175°C). Grease a 9×5-inch loaf pan or line with parchment.
  2. Mash the bananas in a large bowl until smooth.
  3. Add the eggs, yogurt, and vanilla. Mix until well combined.
  4. In another bowl, whisk together flour, baking soda, cinnamon, and salt.
  5. Stir the dry ingredients into the wet mixture until just combined—do not overmix.
  6. Pour the batter into the prepared loaf pan.
  7. Drizzle warmed Nutella on top of the batter.
  8. Swirl gently using a knife or toothpick to create a marbled pattern.
  9. Bake for 50-60 minutes or until a toothpick inserted in the center comes out clean.
  10. Cool on a wire rack before slicing and serving.

Storage Tips

  • Room temperature: Store in an airtight container for 2–3 days.
  • Refrigerator: Keeps fresh up to 5 days.
  • Freezer: Wrap slices in plastic and store for up to 3 months.

Healthier Swaps for Your Nutella Banana Bread Recipe

Want to make your banana bread even more nourishing? Here are a few ideas:

  • Flour: Swap with oat flour or almond flour for a gluten-free version.
  • Nutella: Choose no-added-sugar spreads or make your own using hazelnuts and cocoa.
  • Oil-free version: Greek yogurt or applesauce keeps it moist without the fat.
  • Add-ins: Mix in flaxseed, chopped walnuts, or dark chocolate chips for an extra health boost.

Serving Suggestions and Pairing Ideas

  • Warm a slice and top with Greek yogurt and a drizzle of honey.
  • Serve with a cup of almond milk latte or herbal tea for a cozy breakfast.
  • Add a scoop of sugar-free vanilla ice cream for a balanced dessert.
  • Toast it lightly and spread with almond butter for a protein-rich snack.

Bonus Tips for Making the Best Banana Bread Every Time

Baking Advice

  • Always use very ripe bananas with brown spots.
  • Don’t overmix the batter; it makes the bread dense.
  • Let it rest before slicing to keep it from crumbling.
  • Use parchment paper to lift it easily from the pan.

FAQ – Nutella Swirl Banana Bread

Can I make Nutella Swirl Banana Bread gluten-free?

Yes! Use a gluten-free all-purpose flour blend or oat flour. Ensure it’s designed for baking to maintain texture.

Is there a sugar-free version of Nutella I can use?

Definitely. Look for hazelnut spreads sweetened with stevia or monk fruit, or make your own.

Can I bake this recipe as muffins instead of a loaf?

Absolutely. Pour batter into a muffin tin and bake for 20-25 minutes at 350°F.

How ripe should the bananas be?

The best bananas are heavily spotted or almost black. They’re easier to mash and naturally sweet.

Printable Recipe Card

Nutella Swirl Banana Bread (No Sugar Added)

  • Prep time: 10 minutes
  • Cook time: 50-60 minutes
  • Total time: ~1 hour
  • Servings: 8 slices

Ingredients:

  • 3 ripe bananas
  • 2 eggs
  • 1/3 cup Greek yogurt
  • 1 tsp vanilla
  • 1 1/2 cups whole wheat flour
  • 1 tsp baking soda
  • 1/2 tsp cinnamon
  • 1/4 tsp salt
  • 1/4 cup Nutella, slightly warmed

Instructions:

  1. Preheat oven and prep pan.
  2. Mix wet and dry ingredients separately.
  3. Combine and pour batter into pan.
  4. Swirl in Nutella.
  5. Bake for 50-60 minutes.
  6. Cool and enjoy!

Conclusion – Your New Favorite Banana Bread Recipe

Now you have everything you need to make a better-for-you banana bread that looks fancy but is totally doable. With its natural sweetness and Nutella magic, this is one recipe you’ll keep returning to. Don’t be surprised if it disappears in minutes!