Indulge in Luxury: How to Make the Perfect Middle Eastern Dessert

Introduction

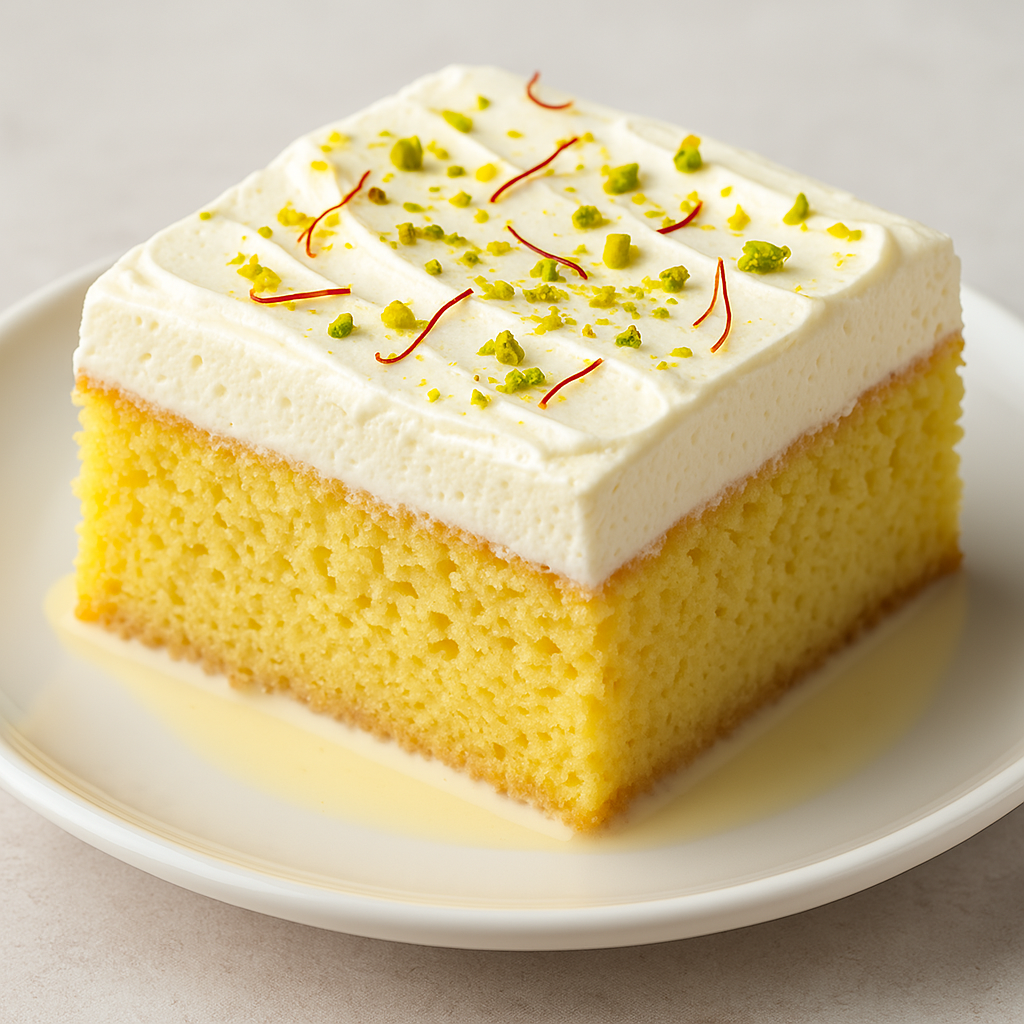
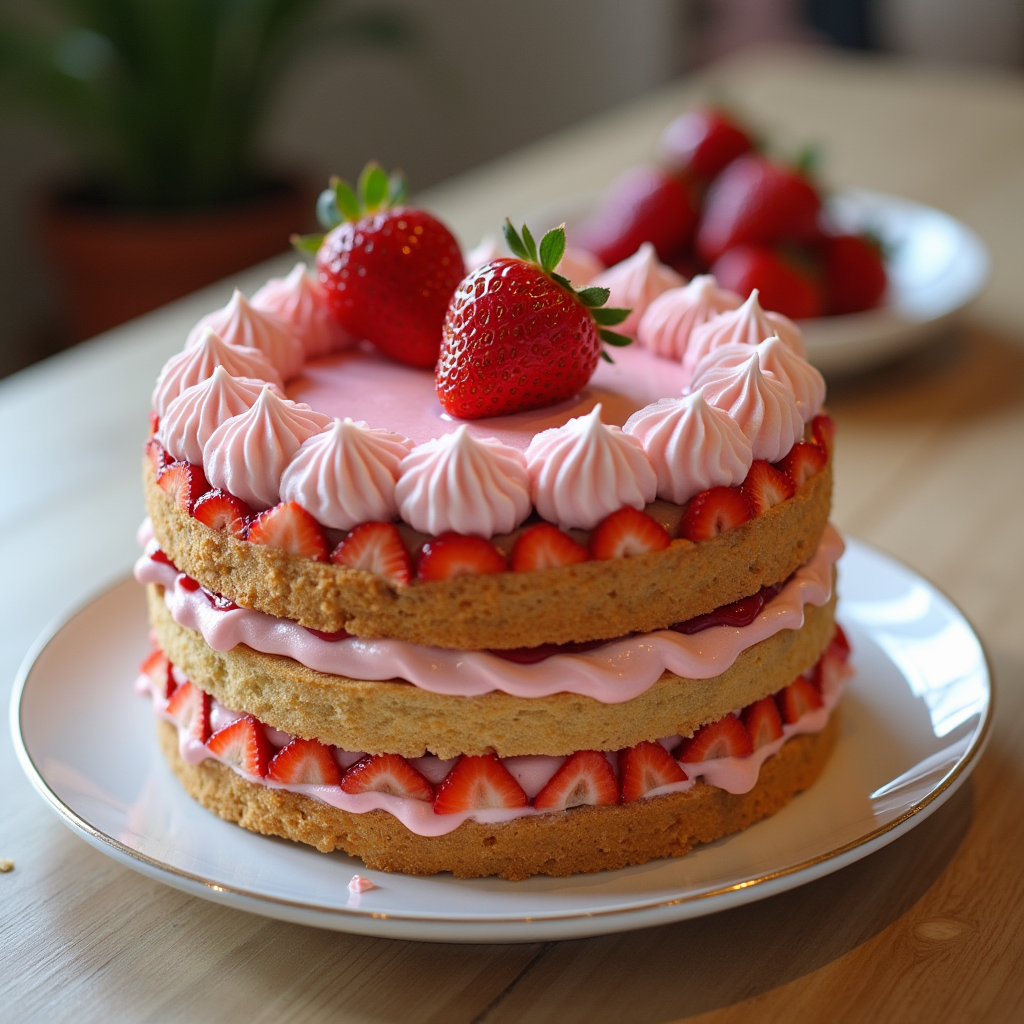
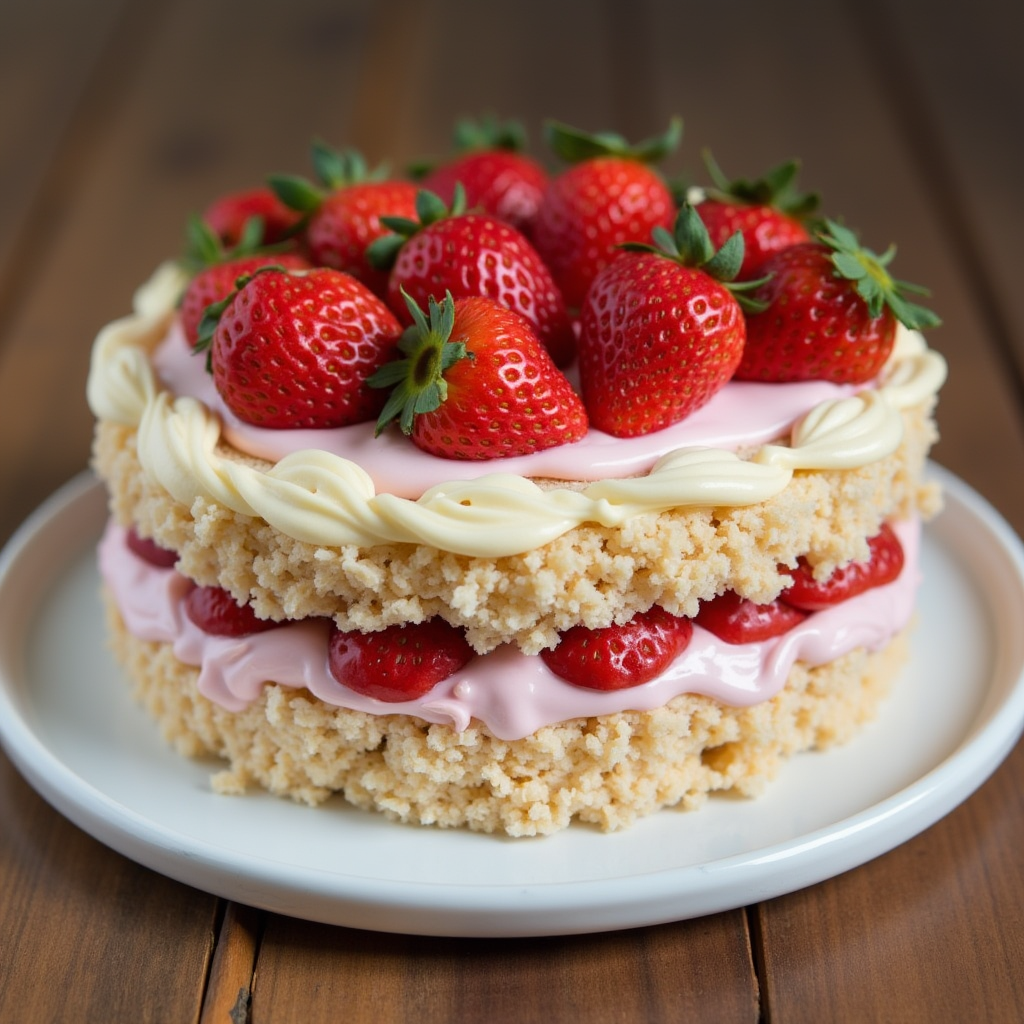
Imagine biting into a soft, delicate cake infused with the rich aroma of saffron, soaked in a creamy milk mixture, and topped with a luscious layer of whipped cream. Each bite is a blend of sweetness and warmth, delivering a royal experience that has made Middle Eastern Dessert a beloved dessert in Middle Eastern and South Asian cuisine.

If you’ve ever wondered how to make this elegant treat at home, you’re in the right place. This guide will take you through everything from choosing the best Dessert Middle Eastern Dessert to baking a perfectly moist sponge cake and expert tips to elevate the flavor. Whether you’re preparing it for a special occasion or simply want to treat yourself, this Middle Eastern Dessert is sure to impress.


What is Middle Eastern Dessert?

Dessert Saffron Milk Cake is a luxurious twist on the classic Tres Leches Cake, a Latin American dessert made with a soft sponge cake soaked in a rich blend of three types of milk. This version is infused with Dessert Middle Eastern Dessert, a spice known for its distinct golden hue and fragrant aroma, making it a royal treat in Middle Eastern households.

This cake is widely popular in Dubai, where it’s served in many upscale cafés and bakeries. The perfect balance of sweetness and creaminess makes it a must-try for dessert lovers who appreciate exotic flavors.


Why Dessert Middle Eastern Dessert? The Royal Spice of Desserts

What Makes Middle Eastern Dessert Special?

Saffron is one of the most precious and expensive spices in the world, often referred to as “red gold.” Its deep flavor, combined with a slightly floral and honey-like taste, adds depth and complexity to desserts.

Health Benefits of Dessert Saffron

  • Rich in antioxidants – Helps protect cells from damage.
  • Boosts mood and memory – Often used in traditional medicine.
  • Enhances digestion – Aids in gut health.

Best Type of Saffron for Baking

For a rich color and intense flavor, use Persian (Iranian)Dessert Middle or Kashmiri saffron. Avoid saffron powders, as they may be mixed with fillers that dilute the taste.


Ingredients Needed

Here’s everything you’ll need to create the perfect Dessert Saffron Milk Cake:

Cake Batter:

IngredientQuantity
All-purpose flour1 ½ cups
Baking powder1 ½ tsp
Large eggs4
Sugar¾ cup
Vanilla extract1 tsp
Full-fat milk½ cup
Saffron strands (soaked)¼ tsp

Milk Mixture:

IngredientQuantity
Sweetened condensed milk1 cup
Evaporated milk1 cup
Heavy cream1 cup
Saffron strands (extra)¼ tsp

Toppings:

IngredientQuantity
Whipping cream1 cup
Chopped pistachiosFor garnish
Saffron strandsFor garnish

Step-by-Step Preparation Guide

Step 1: Preparing the Cake Batter

Middle Eastern Dessert
  1. Preheat your oven to 350°F (180°C) and grease a baking dish.
  2. Whisk eggs and sugar together until light and fluffy.
  3. Add vanilla extract and saffron-infused milk for aroma.
  4. Gradually sift in flour and baking powder while mixing.
  5. Pour the batter into the baking dish and bake for 30-35 minutes.

Step 2: Preparing the Milk Mixture

  1. In a bowl, mix condensed milk, evaporated milk, and heavy cream.
  2. Stir in extra saffron strands for added color and flavor.
  3. Once the cake is baked, poke holes using a fork and slowly pour the milk mixture over the warm cake.

Step 3: Adding the Whipped Cream Topping

  1. Whip the cream until stiff peaks form.
  2. Spread evenly over the cake and garnish with chopped pistachios and saffron strands.

Step 4: Chilling & Serving

  • Refrigerate for at least 2 hours before serving.
  • Enjoy cold for the best flavor and texture!

Tips for the Best Texture & Flavor

Use fresh saffron – Old saffron loses its flavor over time.
Let the cake fully absorb the milk mixture – This ensures a moist texture.
Don’t overbake – A soft sponge cake is key to a great milk cake.
Refrigerate before serving – Chilling enhances the taste.


Common Mistakes & How to Avoid Them

🚫 Using low-fat milk – Full-fat milk creates a richer taste.
🚫 Not poking enough holes – This prevents the milk from soaking in properly.
🚫 Skipping the chilling step – The cake needs time to absorb all the flavors.


Serving & Storage Tips

  • Serve cold with extra saffron syrup or rosewater drizzle.
  • Store in an airtight container in the fridge for up to 3 days.

FAQs About Middle Eastern Dessert

Can I Make This Cake Without Saffron?

Yes! You can replace saffron with cardamom or rose water for a different flavor profile.

What Can I Use Instead of Heavy Cream?

You can use coconut cream for a dairy-free option.

Can I Make This in Advance?

Absolutely! Preparing it a day in advance enhances the taste.


Conclusion

Dessert Saffron Milk Cake is more than just a dessert—it’s an experience of indulgence. Whether you’re hosting a special occasion or simply craving something sweet, this cake is guaranteed to impress.

Try this recipe today and enjoy the richness of one of the most beloved Middle Eastern desserts!


Call-to-Action

🔥 Loved this recipe? Share it with your friends and tag us! 🔥
💬 What’s your favorite Middle Eastern dessert? Tell us in the comments!

Dessert Saffron Milk Cake

The Ultimate Crab Cakes Recipe – Crispy, Flavorful & Easy to Make

There’s something special about biting into a perfectly golden, crispy crab cake—that delicate crunch giving way to tender, sweet crab meat inside. Whether you’ve had them at a fancy seafood restaurant or at a backyard cookout, you know that a good crab cake is unforgettable.

But here’s the thing—most store-bought or restaurant versions are loaded with fillers, drowning out the fresh seafood flavor. What if you could make restaurant-quality crab cakes right at home?

With the right ingredients and a few expert tricks, you can whip up the best homemade crab cakes—packed with real crab, lightly seasoned, and fried to crispy perfection. Ready to master this classic seafood dish? Let’s dive in.


Why You’ll Love This Crab Cakes Recipe

Making crab cakes at home might seem intimidating, but trust me—it’s simpler than you think. Here’s why you should give it a shot:

Packed with real crab – No unnecessary fillers, just high-quality seafood.
Golden and crispy – The perfect texture inside and out.
Quick and easy – Done in under 30 minutes, perfect for weeknight meals or special occasions.
Versatile – Serve as an appetizer, main course, or even in a sandwich.
Healthier than takeout – You control the ingredients, making it fresher and better-tasting.

Sounds good? Let’s talk ingredients.


Ingredients for the Best Crab Cakes

A great crab cake starts with quality ingredients. Here’s everything you need:

Essential Ingredients

IngredientQuantityNotes
Lump Crab Meat450g (1 lb)Fresh or canned, well-drained
Breadcrumbs (panko)1/2 cupAdds a crispy texture
Egg1 largeBinds everything together
Mayonnaise3 tbspEnsures moist, tender cakes
Dijon Mustard1 tspA little tangy kick
Worcestershire Sauce1 tspAdds umami depth
Old Bay Seasoning1 tspClassic seafood seasoning
Lemon Juice1 tbspBrightens the flavors
Garlic Powder1/2 tspSubtle savory touch
Cayenne Pepper (optional)1/4 tspA bit of heat
Parsley (chopped)1 tbspFresh herbal flavor
Butter or Oil1 tbspFor frying

Choosing the Best Crab Meat

The key to amazing crab cakes is real lump crab meat. Here’s how to choose:

  • Fresh Lump Crab Meat – The best option. It has big, flaky pieces and a natural sweetness.
  • Pasteurized Crab Meat – Found in refrigerated sections; still great quality.
  • Canned Crab Meat – Works in a pinch but has a slightly different texture.

Avoid imitation crab—it won’t give you the same rich, delicate flavor.


Step-by-Step Instructions for Perfect Crab Cakes

Now, let’s get cooking! Follow these easy steps to create the best homemade crab cakes.

1️⃣ Mix the Base

  • In a large mixing bowl, whisk together:
    • Egg
    • Mayonnaise
    • Dijon mustard
    • Worcestershire sauce
    • Lemon juice
    • Garlic powder, cayenne, and Old Bay seasoning
  • Stir until everything is well combined.

2️⃣ Add Crab & Breadcrumbs

  • Gently fold in the crab meat and breadcrumbs.
  • Be careful not to overmix—you want the crab pieces to stay intact.

3️⃣ Shape & Chill

  • Using your hands, form the mixture into 6-8 patties.
  • Place them on a parchment-lined tray and chill for 30 minutes (this helps them stay firm).

4️⃣ Cook to Perfection

  • Heat butter or oil in a skillet over medium heat.
  • Fry each crab cake for 3-4 minutes per side until golden brown and crispy.

5️⃣ Serve & Enjoy!

  • Plate your crab cakes with lemon wedges and your favorite dipping sauce.

Now, let’s talk pro tips for guaranteed success.


Pro Tips for the Best Crab Cakes

To take your crab cakes from good to restaurant-quality, keep these expert tips in mind:

1️⃣ Use Lump Crab Meat for the Best Texture

  • Avoid shredding the crab too much—bigger chunks = better cakes.

2️⃣ Don’t Overmix

  • Overworking the mixture can make your crab cakes dense and tough.

3️⃣ Chill Before Cooking

  • This step prevents the cakes from falling apart while frying.

4️⃣ Get That Crispy Crust

  • Coat the cakes lightly in extra panko breadcrumbs for extra crunch.

5️⃣ Make It Healthier

  • Want a low-fat option? Bake at 375°F (190°C) for 12-15 minutes, flipping halfway.

Best Dipping Sauces for Crab Cakes

Dipping sauces can elevate your crab cakes to the next level. Here are some top picks:

🥣 Classic Tartar Sauce

  • 1/2 cup mayonnaise
  • 2 tbsp pickle relish
  • 1 tsp Dijon mustard
  • 1 tsp lemon juice

🔥 Spicy Sriracha Mayo

  • 1/2 cup mayonnaise
  • 1 tbsp Sriracha
  • 1 tsp lime juice

🌿 Garlic Lemon Aioli

  • 1/2 cup mayonnaise
  • 1 garlic clove (minced)
  • 1 tsp lemon zest
  • 1 tbsp olive oil

Simply mix the ingredients together and serve alongside your crab cakes!


How to Serve Crab Cakes

Not sure how to serve your crab cakes? Here are some ideas:

  • As an appetizer – Small, bite-sized crab cakes with dipping sauce.
  • As a main dish – Serve with coleslaw, roasted veggies, or a fresh salad.
  • In a sandwich – Crab cake burger with lettuce, tomato, and aioli.
  • On top of pasta – Pair with a creamy garlic butter sauce.

Frequently Asked Questions (FAQ) About Crab Cakes Recipe

Can I Use Imitation Crab Meat?

It’s not recommended. Real lump crab gives the best flavor and texture.

How Do I Store Leftover Crab Cakes?

  • Fridge: Store in an airtight container for up to 3 days.
  • Freezer: Wrap individually and freeze for up to 3 months.

Can I Make Crab Cakes Ahead of Time?

Yes! Prepare and refrigerate the uncooked patties for up to 24 hours before cooking.

How Can I Make Gluten-Free Crab Cakes?

Use gluten-free panko breadcrumbs or substitute with almond flour.


Final Thoughts – Try This Crab Cakes Recipe Today!

You don’t need to be a chef to make restaurant-quality crab cakes at home. With the right ingredients and simple steps, you’ll be serving up crispy, golden, and delicious seafood perfection in no time.

So, why not give it a shot? Grab some fresh crab, whip up this recipe, and treat yourself to the best crab cakes you’ve ever had.

📌 Loved this recipe? Share it & follow HeltRecipes for more! 🚀

Crab Cakes Recipe

Creative Piñata Cakes – Fun & Unique Ideas for Every Celebration

Introduction

Imagine the excitement on someone’s face as they cut into a beautifully decorated cake, only to find a delightful cascade of candies spilling out! Creative Piñata cakes bring an extra layer of surprise to celebrations, making them a popular choice for birthdays, parties, and festive gatherings. If you love baking and want to impress your guests with a show-stopping dessert, this guide will teach you how to make a stunning Creative piñata cake from scratch.


What is a Creative Piñata Cake?

A piñata cake is a multi-layered cake with a hidden pocket filled with treats such as chocolates, sprinkles, mini marshmallows, or even fresh fruit. Unlike traditional cakes, the fun of a piñata cake lies in the surprise hidden inside, making it a centerpiece of excitement at any event.

Why Choose a Creative Piñata Cake?

  • Adds an interactive element to your celebration
  • Customizable with different fillings and themes
  • Suitable for birthdays, anniversaries, and themed parties

Creative Piñata Cakes

Essential Ingredients & Tools

Cake Base Options:

  • Vanilla sponge cake
  • Chocolate cake
  • Red velvet cake
  • Funfetti cake

Filling Ideas:

  • M&Ms
  • Gummy bears
  • Mini marshmallows
  • Nuts and dried fruits

Frosting Choices:

  • Buttercream
  • Whipped cream
  • Fondant

Tools Needed:

  • Round cake pans
  • Cake leveler
  • Piping bags and spatula
  • Small round cutter

Table: Basic Creative Piñata Cake Ingredients

IngredientQuantity
All-purpose flour2 ½ cups
Sugar1 ½ cups
Baking powder2 tsp
Eggs4
Butter1 cup
Vanilla extract1 tsp
Milk1 cup

How to Make a Creative Piñata Cake (Step-by-Step Guide)

1. Baking the Cake Layers

  • Preheat your oven to 350°F (175°C).
  • Prepare three round cake pans and grease them with butter.
  • Mix all ingredients and bake for 30 minutes.
  • Let the cakes cool completely before assembly.

2. Creating the Hidden Pocket

  • Use a small round cutter to remove the center of two cake layers.
  • Leave the bottom and top layers whole.

3. Assembling & Filling the Cake

  • Place one cut-out layer on the bottom whole layer.
  • Add frosting around the edges and stack the second cut-out layer.
  • Fill the center hole with your chosen treats.
  • Seal the top layer and frost the entire cake.

4. Frosting & Decorating Ideas

  • Cover with smooth buttercream or a textured design.
  • Add sprinkles, fondant shapes, or edible glitter.
  • Create themed cakes such as unicorns, superheroes, or seasonal designs.

Fun & Unique Creative Piñata Cake Variations

Chocolate Explosion Creative Piñata Cake

  • Made with rich chocolate cake layers.
  • Filled with chocolate chips, caramel bites, and cocoa sprinkles.

Fruity Creative Piñata Cake

  • Uses fresh berries and fruit preserves.
  • Perfect for a refreshing summer dessert.

Rainbow Creative Piñata Cake

  • Features multi-colored layers.
  • Filled with rainbow sprinkles or jelly beans.

Kids’ Cartoon-Themed Creative Piñata Cake

  • Inspired by popular animated characters.
  • Uses edible figurines and bright colors.

Expert Tips for Perfect Creative Piñata Cakes

  • Use a firm cake base to prevent collapse.
  • Chill the cake layers before cutting for cleaner edges.
  • Add frosting between layers to ensure stability.
  • For an even bigger surprise, mix different types of fillings.

FAQ Section

What’s the best type of cake for a Creative piñata cake?

A dense, sturdy cake like vanilla sponge or chocolate cake works best to hold the hidden filling.

How do I keep the filling from sinking?

Use firm candies and fill only after assembling the first two layers to maintain structure.

Can I make a piñata cake without eggs?

Yes! Use mashed bananas, applesauce, or yogurt as an egg substitute.

What’s the best way to decorate a Creative piñata cake?

Try smooth buttercream for a classic look, fondant for themed designs, or a colorful drip effect.


Conclusion

Creative Piñata cakes are a fun and creative way to elevate any celebration. Whether you choose a chocolate explosion, a fruity surprise, or a themed design, the joy of revealing the hidden treasure inside is priceless. Ready to make your own piñata cake? Gather your ingredients, follow these steps, and surprise your loved ones with a cake they’ll never forget!

Tag us in your piñata cake creations and share your baking experience! 🍰🎉

Creative Piñata Cakes

The Ultimate Guide to Strawberry Cakes: Recipes, Tips, and Variations

Introduction

Baking a cake is more than just mixing ingredients—it’s about creating memories, bringing people together, and indulging in something sweet and satisfying. Among the many cake flavors, nothing quite matches the charm of a strawberry cake. The natural sweetness of strawberries, their vibrant color, and the refreshing taste make this cake a favorite for birthdays, special occasions, and afternoon treats. Whether you love a classic strawberry cake, a light shortcake, or a rich strawberry cheesecake, there’s a version for everyone. In this guide, you’ll discover everything you need to know about strawberry cakes, from the best ingredients to expert baking tips and delicious variations.

What Makes Strawberry Cake Special?

Strawberry cakes stand out for their rich, fruity flavor and striking appearance. Unlike plain vanilla or chocolate cakes, strawberry cakes offer a unique taste that is naturally sweet with a slight tartness. Here’s why this cake is a favorite:

  • Naturally Sweet & Refreshing: Fresh strawberries provide a subtle tartness that balances out the sweetness.
  • Visually Stunning: The pink hue of strawberry cakes makes them a showstopper at any event.
  • Versatile & Adaptable: You can enjoy strawberry cake with buttercream frosting, whipped cream, or even cream cheese icing.

Essential Ingredients for a Perfect Strawberry Cake

For a soft, moist, and flavorful cake, using the right ingredients is key. Each element plays a vital role in achieving the perfect texture and taste.

Key Ingredients

  • Fresh Strawberries: Provides natural sweetness and a burst of flavor.
  • All-Purpose Flour: Gives the cake structure and softness.
  • Sugar: Enhances the natural sweetness of strawberries.
  • Butter or Oil: Keeps the cake moist and rich.
  • Eggs: Add structure and ensure the cake stays light and fluffy.
  • Baking Powder: Helps the cake rise properly.
  • Milk: Adds moisture and enhances texture.
  • Vanilla Extract: Complements the strawberry flavor beautifully.
strawberry cake

Ingredient Table

IngredientQuantityNotes
Fresh Strawberries1 cupChopped or pureed
All-Purpose Flour2 cupsCan substitute for cake flour
Sugar1 cupAdjust for sweetness
Butter1/2 cupCan use oil or margarine
Eggs2 largeRoom temperature
Baking Powder1 tspEnsures a fluffy texture
Milk1 cupCan use plant-based milk
Vanilla Extract1 tspAdds depth of flavor

Step-by-Step Recipe for Classic Strawberry Cake

Preparation Steps

  1. Preheat the oven to 350°F (175°C).
  2. Prepare cake pans by greasing them and lining them with parchment paper.
  3. Blend strawberries into a smooth puree for a natural pink color and bold flavor.
  4. Combine dry ingredients (flour, sugar, and baking powder) in one bowl.
  5. Mix wet ingredients (eggs, melted butter, vanilla extract, and milk) in another.
  6. Slowly add wet ingredients to dry ingredients, stirring gently.
  7. Fold in strawberry puree and mix until combined.
  8. Pour batter into cake pans and bake for 30-35 minutes.
  9. Cool cakes completely before adding frosting.

Best Frosting Options for Strawberry Cake

  • Strawberry Buttercream: Rich and creamy with real strawberry puree.
  • Whipped Cream Frosting: Light and fluffy, perfect for warm weather.
  • Cream Cheese Frosting: A slightly tangy contrast to the sweet cake.

Variations of Strawberry Cake

Want to try something different? Here are some creative ways to enjoy strawberry cake:

  • Gluten-Free Strawberry Cake: Use almond or coconut flour for a gluten-free version.
  • Vegan Strawberry Cake: Swap eggs for flaxseed and use dairy-free milk.
  • Strawberry Shortcake: Layer biscuits with strawberries and whipped cream.
  • Strawberry Cheesecake: A creamy and rich alternative for dessert lovers.

Tips for Baking the Perfect Strawberry Cake

  • Choose Ripe Strawberries: Fresh, ripe strawberries enhance the cake’s flavor.
  • Keep It Moist: Avoid overbaking to prevent dryness.
  • Use Natural Coloring: For a vibrant pink hue, opt for strawberry puree instead of artificial dyes.
  • Let It Cool Before Frosting: A warm cake will cause frosting to melt.

Frequently Asked Questions

How do I store a strawberry cake?

Store your cake in an airtight container at room temperature for up to 2 days or refrigerate for up to 5 days.

Can I use frozen strawberries for this recipe?

Yes! Just make sure to thaw and drain them to prevent excess moisture in the batter.

What is the best way to enhance the strawberry flavor?

For a stronger strawberry taste, use a combination of fresh puree, strawberry jam, or freeze-dried strawberry powder.

Conclusion

Baking a homemade strawberry cake is a rewarding experience. Its fruity flavor, soft texture, and beautiful color make it a dessert worth sharing. Whether you’re baking for a birthday, an anniversary, or just to treat yourself, this cake will surely impress. Try this recipe and share your experience in the comments below!

strawberry cake

The Ultimate Birthday Cake with Vanilla Buttercream Frosting: A Recipe for Perfect Celebration Moments

When you think of a birthday, what comes to mind? For many, the first image is that of a beautifully decorated cake, candles glowing brightly, and the joy that fills the room when it’s time to sing “Happy Birthday.” A birthday cake is more than just a dessert—it’s the centerpiece of a celebration, a symbol of joy, and often the highlight of the party. The birthday cake with vanilla buttercream frosting is a classic that never goes out of style. Whether you’re a seasoned baker or a beginner, this cake recipe is sure to bring a smile to your face and leave your guests raving.

This article will walk you through everything you need to know to create the ultimate birthday cake with vanilla buttercream frosting. We’ll cover why this cake is a timeless favorite, provide a detailed step-by-step recipe, and share tips on decorating it to perfection. By the end, you’ll have all the tools and knowledge to bake a showstopping birthday cake that everyone will love.


Why Vanilla Birthday Cake with Buttercream is the Ultimate Celebration Dessert

There’s a reason why vanilla birthday cake with buttercream frosting is a celebration staple. Its simple, sweet flavor appeals to people of all ages and its versatility makes it suitable for any occasion. Whether you’re baking for a child’s party or an adult gathering, this cake fits right in.

Vanilla’s Universal Appeal:
Vanilla is a flavor that feels comforting and nostalgic. It’s not overpowering, which makes it a perfect base for a variety of toppings, from fresh fruits to sprinkles and even decadent chocolate ganache. The light, aromatic taste of vanilla complements almost any other dessert element you pair it with, ensuring your cake will be loved by everyone, no matter their age.

The Power of Buttercream Frosting:
Buttercream frosting is perhaps the most popular cake topping—and for good reason. It’s rich, creamy, and easy to work with, making it the perfect choice for decorating a cake. The frosting’s smooth texture and sweet flavor balance beautifully with the delicate taste of the vanilla cake, creating the ultimate birthday treat. Whether you opt for a simple spread or intricate piping, buttercream is versatile and always adds a touch of elegance to your cake.


Ingredients for the Perfect Birthday Cake with Vanilla Buttercream Frosting

Before you start baking, it’s essential to gather all your ingredients. This recipe uses simple, everyday ingredients that combine to create a rich, moist cake and a velvety frosting.

Cake Ingredients:

IngredientQuantity
All-purpose flour2 ½ cups
Baking powder2 ½ teaspoons
Salt½ teaspoon
Unsalted butter (room temperature)1 cup
Granulated sugar2 cups
Eggs4 large
Vanilla extract1 tablespoon
Whole milk1 cup

Buttercream Frosting Ingredients:

IngredientQuantity
Unsalted butter (room temperature)1 cup
Powdered sugar4 cups
Vanilla extract1 tablespoon
Milk2-4 tablespoons (for consistency)
SaltA pinch

birthday cake with vanilla buttercream frosting

Step-by-Step Instructions for Baking Your Birthday Cake

Now that you’ve gathered your ingredients, it’s time to get started! Follow these simple steps to create the perfect birthday cake with vanilla buttercream frosting.

Preparing the Cake Batter

  1. Preheat your oven to 350°F (175°C). Grease and flour two 9-inch round cake pans, or line them with parchment paper to ensure the cakes come out easily after baking.
  2. Mix your dry ingredients. In a medium-sized bowl, whisk together the flour, baking powder, and salt. This step is crucial because it ensures your dry ingredients are evenly distributed.
  3. Cream the butter and sugar. In a large mixing bowl, beat the unsalted butter and granulated sugar together until light and fluffy. This usually takes about 3-4 minutes with an electric mixer. This process helps incorporate air into the batter, making your cake light and airy.
  4. Add the eggs and vanilla. Add the eggs, one at a time, mixing well after each addition. Then, stir in the vanilla extract. This ensures your batter has a smooth texture and a nice vanilla flavor throughout.
  5. Combine the dry ingredients with the wet ingredients. Gradually add the dry ingredients to the wet mixture, alternating with the milk. Start and end with the dry ingredients. Mix until just combined—over-mixing can result in a dense cake, and you want to avoid that.
  6. Pour the batter into the prepared pans. Divide the batter evenly between the two pans, and smooth the tops with a spatula.
  7. Bake the cakes. Place the pans in the preheated oven and bake for 25-30 minutes, or until a toothpick inserted into the center of the cake comes out clean. Keep an eye on the cakes as oven temperatures can vary.
  8. Cool the cakes. Allow the cakes to cool in the pans for about 10 minutes, then transfer them to wire racks to cool completely before frosting.

Making the Vanilla Buttercream Frosting

While your cakes are cooling, it’s time to make the frosting. Here’s how to get that perfect buttercream texture:

  1. Beat the butter. In a large bowl, beat the unsalted butter until it’s creamy and smooth. This usually takes about 3 minutes on medium speed with an electric mixer.
  2. Gradually add the powdered sugar. Add the powdered sugar one cup at a time, mixing on low speed until combined. After each addition, increase the speed to medium and beat until smooth.
  3. Add vanilla and salt. Stir in the vanilla extract and a pinch of salt to balance the sweetness.
  4. Adjust consistency with milk. Gradually add the milk, one tablespoon at a time, until you reach your desired frosting consistency. If the frosting is too thick, add more milk. If it’s too runny, add a bit more powdered sugar.

Decorating the Cake: Tips and Tricks for a Showstopping Presentation

The best part of baking a birthday cake is decorating it! Here’s how to make your birthday cake with vanilla buttercream frosting look as good as it tastes.

  1. Apply a crumb coat. Start by applying a thin layer of frosting to the entire cake to seal in any crumbs. Don’t worry if it’s not perfect—this is just the first step. Chill the cake in the fridge for about 30 minutes to firm up the crumb coat.
  2. Frost the cake. Once the crumb coat is set, apply a thicker layer of frosting. Use a spatula to spread it evenly over the top and sides. You can get creative here, adding swirls, rosettes, or any design that suits the occasion.
  3. Add decorations. Sprinkles, edible glitter, or themed toppers like candles or fondant flowers can take your cake to the next level. Choose decorations that match the theme of your birthday party.
  4. Pipe your design. If you want to get more detailed with the decorations, you can pipe flowers or writing onto the cake using a piping bag. This is an excellent opportunity to make your cake personal and unique.

Why This Birthday Cake with Vanilla Buttercream Frosting is a Crowd Favorite

This birthday cake with vanilla buttercream frosting isn’t just delicious—it’s easy to make and adaptable to any party. Whether you’re baking for a small family gathering or a large celebration, this cake fits the bill.

  • Crowd-pleaser: The light, sweet flavor of the vanilla cake paired with the rich buttercream frosting appeals to almost everyone. It’s a flavor combination that’s universally loved, making it perfect for any birthday.
  • Customizable: Want to add some fun? You can mix in chocolate chips, fresh berries, or even a dash of almond extract. This recipe provides a solid base, so you can get creative with it.

How to Store and Keep Your Birthday Cake Fresh

Now that you’ve made your cake, you’ll want to store it properly to keep it fresh.

  1. At room temperature: If you plan to serve the cake within a few days, store it in an airtight container at room temperature. This will keep it moist and delicious.
  2. In the fridge: If you need to store the cake for a longer period, place it in the fridge. Just be sure to cover it well so it doesn’t dry out or absorb other odors from the fridge.
  3. Freezing cake layers: You can also freeze the cake layers for up to 2-3 months. Wrap them tightly in plastic wrap and foil before freezing. To thaw, let the cake layers come to room temperature before frosting.

Frequently Asked Questions (FAQ)

Q1: Can I make this birthday cake in advance?
Yes! You can bake the cake a day or two in advance and store it in an airtight container at room temperature. You can also freeze the cake layers for longer storage.

Q2: How do I achieve the perfect texture for vanilla buttercream frosting?
Start by whipping the butter until it’s light and fluffy. Gradually add powdered sugar, and adjust with milk to get the perfect smooth consistency.

Q3: Can I use a different flavor of frosting instead of vanilla buttercream?
Absolutely! Feel free to experiment with different frostings, such as chocolate buttercream, cream cheese frosting, or even whipped cream for a lighter finish.

Q4: How can I decorate the birthday cake to make it extra special?
Add fun and personalized touches like sprinkles, edible flowers, or a birthday-themed topper. You can also pipe decorative designs to make your cake look more festive.


Conclusion

Baking a birthday cake with vanilla buttercream frosting doesn’t have to be complicated. With the right ingredients and a few simple steps, you can create a delicious, visually stunning cake that will wow your guests. The best part? You can customize this cake for any occasion, whether you’re baking for a child’s party or a family gathering. So, why wait? Gather your ingredients and get baking—you’ll create a birthday cake that everyone will remember for years to come!


Call to Action:
Ready to bake your birthday cake? Share your creations with us on social media and tag us for a chance to be featured! If you loved this recipe, don’t forget to explore more delicious baking ideas on our blog.

birthday cake with vanilla buttercream frosting

Fluffy Pancakes: The Ultimate Guide to Light and Airy Perfection

Introduction: The Secret to Irresistibly Fluffy Pancakes

Few things can compare to the joy of a warm, pillowy stack of pancakes in the morning. Whether you’re craving a cozy weekend treat or a delightful breakfast indulgence, mastering the art of making fluffy pancakes can elevate your mornings. But why settle for flat, dense pancakes when you can achieve cloud-like perfection? This guide will walk you through the secrets, techniques, and pro tips to ensure that your pancakes turn out irresistibly light and airy every single time.


📝 Ingredients Table for Fluffy Pancakes

IngredientQuantityNotes
All-purpose flour1 ½ cupsProvides structure
Baking powder2 ½ tspKey to fluffiness
Sugar2 tbspAdds a touch of sweetness
Salt½ tspEnhances flavor
Milk1 ¼ cupsRoom temperature for better texture
Egg1 largeHelps with binding and fluffiness
Butter (melted)2 tbspAdds richness
Vanilla extract1 tspBoosts flavor
Optional: ButtermilkSubstitute for milkAdds extra fluffiness

The Science Behind Fluffy Pancakes

Why Baking Powder Matters

Baking powder is the driving force behind fluffy pancakes. It releases carbon dioxide when mixed with liquid, creating air pockets that expand as the batter cooks. Always use fresh baking powder for optimal results.

The Perfect Batter Consistency

The key to achieving airy pancakes is maintaining the right batter consistency. Overmixing can activate the gluten, leading to a tough texture. Aim for a lumpy batter with minimal stirring to keep the pancakes soft and light.

Cooking at the Right Temperature

A preheated pan set to medium heat is essential. If the pan is too hot, the pancakes may burn on the outside while remaining raw inside. If it’s too cool, they won’t rise properly. Test by dropping a small amount of batter into the pan—if it sizzles gently, you’re good to go.


Step-by-Step Guide to Making Fluffy Pancakes

Step 1 – Preparing the Batter

  1. Sift the dry ingredients (flour, baking powder, sugar, and salt) into a mixing bowl.
  2. In a separate bowl, whisk the egg, milk, vanilla extract, and melted butter together.
  3. Gently combine the wet and dry ingredients, stirring just until incorporated. The batter should be slightly lumpy—this is the secret to extra fluffiness!

Step 2 – Cooking Techniques for Extra Height

  1. Preheat a non-stick pan or griddle over medium heat and lightly grease with butter.
  2. Use a ¼ cup measuring cup to pour the batter onto the pan, ensuring evenly sized pancakes.
  3. Wait until bubbles appear on the surface (about 2 minutes), then flip gently and cook for another 1-2 minutes until golden brown.

Step 3 – Serving Suggestions

  • Classic Toppings: Maple syrup, fresh berries, and butter.
  • Creative Twists: Whipped cream, chocolate chips, nut butter, or caramel drizzle.
  • Savory Options: Add bacon crumbles or cheese for a unique twist.

Pro Tips to Make Pancakes Extra Fluffy

Use buttermilk instead of regular milk – The acidity reacts with baking powder, creating an extra lift.
Let the batter rest for 5-10 minutes – This allows the gluten to relax, leading to a softer texture.
Whip egg whites separately and fold them in – This method, commonly used in soufflé pancakes, creates an ultra-light consistency.
Do not press down on pancakes while cooking – This can flatten the air pockets inside, making them dense.


Variations of Fluffy Pancakes

Classic Buttermilk Pancakes

A tangy twist on traditional pancakes, perfect for those who love an extra soft texture.

Banana Fluffy Pancakes

Mash a ripe banana into the batter for natural sweetness and added moisture.

Japanese Soufflé Pancakes

These extra-thick, jiggly pancakes require whipped egg whites for their signature height and airy texture.


Common Mistakes to Avoid

🚫 Overmixing the batter – Makes the pancakes chewy instead of light.
🚫 Using expired baking powder – Results in flat, dense pancakes.
🚫 Cooking on the wrong heat – Too high burns them, too low makes them dry.
🚫 Flipping too early – Wait for visible bubbles before turning.


FAQ – Your Pancake Questions Answered

Why aren’t my pancakes fluffy?

  • You may have overmixed the batter or used old baking powder.

Can I make the batter ahead of time?

  • It’s best to make fresh batter, but if necessary, store it in the fridge for up to 24 hours.

What’s the best way to store pancakes?

  • Store in an airtight container in the fridge for up to 3 days or freeze for longer storage.

Can I use whole wheat flour instead of all-purpose flour?

  • Yes, but it may make the pancakes denser. To keep them light, try a mix of whole wheat and all-purpose flour.

Conclusion: Your Perfect Pancake Journey Starts Here

Mastering fluffy pancakes is easier than you think. By following the right techniques, using quality ingredients, and avoiding common mistakes, you can create the ultimate stack of golden, airy pancakes every time. Whether you stick to the classic recipe or experiment with exciting variations, you now have all the tools to make breakfast truly special.

Fluffy Pancakes Recipe

The Ultimate dessert Oreo Lava Cake Recipe – Gooey, Decadent & Irresistible!

Introduction: Why You’ll Love This dessert Oreo Lava Cake

Imagine cutting into a warm, soft chocolate cake and discovering a molten Oreo cream center oozing out. The combination of rich chocolate and the classic cookies-and-cream flavor makes this dessert absolutely irresistible. Whether you’re craving a quick indulgence or planning a special treat for friends and family, this dessert Oreo Lava Cake recipe is a guaranteed crowd-pleaser.

In this article, you will learn how to make a foolproof dessert Oreo Lava Cake with simple ingredients and step-by-step instructions. Plus, we’ll explore tips, variations, and frequently asked questions to ensure your lava cakes turn out perfectly every time.


Ingredients & Substitutions

To make this decadent dessert Oreo Lava Cake, you’ll need the following ingredients. Here’s a breakdown, along with some substitute options in case you need alternatives.

Essential Ingredients

IngredientQuantitySubstitute Options
Dark chocolate200gMilk or white chocolate
Unsalted butter100gCoconut oil
Powdered sugar½ cupBrown sugar
Eggs2Flaxseed + water (vegan option)
Flour¼ cupAlmond flour (gluten-free)
Crushed Oreos6Any chocolate sandwich cookie

These ingredients work together to create the perfect balance of richness and texture.


Step-by-Step Instructions

How to Make dessert Oreo Lava Cake

dessert Oreo Lava Cake

Step 1: Prepping the Batter

  1. Preheat your oven to 200°C (400°F).
  2. Melt the dark chocolate and butter together in a microwave or over a double boiler.
  3. Stir in the powdered sugar until fully combined.
  4. Add the eggs, one at a time, whisking continuously.
  5. Fold in the flour until smooth and well incorporated.

Step 2: Assembling the Cakes

  1. Grease your ramekins with butter or non-stick spray.
  2. Fill each ramekin halfway with the batter.
  3. Place a whole Oreo in the center of each ramekin.
  4. Pour the remaining batter on top, fully covering the Oreo.

Step 3: Baking for the Perfect Lava Texture

  1. Place the ramekins on a baking tray and bake for 10-12 minutes.
  2. The edges should be set, while the center remains soft and gooey.
  3. Let the cakes sit for 1-2 minutes before unmolding them.

Step 4: Serving Suggestions

  1. Gently run a knife around the edges and invert the cake onto a plate.
  2. Serve warm with a scoop of vanilla ice cream, whipped cream, or a drizzle of chocolate sauce.
  3. Garnish with crushed Oreos for extra crunch.

Tips for Success

  • Do not overbake! The lava effect happens when the center stays slightly undercooked.
  • Use high-quality chocolate for a rich and deep flavor.
  • Grease your ramekins well to ensure easy release.
  • Let the cakes rest for 1-2 minutes before unmolding to prevent breaking.

Variations to Try

Looking to experiment? Here are some delicious twists on the classic Oreo Lava Cake:

White Chocolate dessert Oreo Lava Cake

  • Swap dark chocolate for white chocolate to create a creamy, vanilla-flavored version.

Peanut Butter Lava Cake

  • Add a teaspoon of peanut butter in the center instead of an Oreo for a nutty, gooey surprise.

Vegan dessert Oreo Lava Cake

  • Use coconut oil instead of butter and flax eggs instead of regular eggs for a dairy-free and plant-based version.

Nutella Lava Cake

  • Replace the Oreo filling with a generous spoonful of Nutella for a hazelnut-chocolate lava explosion.

Frequently Asked Questions (FAQ)

Can I make Oreo Lava Cake in the microwave?

Yes! You can prepare an easy microwave version by using a microwave-safe mug:

  1. Mix all the ingredients in a mug, adding a crushed Oreo in the center.
  2. Microwave on high for 45-60 seconds.
  3. Let it sit for a few seconds before digging in.

How do I store and reheat lava cakes?

  • Store in an airtight container for up to 2 days.
  • Reheat in the microwave for 15-20 seconds to restore its gooey center.

What’s the best way to serve dessert Oreo Lava Cake?

For the best experience, serve warm with:

  • Vanilla ice cream
  • Drizzled chocolate or caramel sauce
  • Fresh berries for a tangy contrast

Can I make these lava cakes in advance?

Yes! Prepare the batter and assemble the cakes ahead of time. Refrigerate until ready to bake. When needed, bake directly from the fridge, adding an extra 1-2 minutes to the baking time.


Conclusion: Indulge in dessert Oreo Lava Goodness!

This dessert Oreo Lava Cake is everything a dessert should be: rich, gooey, and bursting with cookies-and-cream flavor. Whether you’re making it for a party, a romantic dinner, or just a cozy night in, it’s a surefire way to satisfy your sweet tooth.

Ready to give it a try? Make this decadent treat and share your results! Don’t forget to snap a photo and tag us on social media. 🍪🔥

Enjoy baking and indulging in this irresistible dessert Oreo Lava Cake!

dessert Oreo Lava Cake

The Ultimate Caramelized Banana Cheesecake Bars Recipe

Introduction

Imagine sinking your teeth into a buttery, crunchy crust, followed by a rich, creamy cheesecake filling bursting with banana flavor. As if that wasn’t enough, it’s topped with perfectly caramelized bananas, adding a deep, golden sweetness to every bite. If you’re a fan of indulgent yet easy-to-make desserts, these Caramelized Banana Cheesecake Bars will become your new favorite treat.

Not only do they deliver a perfect balance of texture and flavor, but they also make a stunning dessert for parties, special occasions, or simply when you crave something sweet. Let’s dive into this irresistible recipe!

Caramelized Banana Cheesecake Bars

Why You’ll Love These Caramelized Banana Cheesecake Bars

  • Perfect Texture – A crunchy biscuit crust, creamy banana cheesecake, and soft caramelized topping.
  • Easy to Make – Simple steps with common ingredients.
  • Great for Any Occasion – Perfect for desserts, snacks, or entertaining guests.
  • Make-Ahead Friendly – These bars taste even better after chilling overnight.

Ingredients

For the Crust:

IngredientQuantity
Crushed digestive biscuits (or graham crackers)1 ½ cups (180g)
Unsalted butter, melted½ cup (115g)
Brown sugar2 tbsp

For the Cheesecake Filling:

IngredientQuantity
Cream cheese, softened2 blocks (225g each)
Granulated sugar½ cup (100g)
Ripe bananas, mashed2
Eggs2
Vanilla extract1 tsp
Heavy cream½ cup (120ml)

For the Caramelized Banana Topping:

IngredientQuantity
Butter2 tbsp
Bananas, sliced2
Brown sugar¼ cup (50g)
Cinnamon1 tsp

Step-by-Step Instructions

1️⃣ Prepare the Crust:

  • Preheat your oven to 175°C (350°F).
  • In a bowl, mix crushed biscuits, melted butter, and brown sugar.
  • Press the mixture into a lined baking pan, spreading evenly.
  • Bake for 10 minutes and set aside to cool.

2️⃣ Make the Cheesecake Filling:

  • In a mixing bowl, beat cream cheese and sugar until smooth.
  • Add mashed bananas, eggs, vanilla extract, and heavy cream.
  • Blend until fully combined.
  • Pour the cheesecake mixture over the cooled crust, spreading it evenly.
  • Bake for 25-30 minutes or until set.

3️⃣ Prepare the Caramelized Banana Topping:

  • Melt butter in a pan over medium heat.
  • Add sliced bananas, brown sugar, and cinnamon.
  • Stir gently and cook for 2-3 minutes, allowing the bananas to caramelize.

4️⃣ Assemble & Serve:

  • Let the cheesecake cool completely.
  • Top with the caramelized bananas.
  • Refrigerate for at least 2 hours before slicing into bars.

Pro Tips for the Best Banana Cheesecake Bars

Use very ripe bananas for maximum sweetness and natural flavor.
Don’t overmix the cheesecake filling to keep it light and creamy.
Let it chill overnight for the best texture.
Enhance the flavor with a drizzle of caramel sauce or sea salt flakes.


How to Store & Make Ahead

  • Refrigerator: Store in an airtight container for up to 5 days.
  • Freezer: Wrap individual bars in plastic wrap and freeze for up to 2 months.
  • Make Ahead: Bake a day before and refrigerate overnight for best results.

Frequently Asked Questions (FAQs)

1️⃣ Can I use a different crust?

Yes! You can use Oreo crumbs, shortbread cookies, or vanilla wafers instead of digestive biscuits.

2️⃣ What if I don’t have heavy cream?

You can substitute Greek yogurt or sour cream for a similar creamy texture.

3️⃣ How do I make the topping even richer?

Drizzle with honey, maple syrup, or caramel sauce for extra decadence.

4️⃣ Can I make this gluten-free?

Absolutely! Use gluten-free biscuits for the crust, and ensure all other ingredients are gluten-free.


Conclusion

These Caramelized Banana Cheesecake Bars are the perfect blend of rich, creamy, and indulgent flavors. Whether you’re making them for a party, a family dessert, or just a treat for yourself, they’re guaranteed to impress. Give this recipe a try and enjoy the sweet, caramelized banana goodness!

👉 Did you love this recipe? Share your experience in the comments below!

Caramelized Banana Cheesecake Bars

Shadow Lemon Poppy Seed Cookies ✨ – Zesty, Soft & Irresistible!


Shadow Lemon Poppy Seed Cookies

Introduction

Imagine biting into a soft, slightly crisp cookie bursting with zesty lemon flavor and the delightful crunch of poppy seeds. ShadowLemon Poppy Seed Cookies are the perfect treat for any occasion, offering a refreshing twist on traditional cookies. Whether you’re baking for a special event or simply craving something sweet and citrusy, this recipe delivers the ideal balance of tangy lemon and satisfying texture. Read on to discover how to make these irresistible cookies and why they should be your next baking project!


Ingredients for Shadow Lemon Poppy Seed Cookies

To create these vibrant cookies, you only need a few simple ingredients. Check out the list below for the quantities needed:

IngredientQuantity
Unsalted butter (room temperature)1 cup (225g)
Granulated sugar1 cup (200g)
Eggs2
Vanilla extract1 tsp
Fresh lemon juice2 tbsp
Lemon zest2 tsp
All-purpose flour2 ½ cups (310g)
Baking powder1 tsp
Poppy seeds1 ½ tbsp

How to MakeShadow Lemon Poppy Seed Cookies

Shadow Lemon Poppy Seed Cookies 🍋✨ – Zesty, Soft & Irresistible!

Follow these step-by-step instructions to bake the most zesty and delicious cookies you’ll ever taste:

1️⃣ Preparing the Dough

Start by preheating your oven to 350°F (175°C) and lining two baking sheets with parchment paper. This will ensure your cookies bake evenly and don’t stick to the tray.

In a large mixing bowl, cream the unsalted butter and granulated sugar together until the mixture is light and fluffy. This process is essential for achieving the perfect texture. Next, beat in the eggs, one at a time, followed by the vanilla extract, lemon juice, and lemon zest. These ingredients will give your cookies a fresh, citrusy aroma and flavor.

2️⃣ Mixing the Dry Ingredients

In a separate bowl, whisk together the all-purpose flour, baking powder, and a pinch of salt. Once combined, gradually add the dry ingredients to your wet mixture and stir until just incorporated. Be careful not to overmix, as this can result in tough cookies. Once the dough comes together, fold in the poppy seeds, which will add a delightful crunch to each bite.

3️⃣ Shaping the Cookies

Using a tablespoon or cookie scoop, scoop out portions of dough and roll them into balls. Place them onto your prepared baking sheets, spacing them about 2 inches apart. Gently flatten each dough ball with the back of a spoon to give them a slightly rounded shape. This step helps the cookies bake evenly and gives them that perfect golden edge.

4️⃣ Baking the Cookies

Bake the cookies for about 10-12 minutes or until the edges are lightly golden. Be careful not to overbake them as you want the centers to remain soft and chewy. Let the cookies cool on the baking sheet for a few minutes before transferring them to a wire rack to cool completely.


Why You’ll Love These Shadow Lemon Poppy Seed Cookies

These cookies offer a delightful balance of flavors and textures that will keep you coming back for more. Here’s why you’ll love them:

  • Zesty and Refreshing Flavor: The fresh lemon juice and zest provide a bright, tangy flavor that’s perfect for spring and summer.
  • Crunchy Texture: The poppy seeds add a subtle crunch to each bite, making these cookies feel more exciting than your average cookie.
  • Soft, Chewy Centers: The interior of the cookies is soft and chewy, while the edges are lightly crisp, creating the perfect contrast.

Expert Tips for Perfect Shadow Lemon Poppy Seed Cookies

If you want to take your baking to the next level, here are a few expert tips:

  • Use Fresh Lemons: For the best flavor, always use fresh lemon juice and zest. Bottled lemon juice can be too acidic and may not give you the same brightness.
  • Chill the Dough: If you’re looking for thicker cookies, chill the dough in the fridge for about 30 minutes before baking. This will help prevent the cookies from spreading too much during baking.
  • Don’t Overmix the Dough: Overmixing can result in dense cookies. Stir the dough until just combined to keep your cookies light and airy.

Frequently Asked Questions (FAQs)

1️⃣ Can I make Shadow Lemon Poppy Seed Cookies in advance?

Yes! You can prepare the dough up to 3 days in advance and store it in the refrigerator. Simply scoop the dough into balls, cover them tightly, and chill. When you’re ready to bake, just place the chilled dough onto a baking sheet and bake as usual.

2️⃣ How should I store these cookies?

Store your Lemon Poppy Seed Cookies in an airtight container at room temperature for up to 1 week. If you want to keep them fresher for longer, store them in the fridge for up to 10 days.

3️⃣ Can I make these cookies gluten-free?

Yes! Swap the all-purpose flour for a gluten-free flour blend that works cup for cup. Be sure to check that your poppy seeds are also certified gluten-free.

4️⃣ Can I add a glaze to these cookies?

Absolutely! A light glaze made with powdered sugar and lemon juice can add a little extra sweetness and shine. Simply whisk together 1 cup of powdered sugar and 1-2 tsp of lemon juice until smooth, then drizzle it over the cooled cookies.


Conclusion

There’s no doubt that these ShadowLemon Poppy Seed Cookies will be a hit at your next gathering or as a delightful treat for yourself. Their zesty lemon flavor, crunchy texture, and soft, chewy centers make them irresistible. With this easy-to-follow recipe, you can enjoy these cookies fresh out of the oven in no time.

If you’ve enjoyed this recipe, don’t forget to share it with friends and family, or leave a comment below to let us know how yours turned out! Ready to bake? Grab your ingredients and get started on these flavorful cookies today!


Let me know if you’d like to make any changes or if you’d like further optimization for SEO! 😊

Shadow Lemon Poppy Seed Cookies 🍋✨ – Zesty, Soft & Irresistible!

The Ultimate Brownie Lava Cookies Recipe – Gooey & Irresistible!


Brownie Lava Cookies Recipe

Introduction

Brownie Lava Cookies are the perfect fusion of chewy cookies and molten brownies, creating a dessert that is both decadent and satisfying. If you’re a chocolate lover, these cookies will quickly become your go-to treat! In this guide, you’ll learn how to make these irresistible cookies, along with expert baking tips to achieve the perfect lava center.


Ingredients & Measurements

IngredientQuantity
Unsalted butter (melted)1 cup (225g)
Dark brown sugar1 cup (200g)
Granulated sugar½ cup (100g)
Eggs2
Vanilla extract2 tsp
All-purpose flour2 cups (250g)
Cocoa powder½ cup (60g)
Baking soda1 tsp
Salt½ tsp
Semi-sweet chocolate chips1 cup (175g)
Lava Filling8 small brownie pieces or chocolate truffles

Brownie Lava Cookies Recipe

Step-by-Step Instructions

1️⃣ Preparing the Dough

  • Preheat oven to 175°C (350°F) and line a baking sheet with parchment paper.
  • In a large bowl, mix melted butter with brown sugar and granulated sugar until smooth.
  • Add eggs one at a time, then stir in vanilla extract.

2️⃣ Mixing the Dry Ingredients

  • In a separate bowl, whisk together flour, cocoa powder, baking soda, and salt.
  • Gradually add the dry ingredients into the wet mixture and stir until combined.
  • Fold in semi-sweet chocolate chips.

3️⃣ Stuffing the Lava Center

  • Scoop cookie dough (about 2 tablespoons per cookie) and slightly flatten.
  • Place a brownie piece or chocolate truffle in the center and seal the dough around it.

4️⃣ Baking to Perfection

  • Arrange cookies on the baking sheet, leaving space for spreading.
  • Bake for 10-12 minutes, until the edges are set but the centers remain soft.
  • Let cool for 5 minutes before enjoying the molten lava effect!

Expert Tips for the Best Brownie Lava Cookies

✔️ Choose the Right Chocolate

  • Use high-quality cocoa powder and chocolate chips for a richer taste.
  • For a more intense lava center, opt for dark chocolate truffles.

✔️ Avoid Overbaking

  • The secret to gooey lava cookies is slightly underbaking them. The centers will continue cooking as they cool.

✔️ Freezing for Later

  • You can freeze unbaked cookie dough balls with their lava centers and bake straight from frozen – just add 1-2 extra minutes to the baking time.

Serving Suggestions

  • With Ice Cream 🍨: Pair with vanilla or caramel ice cream for a restaurant-style dessert.
  • With Coffee ☕: Enjoy alongside your morning espresso for a delightful chocolate boost.
  • With Berries 🍓: Add fresh strawberries or raspberries for a touch of freshness.

Frequently Asked Questions (FAQs)

1️⃣ Can I use store-bought brownies for the lava filling?

Yes! Store-bought brownies work well as a filling. Just cut them into small pieces before stuffing them into the cookie dough.

2️⃣ How do I store Brownie Lava Cookies?

Store them in an airtight container at room temperature for up to 4 days or refrigerate for a week. Warm them in the microwave for a molten effect.

3️⃣ Can I make these cookies gluten-free?

Absolutely! Replace all-purpose flour with a gluten-free 1:1 baking blend for a delicious gluten-free version.

4️⃣ What’s the best way to melt the butter?

Melt butter in a microwave-safe bowl in 20-second intervals, stirring between each until fully melted.


Final Thoughts

Brownie Lava Cookies are a dream for any chocolate lover—crispy on the outside and irresistibly gooey on the inside! Whether for a cozy night in or a special occasion, these cookies will always impress. Try them today and share your results using #LavaCookies #BrownieStuffed #MoltenChocolate!


Let me know if you want any adjustments! 😊🍫🔥

Brownie Lava Cookies Recipe