Top Trending American Desserts in 2025: Sweet Treats You Can’t Miss

When you think about American desserts, what comes to mind? Is it the rich, gooey chocolate chip cookies, the classic apple pie, or perhaps something new and exciting that’s taking the country by storm? If you’re like me, dessert is not just a food—it’s a celebration, a moment of joy, and a way to share love with family and friends.

In 2025, American dessert trends are evolving in exciting ways. From healthier options that don’t compromise on flavor to bold twists on timeless classics, these treats are making waves across the country. Whether you’re a baker, a food blogger, or just a dessert lover, knowing these trending sweets can help you stay ahead, satisfy your sweet tooth, and even boost your blog’s traffic and earnings.

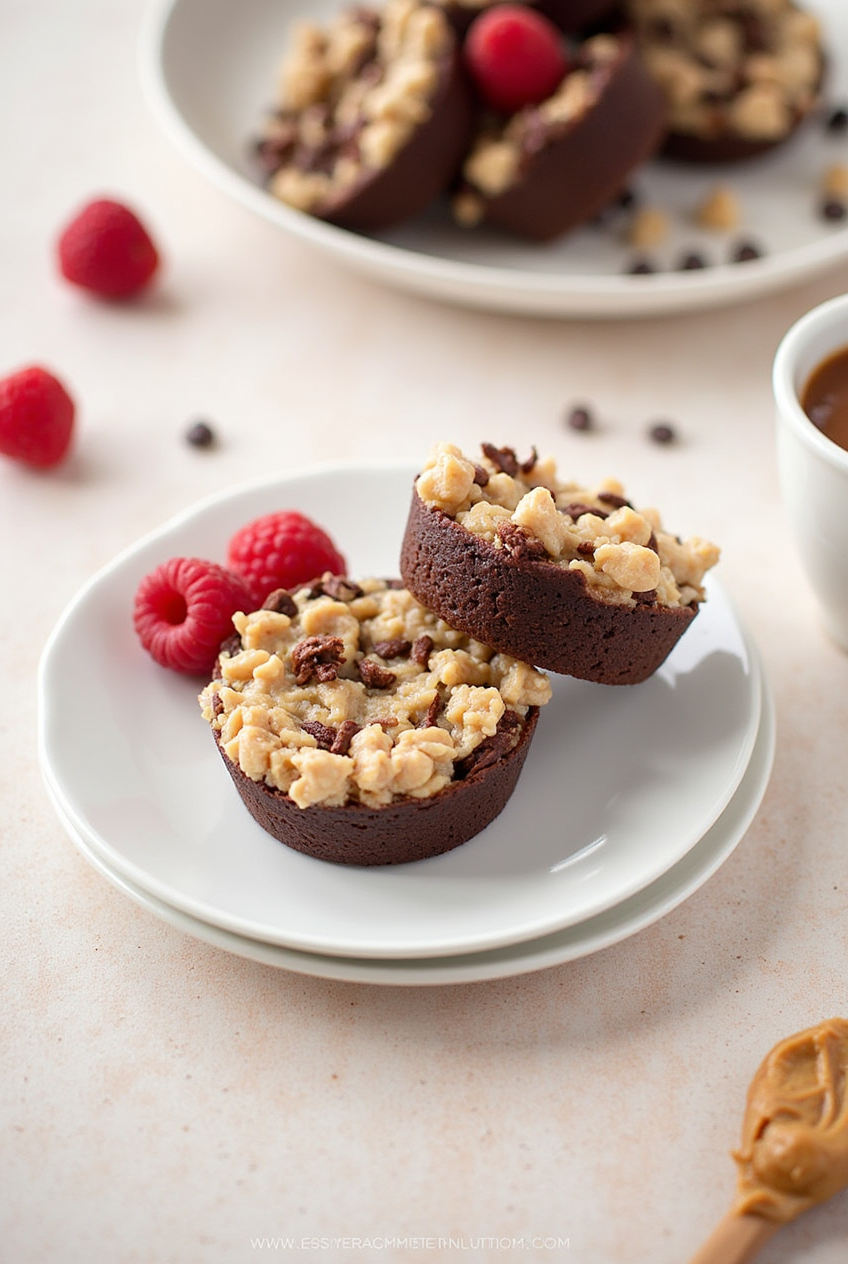
"No-Bake Espresso Cheesecake – A rich and creamy cheesecake infused with espresso set on a chocolate cookie crust

Let’s dive into the sweetest, most popular desserts that are winning hearts and taste buds this year.

What’s Hot in American Desserts Right Now?

1. Plant-Based and Vegan Desserts

More and more people are looking for desserts that are kind to the planet and their bodies. Vegan cakes, cookies, and ice creams that use plant-based ingredients are topping the charts. You don’t need to sacrifice taste to be healthy and ethical.

American Desserts
  • Key ingredients: almond milk, coconut cream, aquafaba, flaxseed, and natural sweeteners
  • Popular examples: Vegan chocolate lava cake, avocado mousse, and oat milk ice cream

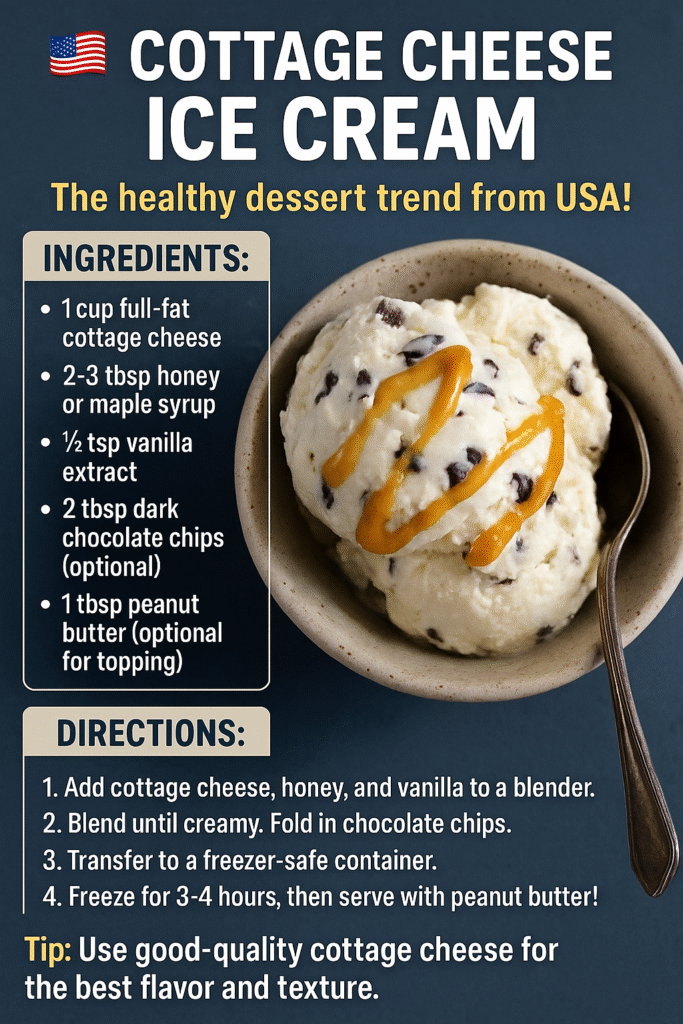
2. High-Protein Sweet Treats

Fitness trends aren’t stopping at savory foods. Protein-packed desserts are becoming a staple for those who want to indulge without guilt.

  • Protein powders, Greek yogurt, and nut butters are common add-ins
  • Examples include protein brownies, high-protein cheesecake, and peanut butter protein bars
American Desserts

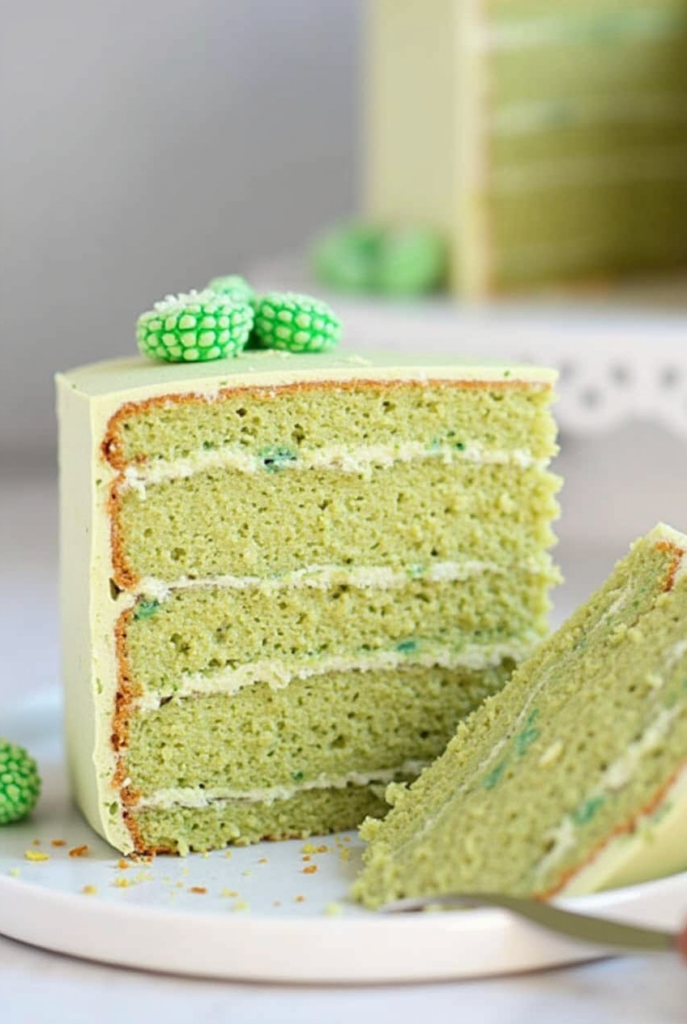
3. Nostalgic Classics with a Modern Twist

Americans love their classics, but in 2025, these are being reimagined with new flavors, textures, and presentations.

American Desserts
  • Think maple bacon doughnuts, matcha apple pie, or salted caramel banana pudding
  • The perfect balance between comfort and innovation

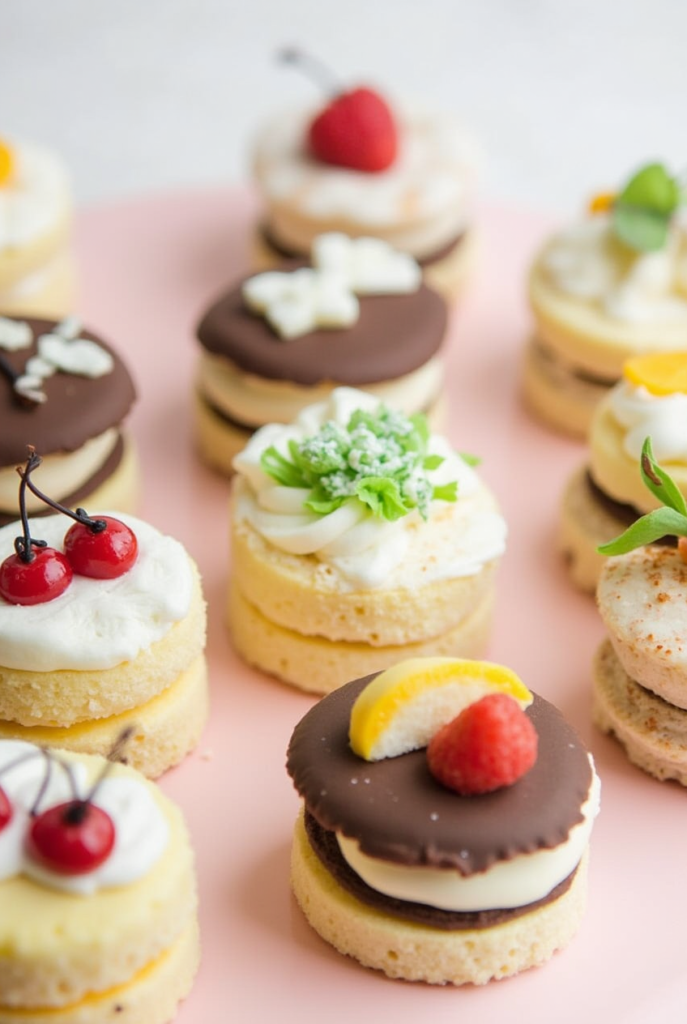
4. Mini and Shareable Desserts

Smaller desserts that are easy to share and Instagram-worthy are booming. Mini cupcakes, bite-sized tarts, and sheet cakes with creative toppings are a hit at events and parties.

American Desserts

If you want to impress your friends or add fresh content to your blog, trying your hand at these recipes can be a great idea. Here’s a simple breakdown of a trending dessert recipe:

High-Protein Chocolate Brownies

IngredientQuantityNotes
Dark chocolate200gUse 70% cocoa for richness
Almond flour1 cupGluten-free option
Whey protein1/2 cupVanilla or chocolate flavor
Coconut sugar1/2 cupNatural sweetener
Eggs3Organic preferred
Coconut oil1/4 cupMelted
Baking powder1 tsp
Vanilla extract1 tsp

Steps:

  1. Preheat your oven to 350°F (175°C).
  2. Melt chocolate and coconut oil together, then mix in eggs and vanilla.
  3. Add almond flour, protein powder, coconut sugar, and baking powder. Stir until smooth.
  4. Pour batter into a greased baking pan and bake for 20-25 minutes.
  5. Cool, slice, and enjoy your protein-rich treat!

You might wonder, why should you care about dessert trends? Here’s the truth: when you focus on popular, trending topics like American desserts in 2025, you tap into what your audience is searching for right now.

  • Google loves fresh, relevant content, boosting your SEO
  • People actively seek recipes that fit their lifestyle, like vegan or protein-packed options
  • Trendy desserts get shared more on social media, driving traffic to your blog
  • Monetization opportunities increase when your content matches audience interests

Q: What makes a dessert “trending” in 2025?
A: Trends emerge based on health consciousness, social media buzz, and cultural influences. In 2025, desserts that blend health, nostalgia, and shareability dominate.

Q: Can I make these desserts healthier without losing taste?
A: Absolutely! Using natural sweeteners, plant-based ingredients, and protein enrichments lets you enjoy sweets guilt-free.

Q: Are mini desserts better for events than full-sized cakes?
A: Mini desserts are perfect for events because they’re easy to serve, less messy, and visually appealing, making your event memorable.

Q: Where can I find reliable recipes for these trending desserts?
A: Trusted food blogs, YouTube cooking channels, and reputable recipe sites often share tested and delicious versions of these desserts.


Conclusion: Sweet Success Awaits You

By embracing these dessert trends, you’re not only treating your taste buds but also enhancing your blog’s appeal and earning potential. Whether you’re crafting high-protein brownies, vegan delights, or mini cakes for parties, these recipes and ideas will help you stay relevant and inspire your audience.

So, are you ready to bake your way to success? Start experimenting with these trending American desserts today, share your journey with your followers, and watch your blog flourish!


Call to Action:
If you loved these dessert ideas, don’t wait! Try baking one today, snap a beautiful photo, and share it with your audience. Don’t forget to bookmark this guide and subscribe for more delicious updates. Your sweet blogging journey starts now!


If you want, I can also help you with social media posts, hashtags, and SEO meta tags for this article! Just say the word.https://www.instagram.com/helterecipes/

High-Protein Ice Cream: How You Can Indulge Without the Guilt

Opening: A Scoop of Something More

Connect emotionally:
Imagine reaching for a cold, creamy dessert that actually fuels your body instead of leaving you with guilt. If you’ve ever wished your nightly treat could support your fitness goals, you’re not alone. This is your chance to turn dessert into a healthy habit.


Why You Should Choose High-Protein Ice Cream

  • The shift in dietary trendsprotein is no longer just for gym junkies.
  • Supports muscle repair and satiety — especially important for your active lifestyle.
  • Comparison with traditional ice cream:
  • Calories
  • Sugar content
  • Nutrient density
High-protein ice cream

The Best Protein Sources for Ice Cream

Whey vs. Plant-Based: Which One is Right for You?

  • Whey protein isolate: quick-absorbing and creamy
  • Casein protein: slower digestion, great texture
  • Pea, almond, soy proteins for plant-based needs

Sweeteners That Work Without the Crash

  • Monk fruit, erythritol, stevia: your natural low-carb allies

How to Make High-Protein Ice Cream at Home

Basic Vanilla High-Protein Ice Cream Recipe

IngredientQuantity
Greek Yogurt1 cup
Vanilla Protein Powder1 scoop
Unsweetened Almond Milk½ cup
Stevia or Monk Fruitto taste
Vanilla Extract½ tsp
Xanthan Gum (optional)¼ tsp

Instructions:

  1. Blend all ingredients until smooth.
  2. Freeze for 2–4 hours, stirring every 30 minutes.
  3. Scoop and enjoy!

  • Chocolate Peanut Butter Protein Ice Cream
  • Strawberry Banana Recovery Scoop
  • Mocha Cold Brew Ice Cream

Top Store-Bought Brands You Can Trust

U.S. Brands Leading the High-Protein Movement

  • Halo Top
  • Nick’s Swedish Style Light Ice Cream
  • Enlightened
  • Rebel Creamery (Keto-focused)

Comparison Table:

BrandProtein (per serving)CaloriesSugarNotable Features
Halo Top6–10g~100LowVariety, accessibility
Nick’s7–9g~90Keto-friendlyCreamy texture
Enlightened7–8g~100Very LowHigh fiber, low net carbs
Rebel2–4g~190ZeroRich, keto-based

Who Should Eat High-Protein Ice Cream?

If You’re Trying to Lose Weight

  • High protein = increased satiety = fewer cravings

If You’re Working on Muscle Gain

  • Great as a post-workout recovery snack

If You’re Diabetic or Keto

  • Control blood sugar with smart sweeteners and high protein

Myths You Should Stop Believing

  • “It can’t taste good without sugar” — false
  • “All protein ice creams are healthy” — not always true
  • “It’s only for bodybuilders” — not anymore

How to Store and Serve for the Best Texture

  • Let it sit 5 minutes after freezing before scooping
  • Store in shallow containers for even freezing
  • Add a splash of almond milk when blending for creaminess

Expert Tips to Upgrade Your Homemade Recipe

  • Use a high-speed blender for smoother texture
  • Freeze with a layer of parchment paper to avoid crystals
  • Add collagen peptides for joint support

Frequently Asked Questions (FAQ) About High-Protein Ice Cream

H3: Is high-protein ice cream really healthy?

Yes, if you use whole ingredients and keep sugar low. It fits into balanced nutrition goals.

Can I eat high-protein ice cream every day?

Absolutely—if it fits your daily calorie and protein goals.

Does it help with muscle growth?

Yes. Protein helps your muscles recover and grow, especially post-workout.

What’s the best time to eat it?

As a dessert, post-workout snack, or mid-day craving buster.

What protein powder works best?

Whey isolate or a blend with minimal flavor and carbs.


Conclusion: Your Sweet Tooth Meets Smart Choices

You no longer need to feel torn between treating yourself and sticking to your health goals. High-protein ice cream brings you the best of both worlds—indulgence and nutrition. With the right ingredients and a little creativity, you can make every scoop count.


✅ Call to Action:

Ready to take your cravings into your own hands? Try one of the recipes above and tag us with #ProteinScoopPower to share your creation. Or sign up for our newsletter to get weekly healthy dessert hacks delivered straight to you![email protected]

Health-Conscious Baking: How to Satisfy Your Sweet Tooth Without Sacrificing Wellness

Health-Conscious Baking

You Shouldn’t Have to Choose Between Health and Indulgence

Maybe you’ve stood in the kitchen, eyeing that piece of chocolate cake and wondering if it’s worth the guilt. You love dessert, but you also care about your health. Sound familiar? If so, you’re not alone. The good news? You don’t have to give up one for the other. Health-conscious baking lets you enjoy the treats you crave while keeping your wellness goals in check. It’s not about restriction—it’s about rethinking ingredients and baking techniques to nourish your body and soul.

What Is Health-Conscious Baking?

Understanding the Concept

Health-conscious baking is about transforming traditional recipes using nutrient-rich alternatives. It replaces heavily processed ingredients with wholesome options, so you can enjoy flavor and texture without the health drawbacks.

Key Benefits

  • Supports long-term well-being
  • Stabilizes blood sugar levels
  • Reduces unhealthy fat and sugar intake
  • Encourages mindful eating

Ingredients That Make the Difference

Natural Sweeteners

Swap refined sugar for:

  • Honey
  • Maple syrup
  • Coconut sugar
  • Date paste

These alternatives offer sweetness with added minerals and a lower glycemic impact.

Better Flours

Trade traditional flour for:

  • Almond flour
  • Coconut flour
  • Oat flour
  • Whole wheat flour

They’re richer in fiber, protein, and essential nutrients.

Plant-Based Fats

Ditch butter or shortening in favor of:

  • Avocado
  • Coconut oil
  • Nut butters

These fats support heart health and add a creamy richness.

Ingredient Substitution Table

Traditional IngredientHealthy AlternativeBenefits
White SugarCoconut Sugar, DatesLower GI, nutrient-rich
White FlourOat, Almond, CoconutHigher fiber, gluten-free
ButterAvocado, Coconut OilHeart-healthy fats
EggsFlax/Chia EggsVegan, fiber-rich

Baking Techniques for Better Nutrition

Portion Control

You can satisfy your craving without overeating. Try:

  • Mini muffins
  • Bite-sized cookies
  • Small loaf pans

Baking Without Butter or Sugar

Add natural flavor and texture with:

  • Roasted fruits
  • Mashed banana
  • Applesauce
  • Greek yogurt

Low-Temperature Baking

Bake at slightly lower temperatures to retain nutrients and avoid over-browning natural sugars.

Easy Recipes for Health-Conscious Bakers

Almond Flour Banana Bread

Ingredients

ItemQuantity
Almond flour2 cups
Bananas3 ripe, mashed
Eggs2
Honey1/4 cup
Baking soda1 tsp
Cinnamon1 tsp

Instructions

  1. Preheat oven to 350°F.
  2. Mix wet ingredients in one bowl.
  3. Stir dry ingredients separately.
  4. Combine and pour into loaf pan.
  5. Bake for 45-50 minutes.

Gluten-Free Chocolate Avocado Cake

Ingredients

ItemQuantity
Ripe avocado1, mashed
Almond flour1.5 cups
Cocoa powder1/2 cup
Eggs3
Maple syrup1/3 cup
Baking powder1 tsp

Instructions

  1. Blend avocado until smooth.
  2. Mix with eggs and maple syrup.
  3. Add dry ingredients.
  4. Bake at 350°F for 30 minutes.

Vegan Oatmeal Cookies with Raisins

Ingredients

ItemQuantity
Rolled oats2 cups
Mashed banana1
Peanut butter1/2 cup
Raisins1/3 cup
Cinnamon1 tsp
Health-Conscious Baking

Instructions

  1. Mix all ingredients.
  2. Scoop onto baking sheet.
  3. Bake at 325°F for 12-15 minutes.

Tips for First-Time Healthy Bakers

  • Start with simple swaps.
  • Keep healthy staples stocked.
  • Read ingredient labels.
  • Taste as you go—natural ingredients can vary.
  • Don’t sacrifice flavor: add vanilla, zest, spices.

Nutrition Facts vs. Taste Satisfaction

Do Healthy Desserts Still Taste Good?

Yes! Your palate adjusts over time. Natural sweeteners and spices enhance the flavors.

Psychological Satisfaction

Knowing your dessert is nourishing makes it more enjoyable. It eliminates guilt and fosters a sustainable lifestyle.

FAQ – Health-Conscious Baking

What is the healthiest sugar substitute for baking?

Monk fruit, dates, and maple syrup are great low-GI choices.

Can you bake without flour or sugar?

Yes, using nut flours and fruit purées as bases.

Is health-conscious baking good for kids?

Absolutely! It reduces their sugar intake and builds healthy habits early.

Can healthy baked goods be frozen?

Yes, most freeze well—just cool completely and use airtight containers.

Conclusion: Your Path to Guilt-Free Baking

You can finally bake with freedom. With the right swaps and a little practice, your desserts can nourish your body and delight your taste buds. It’s not about sacrificing; it’s about evolving. Embrace health-conscious baking as your new norm.

Call to Action

Try your first healthy recipe today. Share your success with #HealthyBakes2025 and inspire your community to eat well, live well, and bake smart!

Burn-Away Cakes: The Sweetest Surprise Hidden Beneath the Flame

Discover how to create and enjoy the hottest cake trend of 2025 with this in-depth guide.


Burn-Away Cakes

When Fire Meets Frosting: Your First Encounter with Burn-Away Cakes

Picture this: you’re at a celebration. Laughter fills the air, and a beautifully decorated cake takes center stage. But something’s different. Someone lights a small flame on top of the cake. The top layer slowly burns away, revealing a hidden message underneath. Gasps turn to applause. You’ve just experienced the magic of a burn-away cake.

If you’re someone who loves throwing unforgettable events or adding personal flair to life’s milestones, burn-away cakes are your perfect match. These cakes aren’t just desserts. They’re statements, stories, and moments rolled into one.


What Are Burn-Away Cakes?

At their core, burn-away cakes feature a flammable, edible top layer that conceals a message or design underneath. Once lit, the layer burns away to reveal what’s hidden. It’s an edible twist on mystery and drama.

Unlike regular cakes that rely solely on taste and decoration, burn-away cakes offer a multi-sensory experience. They blend visual storytelling with flavor, and they turn simple cake-cutting into a performance.

The concept first gained traction through TikTok and Instagram, where video reveals went viral. Since then, bakers everywhere have embraced the trend, pushing the boundaries of edible creativity.


Why Burn-Away Cakes Are Trending in 2025

You live in a world that craves personalization and spectacle. Burn-away cakes deliver both. These cakes have become the highlight of:

  • Birthday parties
  • Marriage proposals
  • Gender reveals
  • Corporate launches

They’re Instagrammable. They’re unexpected. And they tap into the growing demand for meaningful, made-for-you moments.

As of 2025, search engines show a significant spike in terms like “reveal cake ideas,” “custom burn-away cakes,” and “surprise celebration cakes.” This surge signals not just curiosity—but serious consumer interest.


Types of Burn-Away Cakes You Can Create

1. Message Reveal Cakes

These cakes feature words or phrases hidden beneath the burn-away layer. Imagine revealing “Will you marry me?” or “You’re going to be a mom!” right in front of everyone. Emotional, intimate, unforgettable.

2. Themed Design Cakes

Want to surprise a Marvel fan? Or reveal a princess castle to your daughter? This style reveals an image or design that ties into a party theme, making your event even more memorable.

3. Branded or Promotional Cakes

Businesses use these to reveal logos, product launches, or slogans. Picture a product launch where the cake ignites, and the new logo emerges. It’s branding with a delicious twist.


How to Make a Burn-Away Cake at Home

You don’t need to be a professional baker to pull this off. Here’s how you can make one yourself:

Ingredients and Tools You’ll Need

  • 2 cups all-purpose flour
  • 1.5 cups sugar
  • 3 eggs
  • 1 cup unsalted butter
  • 2 tsp baking powder
  • Fondant or rice paper (for burn-away layer)
  • Edible ink or food coloring
  • Optional: culinary torch or long lighter

Step-by-Step Instructions

  1. Bake your cake using your favorite recipe.
  2. Decorate the top lightly to avoid interference with the reveal.
  3. Print or draw your reveal message/design on edible rice paper using edible ink.
  4. Place the burn-away sheet carefully over the top of the cake.
  5. Light the corner of the top layer using a safe flame source.

Safety Tips

  • Perform the reveal in a well-ventilated space.
  • Keep water or a fire extinguisher nearby.
  • Make sure kids are supervised during the reveal.

Decorating Tips for Maximum Impact

To make your cake stand out:

  • Use high-contrast colors beneath the reveal.
  • Decorate around the edges to avoid interfering with the center.
  • Try heat-reactive color icing that changes slightly when warmed.

Where to Buy Burn-Away Cakes

If DIY isn’t your thing, several bakeries and online platforms offer custom burn-away cakes:

  • Anges de Sucre (U.S.): Known for intricate designs and edible magic.
  • Goldbelly: Offers nationwide delivery of custom cakes.
  • Sweet Heather Anne (Michigan): Trendy, artistic, and fully customizable.
  • Etsy: Independent bakers often offer bespoke options.

Pricing Tips for Home Bakers

If you’re planning to sell these cakes, consider the following:

  • Standard cakes: \$50 – \$100
  • Customized burn-away designs: Add \$20 – \$50
  • Rush orders and premium decorations can go higher

Charge based on:

  • Ingredient quality
  • Time investment
  • Customization level

Pros and Cons of Burn-Away Cakes

Pros

  • Eye-catching and memorable
  • Perfect for viral content
  • Great for special occasions

Cons

  • Can’t be used in some indoor venues
  • Requires supervision and safety awareness
  • Might cost more than traditional cakes

Frequently Asked Questions

Is it safe to eat a burn-away cake?

Yes. The burning only affects the top edible layer, which is removed before serving.

What materials are safe to use for the burn-away effect?

Rice paper, wafer paper, and specific types of fondant. Always check labels for flame safety.

Can I do this without a culinary torch?

Yes. A long lighter or safe candle can work. Just be extra cautious.

How far in advance can I prepare the cake?

1–2 days before the event, kept in a cool space or refrigerator.


Create Moments That Burn Into Memory

You’re not just baking a cake. You’re crafting a reveal. You’re creating a moment. Burn-away cakes are the perfect way to turn life’s events into experiences people talk about long after the candles go out.

Whether you decide to make one yourself or order from a boutique baker, you now know how to make it unforgettable. So light the flame and let the magic unfold.


Now It’s Your Turn

Try making your own burn-away cake for your next event—or share this guide with a friend who’s planning something special. Don’t forget to snap a video and tag your creation online. Because every flame reveals more than a message—it reveals a memory in the making.


Mini Bento Cakes: The Perfect Bite-Sized Treat That Delights Every Occasion

Mini Bento

Imagine unwrapping a tiny, exquisitely crafted cake made just for you. Mini bento cakes aren’t just desserts; they’re personal moments of joy, small gifts of sweetness that brighten your day. Whether you’re celebrating a special occasion or simply craving a delightful snack, these petite cakes offer a perfect balance of charm, flavor, and convenience. You get the pleasure of a full cake experience, all wrapped into a single bite-sized delight that fits beautifully into your busy lifestyle.

What Are Mini Bento Cakes?

Mini bento cakes are individually sized, elaborately decorated cakes that have gained massive popularity worldwide. Unlike traditional large cakes or even cupcakes, mini bento cakes are often square or rectangular, resembling small lunch boxes — hence the name “bento.” Their compact size makes them incredibly portable and easy to share, which is why they are fast becoming a favorite for celebrations and gifting.

You’ll notice that mini bento cakes shine because of their visual appeal and versatility. The designs can range from minimalist elegance to vibrant, intricate decorations, allowing you to personalize them to any occasion. Thanks to social media trends, these tiny masterpieces have garnered attention globally, sparking creativity among home bakers and professionals alike.

Why Mini Bento Cakes Are the Perfect Personalized Gift

When you want to give a gift that feels intimate and thoughtful, mini bento cakes offer something truly special. Unlike larger cakes that are shared among many, these petite treats create a sense of personal connection. You can customize everything—from flavor to design, even to the messages written on top—making it a perfect way to show you care.

Here’s why you should consider mini bento cakes as gifts:

  • Personalization: You get to choose flavors and decorations that fit the recipient’s taste perfectly.
  • Portion Control: Ideal for those who want to indulge without overeating.
  • Convenience: Easy to transport and share individually, reducing mess and hassle.
  • Versatility: Great for birthdays, anniversaries, corporate events, or just as a sweet surprise.
  • Memorable Presentation: Their unique look makes the gift stand out, showing effort and creativity.

The rise of personalized gifts has seen consumer demand soar, with many people preferring items that carry emotional weight and personal touch over generic presents. Mini bento cakes fit this niche perfectly.

If you’re wondering which flavors to pick or try, you’re in luck. Mini bento cakes come in endless varieties, but some flavors have proven to be crowd favorites due to their delightful taste combinations and aesthetic appeal.

FlavorKey IngredientsFlavor ProfileOccasions
Matcha VanillaMatcha powder, vanilla beanEarthy and creamyTea parties, gifts
Chocolate BerryCocoa, fresh berriesRich and tangyBirthdays, events
Lemon RaspberryLemon zest, raspberry jamTart and sweetSummer, brunch

You can also find fusion flavors like chocolate matcha swirl or salted caramel berry, blending classic tastes with trendy twists. These combinations not only enhance the flavor but also make the cakes visually stunning—perfect for sharing on Instagram or at social gatherings.

When choosing flavors, consider pairing complementary tastes, such as the bitterness of matcha with the sweetness of vanilla or the richness of chocolate with the freshness of berries. This balance elevates your experience and keeps your taste buds intrigued.

How to Make Mini Bento Cakes at Home: Step-by-Step Guide

Feeling inspired to bake your own mini bento cakes? Making these petite delights at home is simpler than you might think. Here’s what you’ll need and how to do it right.

Essential Tools & Ingredients

IngredientQuantityNotes
All-purpose flour1 ½ cupsSifted
Sugar1 cupGranulated
Eggs2 largeRoom temperature
Butter½ cupUnsalted, softened
Milk½ cupWhole or plant-based
Flavor extractsAs neededVanilla, almond, etc.

You’ll also want mini cake pans or silicone molds, piping bags for decorating, and optionally edible decorations like sprinkles or fresh fruits.

Baking Instructions

  1. Preheat the oven to 350°F (175°C) and grease your mini pans.
  2. Mix dry ingredients: In a bowl, sift the flour and sugar.
  3. Add wet ingredients: Beat the eggs and mix with softened butter and milk.
  4. Combine: Gradually mix wet and dry ingredients until you have a smooth batter.
  5. Fill molds: Pour batter into mini pans, about ¾ full.
  6. Bake: Place pans in the oven for 15-20 minutes or until a toothpick inserted comes out clean.
  7. Cool: Let the cakes cool completely before decorating.

Decorating Tips

  • Use whipped cream, buttercream, or fondant to create intricate designs.
  • Add edible flowers or gold leaf for elegance.
  • Package each cake in a small box or wrap with ribbon for gifting.

If you encounter dry or unevenly baked cakes, try reducing oven temperature or checking your batter consistency.

Where to Buy Mini Bento Cakes: Best Online and Local Options

If baking isn’t your thing or you want a professionally crafted cake, many bakeries specialize in mini bento cakes. You can order them online or find local shops that deliver personalized options.

  • Sweet Petite Bakery: Known for unique flavor combinations and beautiful packaging.
  • Bento Bliss: Offers vegan and gluten-free mini cakes.
  • Tiny Treats Co.: Specializes in customizable designs for corporate events.

Local Bakeries

Check out your neighborhood or city’s artisan bakeries—many have jumped on the mini bento cake trend. Prices usually range from \$5 to \$10 per cake, depending on customization and ingredients.

Choosing the Right Vendor

  • Look for bakeries with good reviews and portfolio photos.
  • Check customization options and delivery policies.
  • Consider freshness guarantees and packaging quality.

Mini Bento Cakes and Social Media: How to Share Your Creations

Sharing your mini bento cake creations online can be just as rewarding as making or gifting them. Platforms like Instagram, Pinterest, and TikTok are perfect for showcasing your artistic skills.

Tips for Social Sharing

  • Lighting: Use natural light for crisp, bright photos.
  • Angles: Shoot from above or close up to highlight details.
  • Hashtags: Use popular tags like #MiniBentoCake, #TinyDesserts, #CakeArt.
  • Engagement: Tag friends, join baking groups, and respond to comments.

Sharing your cakes online also connects you to a community of bakers and enthusiasts, inspiring new ideas and feedback.

FAQ: Everything You Need to Know About Mini Bento Cakes

Q1: What is a mini bento cake?
Mini bento cakes are small, often square or rectangular, elaborately decorated cakes designed to be single servings.

Q2: How long do mini bento cakes stay fresh?
Typically, they last 2-3 days refrigerated. For best taste, consume within 24 hours.

Q3: Can I make mini bento cakes vegan or gluten-free?
Absolutely! Many recipes adapt easily with plant-based milk and gluten-free flours.

Q4: How many mini bento cakes equal a regular cake?
Usually, 6-8 mini cakes are equivalent in volume to a standard 8-inch round cake.

Q5: Are mini bento cakes suitable for large events?
Yes, they’re perfect for portion control and elegant presentation at weddings, parties, and corporate events.

Q6: Can I customize mini bento cakes with my own designs?
Definitely. Many bakers offer fully customizable designs to suit your theme or message.


Conclusion

Mini bento cakes invite you into a world where each small bite carries a big burst of flavor and joy. Whether you make them yourself, order them as personalized gifts, or share your artistic creations online, these charming treats are the perfect way to celebrate moments—both grand and simple. Now that you know what makes mini bento cakes so special, why not try creating your own or surprising someone with a custom-made gift? Dive into the delightful universe of mini bento cakes and make your sweet moments unforgettable.


If you’re ready to bake or order your first mini bento cake, don’t hesitate—share your creations online with #MiniBentoCakeMagic and join a community that celebrates creativity, flavor, and the joy of tiny desserts.

Mini Bento

Pistachio and Matcha Cake: A Trending Flavor Combination

pistachio and matcha

Introduction
Baking trends are constantly evolving, and one of the most exciting combinations to hit the scene in recent years is pistachio and matcha. This delightful duo brings together the earthy, slightly sweet flavor of pistachios with the vibrant, antioxidant-rich benefits of matcha green tea. Whether you’re a seasoned baker or just looking for something new to try, this pistachio and matcha cake recipe is perfect for any occasion.

Not only does this cake offer a visually stunning appearance with its lush green color, but it also provides an exceptional taste experience that combines rich nuttiness and delicate sweetness. In this article, you’ll discover why pistachio and matcha are the perfect pairing, and how you can recreate this trendy dessert in your own kitchen.

The Health Benefits of Pistachio and Matcha
Before diving into the recipe, let’s talk about why this flavor combination is not only delicious but also beneficial for your health. Both pistachios and matcha are packed with nutrients that contribute to a balanced diet.

  1. Pistachios
  • Rich in Healthy Fats: Pistachios are a great source of monounsaturated fats, which are heart-healthy and can help manage cholesterol levels.
  • Protein Powerhouse: Pistachios are also high in protein, making them an excellent option for those looking to boost their daily intake.
  • Packed with Antioxidants: These tiny nuts are rich in antioxidants that help reduce inflammation and protect the body from free radical damage.
  1. Matcha
  • Full of Antioxidants: Matcha is loaded with catechins, a type of antioxidant that fights oxidative stress, supports immune function, and contributes to overall health.
  • Boosts Metabolism: The green tea powder has been shown to enhance metabolism and promote fat burning, making it a great addition to any diet.
  • Promotes Calm Focus: Unlike regular tea, matcha provides a steady release of energy without the jitters, helping you stay calm and focused throughout the day.

By combining pistachios and matcha, you’re not only indulging in a delicious dessert but also fueling your body with beneficial nutrients.

Why These Flavors Are Trending
Pistachio and matcha have quickly gained popularity in recent years, particularly in the baking world. Their unique flavors appeal to a wide range of taste buds, and they bring an exotic twist to traditional cakes, cookies, and desserts.

  • The Appeal of Matcha: Matcha has gone from being a niche ingredient to a mainstream trend. It’s no longer just for lattes and smoothies; matcha is being used in everything from ice cream to cakes, offering a natural, earthy flavor and vibrant green color.
  • Pistachios as a Trendy Nut: Once reserved for savory dishes or as a simple snack, pistachios are now being embraced in desserts. Their rich, buttery taste pairs perfectly with matcha, making them an ideal choice for cakes and pastries.

Together, these ingredients offer a sophisticated yet accessible flavor profile that caters to health-conscious foodies, dessert enthusiasts, and anyone looking for something different from the standard chocolate or vanilla cake.

Step-by-Step Recipe for Pistachio and Matcha Cake
Now that we’ve covered the health benefits and trends, let’s dive into how you can make your own pistachio and matcha cake. This recipe combines the richness of pistachio flour with the unique flavor of matcha powder to create a cake that’s both visually appealing and bursting with flavor.

Ingredients:

  • 1 cup pistachio flour
  • 1 ½ cups all-purpose flour
  • 1 tbsp matcha green tea powder
  • 1 ¼ cups granulated sugar
  • 4 large eggs
  • ½ cup unsalted butter (softened)
  • 1 tsp vanilla extract
  • 1 cup whole milk
  • 1 ½ tsp baking powder
  • ¼ tsp salt

For the Frosting:

  • 8 oz cream cheese (softened)
  • ½ cup unsalted butter (softened)
  • 1 tsp vanilla extract
  • 2 cups powdered sugar
  • 1 tbsp matcha green tea powder

Instructions:

  1. Preheat the Oven: Preheat your oven to 350°F (175°C) and grease two 8-inch cake pans.
  2. Prepare Dry Ingredients: In a medium bowl, whisk together the pistachio flour, all-purpose flour, matcha powder, baking powder, and salt.
  3. Cream the Butter and Sugar: In a large mixing bowl, cream together the softened butter and sugar until light and fluffy.
  4. Add Eggs and Vanilla: Add the eggs one at a time, mixing well after each addition. Then, add the vanilla extract.
  5. Alternate Adding Wet and Dry Ingredients: Gradually add the dry ingredients to the wet mixture, alternating with the milk. Begin and end with the dry ingredients. Mix until just combined.
  6. Bake the Cake: Divide the batter evenly between the prepared cake pans and smooth the tops. Bake for 25-30 minutes, or until a toothpick inserted into the center comes out clean.
  7. Cool the Cake: Allow the cakes to cool in the pans for 10 minutes before transferring them to wire racks to cool completely.
  8. Prepare the Frosting: In a mixing bowl, beat the softened cream cheese and butter until smooth. Add the matcha powder and powdered sugar and beat until well combined.
  9. Assemble the Cake: Once the cakes are completely cooled, spread frosting on top of one layer, then place the second layer on top. Frost the top and sides of the entire cake.
  10. Serve and Enjoy: Slice and serve your pistachio and matcha cake, and enjoy the delicious combination of flavors!

Tips and Customization Ideas

  • Add a Crunchy Element: For added texture, sprinkle chopped pistachios on top of the cake before serving.
  • Make It Dairy-Free: Use dairy-free butter and a plant-based milk substitute to make this cake suitable for dairy-free diets.
  • Flavor Variations: You can add a hint of lemon zest to the frosting for a citrusy contrast to the matcha’s earthy flavor.

How to Store and Serve Your Cake
To keep your pistachio and matcha cake fresh, store it in an airtight container at room temperature for up to three days. If you need to store it for a longer period, wrap it tightly in plastic wrap and refrigerate it for up to one week. The flavors will continue to deepen over time, making it even more delicious the next day.

Conclusion & Call to Action
Pistachio and matcha are more than just a passing trend — they’re a flavorful, healthy, and visually stunning combination that’s perfect for any baking enthusiast. This cake recipe offers a simple yet sophisticated way to enjoy these trendy flavors in your own kitchen.

Now that you have the recipe, it’s time to get baking! Try out this pistachio and matcha cake for your next event, and watch it become an instant hit. Don’t forget to share your results on social media and tag us — we’d love to see how your creation turns out!

pistachio and matcha

🎂 Revival of Lambeth Cakes: A Detailed Recipe Guide

✨ What Is a Lambeth Cake?

A Lambeth cake is an ornate, vintage-style cake decorated using classic overpiping techniques and rich royal icing. Named after Joseph Lambeth, a British cake decorator, this cake style rose to fame in the 1930s and is now enjoying a modern revival.

Expect dramatic, tiered designs adorned with ruffles, scrolls, swags, shells, and delicate drop strings—all in buttercream or royal icing.


🍰 Ingredients

For the Cake (Vanilla Sponge Base):

  • 2 1/2 cups all-purpose flour
  • 2 1/2 tsp baking powder
  • 1/2 tsp salt
  • 1 cup unsalted butter, room temperature
  • 2 cups granulated sugar
  • 4 large eggs, room temperature
  • 1 tbsp vanilla extract
  • 1 cup whole milk, room temperature

For the Buttercream Frosting (American or Swiss Meringue):

  • 1 cup unsalted butter, room temperature
  • 3–4 cups powdered sugar (sifted)
  • 1–2 tbsp milk or cream
  • 1 tsp vanilla extract

For Royal Icing (for piping details):

  • 3 egg whites
  • 4 cups powdered sugar
  • 1/2 tsp lemon juice
  • Food coloring (optional, for piping layers)

🧁 Instructions

Step 1: Bake the Cake Layers

  1. Preheat oven to 350°F (175°C). Grease and line 2–3 round 6” or 8” cake pans.
  2. In a bowl, whisk flour, baking powder, and salt.
  3. Cream butter and sugar until light and fluffy (3–4 minutes).
  4. Add eggs one at a time, then vanilla.
  5. Alternate adding dry ingredients and milk, starting and ending with flour.
  6. Divide into pans, bake 25–30 minutes. Cool completely.

Step 2: Prepare Buttercream

  1. Beat butter until pale and fluffy.
  2. Gradually add powdered sugar.
  3. Mix in vanilla and a bit of milk until spreadable.

Step 3: Prepare Royal Icing

  1. Beat egg whites until foamy.
  2. Gradually add powdered sugar.
  3. Add lemon juice. Beat until stiff peaks form.
  4. Separate and color as desired for piping.

🎨 Decorating the Lambeth Cake (Piping Techniques)

Tools Needed:

Lambeth Cake
  • Piping bags
  • Fine tips (#1 to #4 for intricate work, #104 for ruffles)
  • Turntable
  • Spatula
  • Parchment for practice

Layering Technique:

  1. Stack and crumb-coat the cake with buttercream.
  2. Chill the cake for 30 minutes.
  3. Smooth a final coat of buttercream.
  4. Begin piping decorative elements with royal icing:
  • Bottom borders: Shells or pearls
  • Upper edges: Drop strings, overpiped scrolls
  • Middle tiers: Swags and scrollwork
  • Add piped roses or fondant pearls if desired

Pro Tips:

  • Use a turntable for cleaner curves.
  • Practice intricate piping on parchment first.
  • Start with white icing and tint pastel shades.
  • Keep royal icing covered to prevent drying.

🧁 Modern Lambeth Cake Flavor Variations

  • Chocolate sponge with coffee buttercream
  • Lemon cake with lavender royal icing
  • Red velvet cake with cream cheese buttercream

🎯 Final Touches

Lambeth cakes are showstoppers, perfect for weddings, birthdays, and retro-themed events. The style demands precision but rewards you with jaw-dropping results.

Pair your vintage aesthetic with a modern twist of flavors to wow your guests.


📣 Call to Action

Loved this Lambeth cake tutorial? Try it out and share your creations with #LambethRevival. For more retro cake designs and piping tutorials, subscribe to our newsletter or follow us on Pinterest!

🥑 These Avocado Rice Cakes Are the Snack You Didn’t Know You Needed

✨ Introduction: When Healthy Meets Crave-Worthy

You’re always on the move, managing a full plate, and making smarter choices for your body and mind. But let’s be real—healthy snacks often miss the mark. Too bland. Too boring. Too complicated. That changes today. Meet your new obsession: These avocado rice cakes. They’re crunchy, creamy, colorful, and packed with goodness.

If you’re someone who enjoys meals that check the boxes for simplicity, nutrition, and serious flavor, then this recipe is calling your name. Get ready to elevate your snack game, and perhaps your Instagram feed too.

A Social Media Star

You’ve likely seen them pop up on your feed—those beautifully styled rice cakes layered with bright green avocado and topped with vibrant extras like microgreens or poached eggs. These aren’t just photogenic; they’re the new standard for quick, health-forward bites.

Why They Work

  • Nutritionally dense but not heavy
  • Easy to prep in less than 5 minutes
  • Highly customizable
  • Great for post-workout fuel, afternoon pick-me-ups, or a light breakfast

These cakes have become a staple in wellness circles for one big reason: they deliver on taste and benefits without sacrificing time.

🛌 Ingredients for These Avocado Rice Cakes (With Variations)

Base Ingredients

IngredientAmountNotes
Rice cakes2–4Go for plain or lightly salted
Ripe avocado1Mash it for easy spreading
Lemon or lime juice1/2 tspAdds zest, prevents browning
Salt and pepperTo tasteSeason to your preference

Optional Toppings to Customize

ToppingFlavor ProfileBonus Benefits
Cherry tomatoesFresh & juicyVitamin C, antioxidants
Chili flakesSpicyMetabolism booster
Boiled or poached eggRich & savoryHigh in protein
Smoked salmonSalty & boldOmega-3s, healthy fats
MicrogreensEarthy crunchNutrient-dense, fiber
Cucumber slicesRefreshingHydrating, low-calorie
Feta cheeseTangy & creamyAdds calcium and protein

🍽️ How to Make These Avocado Rice Cakes Step-by-Step

1. Toast the Base (Optional)

If you like extra crunch, lightly toast your rice cakes for 1-2 minutes. This enhances their texture and makes them feel more like an open-faced sandwich.

2. Prep the Avocado

Cut your ripe avocado in half, remove the pit, and scoop the flesh into a bowl. Add lemon juice, salt, and pepper. Mash it with a fork until it’s smooth but slightly chunky for texture.

3. Assemble Your Canvas

Spread a generous layer of the avocado mixture onto each rice cake. Don’t skimp—you want every bite to be satisfying.

4. Layer on Your Toppings

Pick your theme: spicy, savory, or sweet. Load up with your favorite combo or mix and match. The beauty is in the creativity.

5. Finish with a Flair

Sprinkle with sesame seeds, drizzle with olive oil, or add a dash of your favorite seasoning blend to finish off your creation.

🤔 Why These Avocado Rice Cakes Are a Smart Choice

Health Benefits of Avocados

You already know avocados are good for you, but here’s the breakdown:

  • Loaded with monounsaturated fats for heart health
  • Rich in fiber, aiding digestion and satiety
  • Contain potassium, folate, and vitamin E

Low-Calorie Snacking Without Compromise

Most pre-packaged snacks clock in at 200+ calories with added sugars and preservatives. A basic avocado rice cake? Roughly 100-150 calories of whole-food goodness.

Who Should Eat These?

  • Fitness enthusiasts seeking recovery fuel
  • Busy professionals needing a fast, healthy option
  • Parents looking for kid-friendly, nutritious snacks
  • Vegans and vegetarians craving plant-based satisfaction

🍳 10 Topping Combinations to Try Today

  1. Classic Crunch: Avocado + Cherry Tomato + Sea Salt
  2. Protein Punch: Avocado + Boiled Egg + Chili Flakes
  3. Keto-Friendly: Avocado + Bacon Bits + Cheddar
  4. Plant Power: Avocado + Microgreens + Sunflower Seeds
  5. Sweet Heat: Avocado + Mango Slices + Jalapeño
  6. Brunch Vibes: Avocado + Poached Egg + Everything Bagel Seasoning
  7. Mediterranean Mix: Avocado + Feta + Olive Tapenade
  8. Asian Twist: Avocado + Soy Sauce + Sesame Seeds
  9. Mexican Fiesta: Avocado + Corn + Cilantro + Lime
  10. Breakfast Glow-Up: Avocado + Strawberries + Honey Drizzle

📸 Make It Instagram-Worthy

Styling Secrets

  • Use vibrant ingredients: red tomatoes, green herbs, golden eggs
  • Go vertical with layered toppings for dimension
  • Use round or rectangular plates in neutral tones

Capture the Moment

  • Natural daylight always wins
  • Overhead or 45-degree angles work best
  • Focus on contrast: creamy vs. crispy

Pro tip: Snap before the avocado oxidizes. Nothing ruins a good shot like brown avocado.

❓ Frequently Asked Questions

Are avocado rice cakes good for weight loss?

Yes! They provide healthy fats and fiber to keep you fuller longer without loading on unnecessary calories.

Can I prep them in advance?

It’s best to make them fresh, but you can mash the avocado and store it in an airtight container with lemon juice for 1 day.

Are they gluten-free?

Yes, as long as you use certified gluten-free rice cakes.

Can I eat this for breakfast?

Absolutely. Add an egg or protein-rich topping for a more filling start to your day.

🏆 Conclusion: Crunch Into Something Better

Healthy eating doesn’t have to be dull or complicated. With avocado rice cakes, you get the best of all worlds: crunch, creaminess, convenience, and clean ingredients. They’re more than just a snack; they’re a lifestyle choice that supports your goals while treating your taste buds.

So next time you’re tempted by an ultra-processed option, reach for this quick fix instead. It’s the kind of upgrade your routine needs—simple, smart, and satisfying.


🙌 Call to Action

Now it’s your turn: Create your own version of these avocado rice cakes and tag your masterpiece on social with #CrunchSmart or #AvocadoFix. Want more quick, healthy recipes like this? Subscribe to our weekly health bites for recipes, wellness tips, and foodie inspiration right in your inbox.

Start snacking smarter—you deserve it.

These Avocado Rice Cakes

Guacamole & Crackers: The Irresistible Snack Combo Everyone’s Talking About

A Snack You Crave Without Even Realizing It

Guacamole & Crackers

You know those moments when your stomach growls, and you just need something? Not too heavy, not too sweet—just satisfying. That’s where Guacamole crackers step in. This combo is more than trendy; it’s comfort in a bite. Whether you’re diving into a Netflix marathon, prepping appetizers for friends, or snacking between Zoom calls, this duo delivers every time.

If you haven’t yet embraced the guac-and-cracker lifestyle, you’re missing out on a guilt-free, flavor-rich experience. Let’s break down why this is the snack of 2025—and why it belongs on your table.


Why Guacamole & Crackers: The Irresistible Snack Combo Everyone’s Talking About

A Snack You Crave Without Even Realizing It

You know those moments when your stomach growls, and you just need something? Not too heavy, not too sweet—just satisfying. That’s where guacamole and crackers step in. This combo is more than trendy; it’s comfort in a bite. Whether you’re diving into a Netflix marathon, prepping appetizers for friends, or snacking between Zoom calls, this duo delivers every time.

If you haven’t yet embraced the guac-and-cracker lifestyle, you’re missing out on a guilt-free, flavor-rich experience. Let’s break down why this is the snack of 2025—and why it belongs on your table.


Why Guacamole & Crackers Are the Perfect Pair

You might wonder: why not tortilla chips? Or just avocado toast? Here’s the magic of guacamole with crackers:

  • Texture Harmony: Creamy guac meets crispy crunch.
  • Flavor Balance: Salted, herbed, or spicy crackers enhance guacamole’s earthy richness.
  • Healthier Option: Most crackers come baked, not fried.
  • Convenience: No toaster required—just dip and snack.

Whether it’s post-workout hunger or a midday slump, this combo checks all the boxes.


How to Make the Perfect Homemade Guacamole

You don’t need to be a chef to make guacamole that stops people in their tracks. Just five minutes, a few ripe avocados, and a fork.

Ingredients Table

IngredientQuantity
Ripe avocados2–3
Fresh lime juice1–2 tablespoons
Chopped cilantro2 tablespoons
Diced red onion¼ cup
Diced tomato (optional)½ cup
Minced garlic1 clove
Salt and pepperTo taste

Instructions

  1. Slice avocados in half and remove pits. Scoop flesh into a bowl.
  2. Mash to your desired texture—chunky or smooth.
  3. Stir in lime juice, onion, tomato, garlic, and cilantro.
  4. Add salt and pepper. Taste and adjust.
  5. Let chill for 10–15 minutes, or serve right away.

Choosing the Right Crackers for Your Guac

Crackers aren’t just filler. They bring flavor, structure, and personality to every bite.

Top Cracker Choices:

  • Whole Grain: Earthy taste and packed with fiber.
  • Seeded or Nut-Based: Adds texture and healthy fats.
  • Gluten-Free: For those watching gluten, rice and quinoa crackers are top picks.
  • Spiced or Herbed: Adds depth to mild guacamole.
  • Homemade: Customize seasoning and skip preservatives.

Pro Tip:

Create a cracker board—a mix of options to suit every palate.


Guacamole & Crackers: A Nutritional Power Combo

Snacks don’t have to be empty calories. With the right ingredients, you’re fueling your body.

Health Benefits:

  • Avocados: Rich in heart-healthy monounsaturated fats, potassium, and fiber.
  • Cilantro & Lime: Detoxifying and full of antioxidants.
  • Crackers: Whole grain varieties provide complex carbs and fiber.

Together, they offer a satisfying, nutrient-dense snack that keeps you energized.


Elevate Snack Time: Serving Ideas for Parties

Want to impress your guests or elevate your weekday snacking? Here are ideas you’ll want to copy:

  • Mini Guac Cups: Serve guacamole in small clear cups, each with a cracker inserted.
  • Cracker Toppers: Spread guacamole on crackers, then add cherry tomatoes, olives, or even feta.
  • Colorful Platters: Offer bowls of guacamole with a rainbow of cracker types around the edge.

Bonus: add a touch of chili oil or smoked paprika for flair.


Flavor Variations to Try

Craving something different? Don’t stop at basic guac. Let your creativity shine.

Flavor Twists:

  • Spicy Jalapeño: Add diced jalapeños or hot sauce.
  • Tropical Twist: Mix in mango or pineapple chunks.
  • Greek Fusion: Feta, olives, and cucumber give it a Mediterranean flair.
  • Tex-Mex Vibe: Black beans, corn, and cumin bring Southwest heat.

Swap crackers to match the mood—think cinnamon crisps with tropical guac!


Can this snack be keto-friendly?

FAQs: Everything You Wanted to Know About Guacamole & Crackers

Can I make guacamole in advance?

Yes, but minimize browning by storing it with plastic wrap pressed against the surface. Add extra lime for freshness.

What crackers pair best with guacamole?

Whole grain and gluten-free crackers are perfect. Try ones with herbs or spices for extra punch.

Absolutely. Use seed-based or almond flour crackers.

How long does guacamole last?

Best within 1–2 days. For parties, make it fresh that morning.


Conclusion: The Snack That Does It All

Guacamole and crackers aren’t just trendy—they’re practical, delicious, and endlessly versatile. Whether you’re feeding a crowd or just treating yourself, this is the snack that fits every lifestyle. It’s clean, quick, and customizable. Best of all, you control every ingredient.

Once you taste the balance of creamy and crunchy, there’s no turning back.


✅ Call to Action

Now it’s your turn! Whip up your favorite guacamole blend, try it with a cracker you’ve never used before, and post your creation on Facebook or Instagram using the tag #GuacAndCrackLove. Let your flavor story inspire others! & Crackers Are the Perfect Pair

You might wonder: why not tortilla chips? Or just avocado toast? Here’s the magic of guacamole with crackers:

  • Texture Harmony: Creamy guac meets crispy crunch.
  • Flavor Balance: Salted, herbed, or spicy crackers enhance guacamole’s earthy richness.
  • Healthier Option: Most crackers come baked, not fried.
  • Convenience: No toaster required—just dip and snack.

Whether it’s post-workout hunger or a midday slump, this combo checks all the boxes.


How to Make the Perfect Homemade Guacamole

You don’t need to be a chef to make guacamole that stops people in their tracks. Just five minutes, a few ripe avocados, and a fork.

Ingredients Table

IngredientQuantity
Ripe avocados2–3
Fresh lime juice1–2 tablespoons
Chopped cilantro2 tablespoons
Diced red onion¼ cup
Diced tomato (optional)½ cup
Minced garlic1 clove
Salt and pepperTo taste

Instructions

  1. Slice avocados in half and remove pits. Scoop flesh into a bowl.
  2. Mash to your desired texture—chunky or smooth.
  3. Stir in lime juice, onion, tomato, garlic, and cilantro.
  4. Add salt and pepper. Taste and adjust.
  5. Let chill for 10–15 minutes, or serve right away.

Choosing the Right Crackers for Your Guac

Crackers aren’t just filler. They bring flavor, structure, and personality to every bite.

Top Cracker Choices:

  • Whole Grain: Earthy taste and packed with fiber.
  • Seeded or Nut-Based: Adds texture and healthy fats.
  • Gluten-Free: For those watching gluten, rice and quinoa crackers are top picks.
  • Spiced or Herbed: Adds depth to mild guacamole.
  • Homemade: Customize seasoning and skip preservatives.

Pro Tip:

Create a cracker board—a mix of options to suit every palate.


Guacamole & Crackers: A Nutritional Power Combo

Snacks don’t have to be empty calories. With the right ingredients, you’re fueling your body.

Health Benefits:

  • Avocados: Rich in heart-healthy monounsaturated fats, potassium, and fiber.
  • Cilantro & Lime: Detoxifying and full of antioxidants.
  • Crackers: Whole grain varieties provide complex carbs and fiber.

Together, they offer a satisfying, nutrient-dense snack that keeps you energized.


Elevate Snack Time: Serving Ideas for Parties

Want to impress your guests or elevate your weekday snacking? Here are ideas you’ll want to copy:

  • Mini Guac Cups: Serve guacamole in small clear cups, each with a cracker inserted.
  • Cracker Toppers: Spread guacamole on crackers, then add cherry tomatoes, olives, or even feta.
  • Colorful Platters: Offer bowls of guacamole with a rainbow of cracker types around the edge.

Bonus: add a touch of chili oil or smoked paprika for flair.


Flavor Variations to Try

Craving something different? Don’t stop at basic guac. Let your creativity shine.

Flavor Twists:

  • Spicy Jalapeño: Add diced jalapeños or hot sauce.
  • Tropical Twist: Mix in mango or pineapple chunks.
  • Greek Fusion: Feta, olives, and cucumber give it a Mediterranean flair.
  • Tex-Mex Vibe: Black beans, corn, and cumin bring Southwest heat.

Swap crackers to match the mood—think cinnamon crisps with tropical guac!


FAQs: Everything You Wanted to Know About Guacamole & Crackers

Can I make guacamole in advance?

Yes, but minimize browning by storing it with plastic wrap pressed against the surface. Add extra lime for freshness.

What crackers pair best with guacamole?

Whole grain and gluten-free crackers are perfect. Try ones with herbs or spices for extra punch.

Can this snack be keto-friendly?

Absolutely. Use seed-based or almond flour crackers.

How long does guacamole last?

Best within 1–2 days. For parties, make it fresh that morning.


Conclusion: The Snack That Does It All

Guacamole and crackers aren’t just trendy—they’re practical, delicious, and endlessly versatile. Whether you’re feeding a crowd or just treating yourself, this is the snack that fits every lifestyle. It’s clean, quick, and customizable. Best of all, you control every ingredient.

Once you taste the balance of creamy and crunchy, there’s no turning back.


✅ Call to Action

Now it’s your turn! Whip up your favorite guacamole blend, try it with a cracker you’ve never used before, and post your creation on Facebook or Instagram using the tag #GuacAndCrackLove. Let your flavor story inspire others!

guacamole-and-crackers-

🍰 Irresistible no-Bake cakes – The Ultimate Easy Dessert for Every Occasion

✨ The Joy of Effortless Desserts

no-bake cakes

You know those warm afternoons when you crave something sweet, but turning on the oven feels like a chore? That’s exactly where no-bake cakes come to the rescue. These delightful desserts deliver all the indulgence of traditional cakes without the fuss of baking. Whether you’re in a rush, lack baking experience, or just don’t want to heat up your kitchen, no-bake cakes give you that sweet fix with minimal effort.

They’re ideal for busy parents, dorm-room dwellers, and anyone living life on the go. With a few simple ingredients and your fridge doing the heavy lifting, you can whip up an eye-catching, crowd-pleasing dessert that looks like it came from a bakery.


🍰 What Are no-Bake cakes?

No-bake cakes are desserts that don’t require oven time. Instead, they rely on refrigeration or freezing to set and hold their structure. Think cheesecake without the cracks, or tiramisu without the water bath. These cakes are smooth, creamy, and often layered—delivering incredible textures with half the effort.

Common Ingredients in no-Bake cakes

  • Crust base: Graham crackers, Oreos, or digestive biscuits
  • Binding agents: Melted butter, condensed milk
  • Creamy elements: Cream cheese, mascarpone, whipped cream, yogurt
  • Sweeteners: Powdered sugar, honey, maple syrup
  • Add-ins: Fruits, chocolate, nuts, or jams

You can even tweak the ingredients for dietary preferences—vegan, gluten-free, or keto variations are all possible.


Top Reasons for Popularity

  1. Time-saving – Most recipes take under 30 minutes to prepare
  2. Kid-friendly – No ovens mean safer baking for little helpers
  3. Versatile – Easy to adapt for food allergies or preferences
  4. Minimal equipment – No need for stand mixers or baking trays
  5. Chill factor – Ideal for warmer climates and summer parties

Social Media & Culture Shift

TikTok, Instagram, and Pinterest are packed with creative spins on no-bake cakes—from mason jar cheesecakes to viral no-bake tiramisu cups. In 2025, the theme is clear: convenience meets aesthetic.

Popular hashtags include:

  • #NoBakeDessert
  • #FridgeCakeMagic
  • #EasySweets

🥒 Top 5 Must-Try no-Bake cake Recipes

These recipes blend simplicity and flavor to help you impress without stress. Each comes with an ingredient table and tips.

1. No-Bake Cheesecake

IngredientQuantity
Cream cheese2 cups
Graham cracker crumbs1.5 cups
Butter (melted)½ cup
Powdered sugar¾ cup
Vanilla extract1 tsp
Whipping cream1 cup
  • Mix crumbs and butter for the base, press into a pan, and chill.
  • Whip cream cheese, sugar, and vanilla; fold in whipped cream.
  • Spread over crust and refrigerate overnight.

2. Chocolate Biscuit Cake

  • Digestive biscuits
  • Melted dark chocolate
  • Butter and golden syrup
  • Optional: dried fruits, chopped nuts

Break biscuits, mix with warm chocolate mixture, pour into mold, refrigerate.

3. Strawberry Icebox Cake

  • Graham crackers, whipped cream, sliced strawberries
  • Layer: crackers, cream, berries
  • Refrigerate 8 hours

4. Oreo No-Bake Cake

  • Whole Oreos
  • Milk
  • Whipped cream or pudding mix
  • Layer and freeze; slice like an ice cream cake

5. Vegan Mango Coconut Cake

  • Cashew cream, coconut milk, mango puree
  • Crust: dates and almonds blended
  • Chill for 6 hours minimum

🎂 Tips for Perfect no-Bake cakes

1. Full-Fat Ingredients Work Best

Using full-fat cream cheese or coconut milk ensures a richer texture that holds up better.

2. Don’t Rush the Chill Time

Refrigerate for at least 6 hours or overnight to allow flavors to meld and layers to firm.

3. Layer with Intention

Add crunch with nuts or cookie bits between creamy layers.

4. Presentation Matters

Use transparent dishes or glasses for visual appeal, especially if you’re posting on social media.


🎁 no-Bake cakes for Every Occasion

No-bake cakes aren’t just for summer. You can tweak them year-round:

  • Birthdays: Add funfetti to cheesecake filling
  • Summer BBQs: Lemon blueberry or strawberry themes
  • Ramadan or Eid: Date and pistachio with rose water
  • Valentine’s Day: Raspberry and white chocolate

❓ FAQ: Everything You Need to Know About No-Bake Cakes

Can you freeze no-bake cakes?

Yes. Wrap them well and store for up to 2 weeks. Thaw in the fridge before serving.

Are no-bake cakes safe?

Absolutely. Most recipes skip eggs entirely, and the chilled ingredients stay fresh for days.

Can I make them vegan or gluten-free?

Yes! Use plant-based dairy and gluten-free cookies or oats.

How do I prevent a runny filling?

Chill longer, use gelatin or agar if needed, and go for thicker cream bases.


📅 Final Thoughts: Your Sweet Shortcut to Joy

You don’t need a mixer, oven, or culinary school degree to make a stunning dessert. No-bake cakes offer you simplicity, flexibility, and a whole lot of joy. Perfect for any celebration or an indulgent weekend treat, these cakes are a trend that’s here to stay.

Why not try one today and treat yourself to effortless sweetness?


📢 Call to Action

Tried a recipe? Share your masterpiece using the hashtag #ChillCakeChallenge and tag us for a chance to be featured!

Subscribe to our newsletter for more no-bake ideas, and never miss the latest dessert trend!

no-bake cakes

no-bake cakes