Old-Fashioned Banana Cake That Tastes Like Grandma’s Kitchen

old-fashioned banana cake

You know that comforting feeling you get when you walk into a room and catch the scent of something sweet and nostalgic baking in the oven? That scent might just be a homemade old-fashioned banana cake—a timeless dessert that never fails to bring back memories. Whether you’re reminiscing about your childhood kitchen or simply craving something classic, this recipe brings the warmth of tradition right into your home.

Let’s dive into how you can recreate this delicious throwback that tastes just as good as you remember.


What Makes an Old-Fashioned Banana Recipe So Special?

What sets an old-fashioned banana cake apart from modern versions? It’s not just the simplicity of the ingredients, but the intention behind every bite. This cake is all about using ripe bananas at their sweetest stage, real butter, and no fancy tricks—just pure, homemade goodness.

The tradition of banana cake dates back to the early 20th century when home bakers started using overripe bananas to avoid waste. Its popularity only grew as families passed down their favorite versions, making it a treasured dessert in countless households.


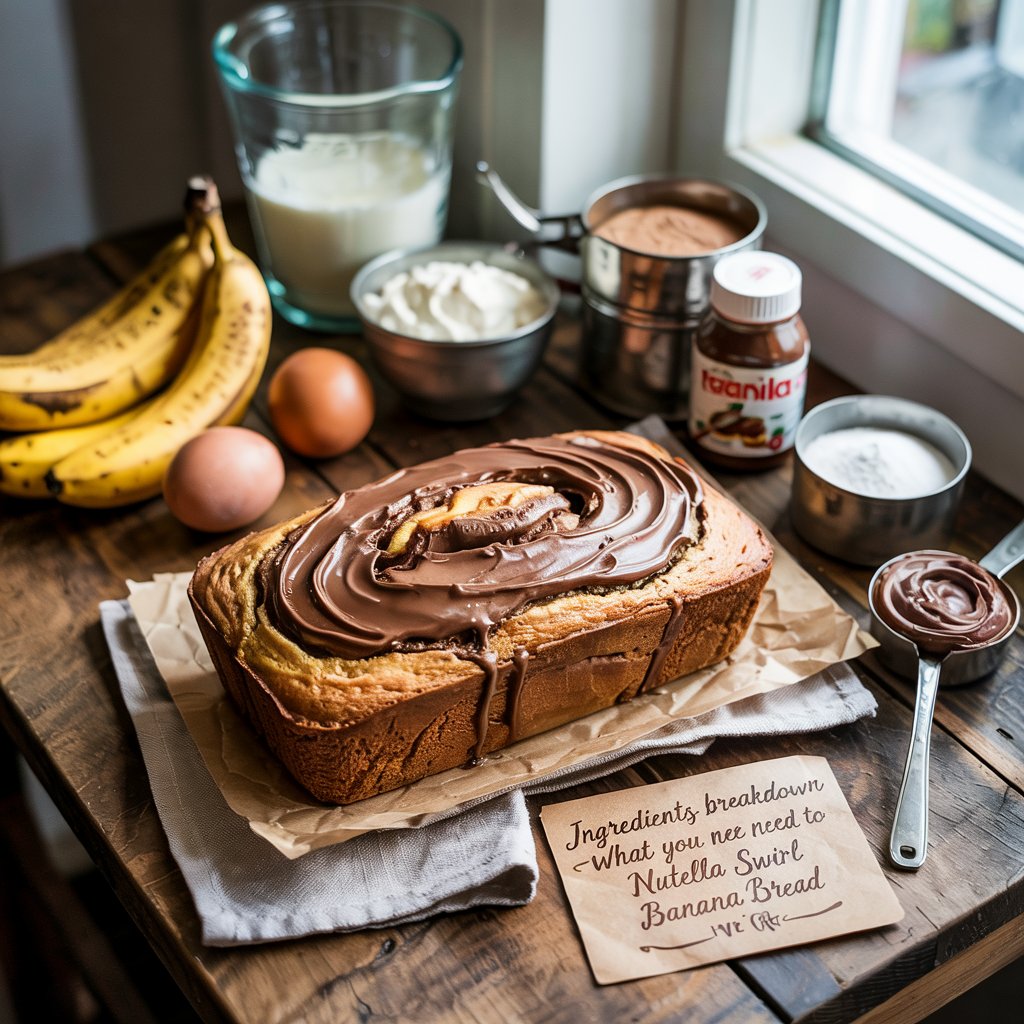
Ingredients for the Perfect Old-Fashioned Banana Cake

Getting your ingredients right is the key to nailing this nostalgic treat. Use fresh, whole ingredients whenever possible for the most authentic flavor.

Classic Banana Cake Ingredients Table

IngredientQuantityNotes
Ripe bananas3 mediumThe spottier, the better
All-purpose flour2 cupsSifted for a lighter texture
Baking soda1 tspHelps with rise
Salt1/2 tspBalances sweetness
Unsalted butter1/2 cupRoom temperature
Sugar1 cupCan substitute brown sugar
Eggs2 largeRoom temperature
Vanilla extract1 tspAdds depth of flavor
Buttermilk or yogurt1/2 cupFor moisture and tang

How to Make an Old-Fashioned Banana Cake Step by Step

You don’t need fancy equipment or culinary school techniques. Just follow these simple instructions and you’ll be savoring a slice of homemade bliss in no time.

Instructions

  1. Preheat your oven to 350°F (175°C).
  2. Grease and lightly flour an 8-inch round or square baking pan.
  3. Mash the ripe bananas in a small bowl and set aside.
  4. In a large bowl, cream the butter and sugar until light and fluffy.
  5. Add eggs one at a time, mixing well after each addition. Stir in vanilla.
  6. In a separate bowl, whisk together the flour, baking soda, and salt.
  7. Gradually add the dry ingredients to the creamed mixture, alternating with buttermilk.
  8. Gently fold in the mashed bananas.
  9. Pour the batter into your prepared pan and smooth the top.
  10. Bake for 35–40 minutes, or until a toothpick inserted into the center comes out clean.
  11. Cool for at least 10 minutes before removing from the pan. Let it cool completely on a wire rack before frosting.
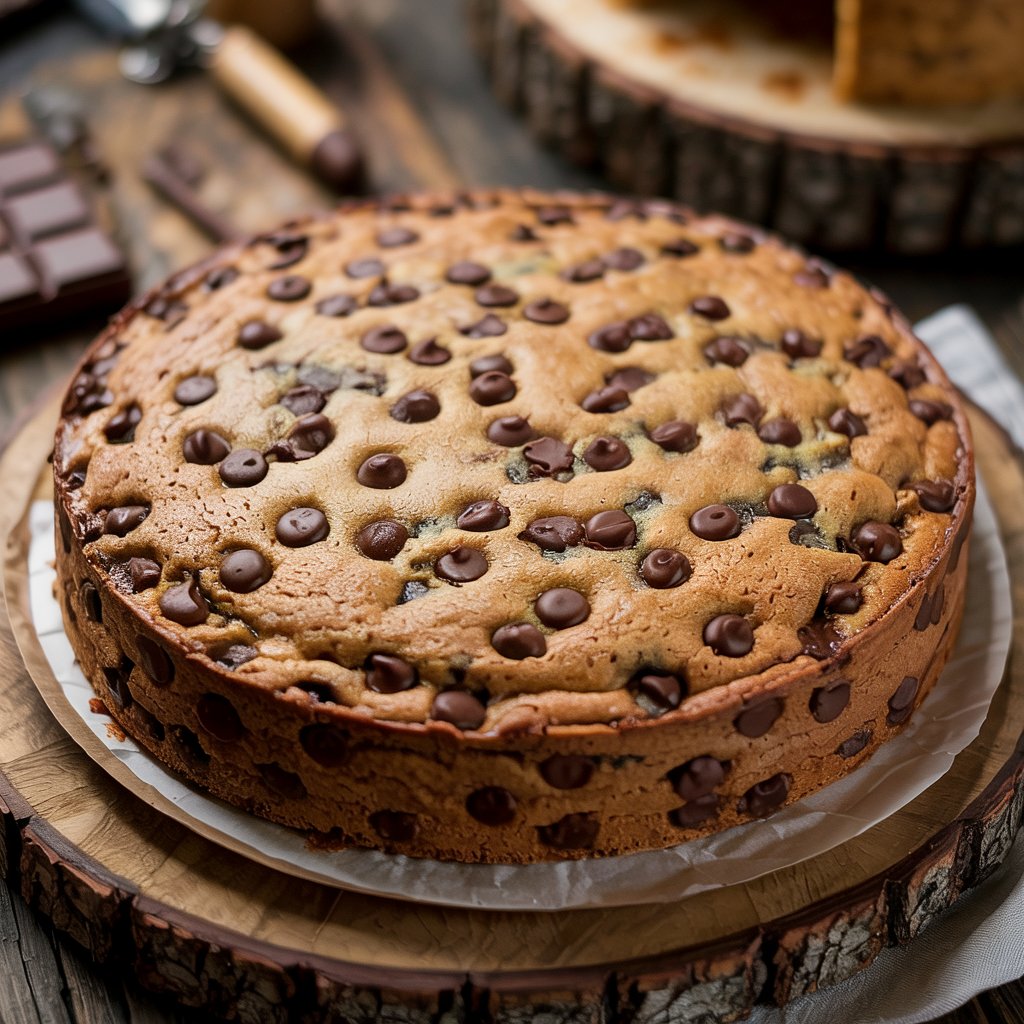
Optional Add-ins

  • 🥜 Chopped walnuts
  • 🍫 Dark chocolate chips
  • ☕ A pinch of cinnamon or nutmeg

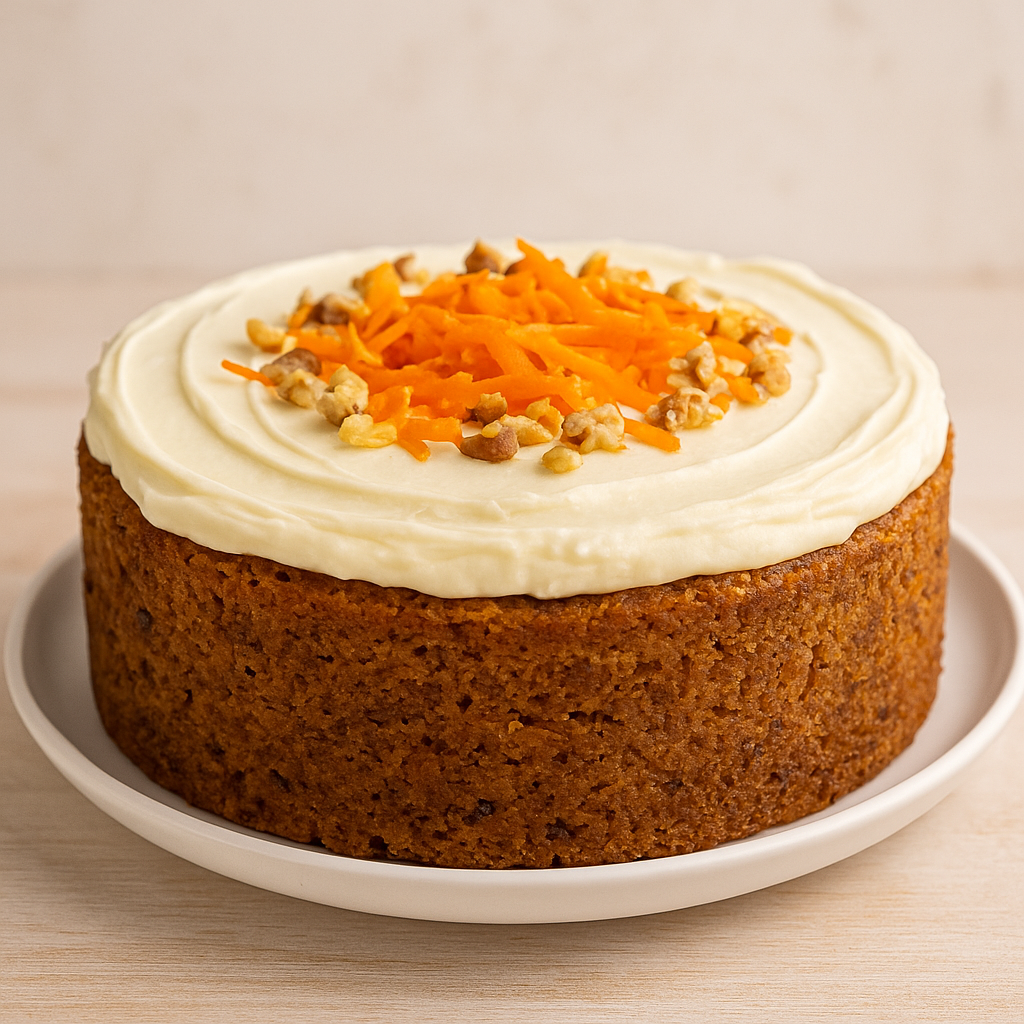
Frosting Options for Your Banana Cake

The beauty of this cake is its versatility. You can enjoy it plain, or add a frosting that complements its flavor.

  • Cream Cheese Frosting: A tangy and smooth choice that pairs beautifully with the sweetness.
  • Brown Butter Icing: Adds a rich, nutty flavor that elevates the entire cake.
  • Classic Buttercream: A simple vanilla buttercream for that extra touch of sweetness.

Frosting Tips

  • Always let the cake cool completely before frosting.
  • Store frosted cake in the fridge to maintain freshness.

Storage and Make-Ahead Tips

Life gets busy, but that doesn’t mean you can’t plan ahead. Here’s how you can store your cake for later enjoyment:

  • ☕ Store the cake at room temperature (unfrosted) for 2 days in an airtight container.
  • ❄️ Refrigerate frosted cake for up to 5 days.
  • 🌧️ Freeze unfrosted cake layers for up to 3 months. Wrap in parchment and then foil.

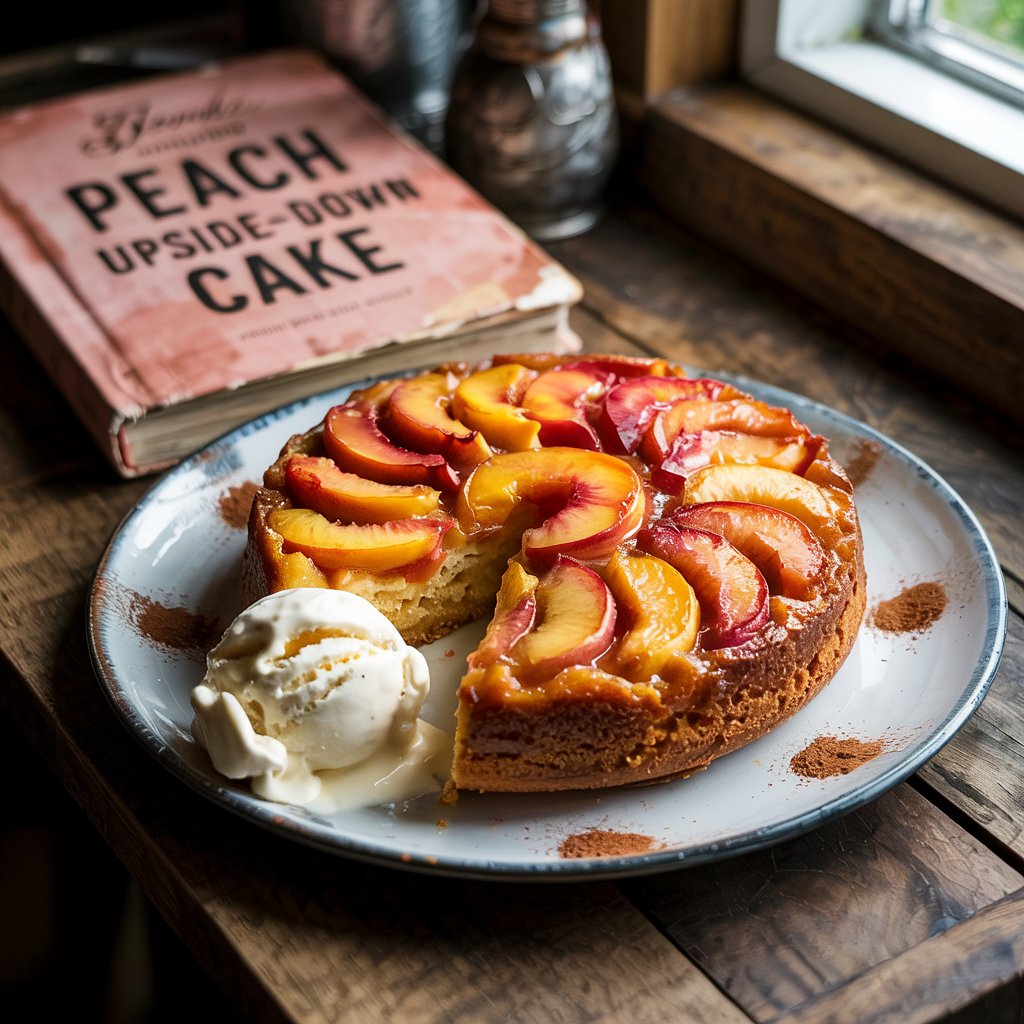
Variations of Old-Fashioned Banana Desserts

Feeling inspired? There are many delicious ways to give the classic banana flavor a fresh twist:

  • 🍪 Banana Cream Pie with a buttery graham cracker crust and whipped topping.
  • Banana Bread Pudding using leftover banana bread.
  • 🍬 Mini Banana Cupcakes with chocolate or caramel drizzle.

Healthier Swaps for a Guilt-Free Banana Cake

Looking to lighten things up? You can tweak this recipe without sacrificing flavor:

  • Replace butter with Greek yogurt or mashed avocado.
  • Swap sugar with honey or maple syrup.
  • Use whole wheat flour or oat flour.

These changes make it easier to enjoy your favorite treat while sticking to your health goals.


FAQ – Old-Fashioned Banana Recipes

Can I use frozen bananas in old-fashioned banana cake?

Absolutely! Thawed frozen bananas work perfectly. Just drain any excess liquid before mashing.

What’s the difference between banana bread and banana cake?

Banana bread is denser and usually not frosted, while banana cake is lighter, fluffier, and often topped with frosting.

How ripe should bananas be for old-fashioned banana cake?

The riper, the better. You want bananas that are heavily spotted or even blackened on the outside.

Can I make this cake gluten-free?

Yes, by using a 1:1 gluten-free flour blend and ensuring other ingredients are certified gluten-free.


Perfect Pairings – What to Serve with Old-Fashioned Banana Cake

This cake is delicious on its own, but these sides can elevate your dessert experience:

  • ☕ A hot cup of tea or coffee
  • 🍦 A scoop of vanilla or cinnamon ice cream
  • 🍇 Fresh berries or caramel drizzle

Reader Tips & Memories – Share Yours!

Have your own version of this cake? Maybe a family story behind it? Share your memories in the comments or on social media. Your twist could inspire someone else!


Conclusion – Why You’ll Always Come Back to This Old-Fashioned Favorite

There’s something timeless about an old-fashioned banana cake. It’s more than just dessert—it’s a reminder of the joy in simplicity. Whether you’re baking for a special occasion or a cozy night in, this cake delivers the comfort you didn’t know you needed.

So go ahead, let those bananas ripen on the counter, gather your ingredients, and bring a piece of the past into your present.


Call to Action

Ready to turn your ripe bananas into something unforgettable? Bake this old-fashioned banana cake today and tag your creation on Instagram using #HeltRecipes. We can’t wait to see your version of this sweet classic!

Irresistible Nutella Swirl Banana Bread – A Guilt-Free Treat You’ll Love

Introduction – Why You’ll Fall in Love With Nutella Swirl Banana Bread

There’s something about the comforting aroma of banana bread baking in the oven that takes you back to warm, familiar moments. Now, imagine elevating that classic recipe with swirls of rich, velvety Nutella. That’s what this guide is all about—helping you make the ultimate Nutella Swirl Banana Bread, naturally sweetened, perfectly moist, and entirely irresistible. Whether you’re baking for your family, impressing guests, or just treating yourself, this recipe brings together comfort and indulgence in every bite.

What Makes Nutella Swirl Banana Bread So Special?

You may be wondering, what’s the big deal about adding Nutella to banana bread? Here’s why this recipe is so beloved:

  • Naturally Sweetened: Thanks to ripe bananas, you won’t need to add refined sugar.
  • Rich Flavor: The chocolate-hazelnut swirl enhances the banana flavor without overpowering it.
  • Soft and Moist Texture: Yogurt helps achieve that perfectly tender crumb.
  • Visual Appeal: The Nutella swirl gives it a bakery-style look right at home.

Whether you enjoy it as breakfast, a snack, or dessert, this bread suits any time of day.

Ingredients Breakdown – What You Need to Make Nutella Swirl Banana Bread

Table of Ingredients

IngredientQuantity
Ripe bananas (mashed)3 medium
Eggs2
Greek yogurt (plain)1/3 cup
Vanilla extract1 tsp
Whole wheat flour1 1/2 cups
Baking soda1 tsp
Ground cinnamon (optional)1/2 tsp
Salt1/4 tsp
Nutella (slightly warmed)1/4 cup

Ingredient Notes

  • Overripe bananas give maximum sweetness and flavor.
  • You can swap Greek yogurt for unsweetened applesauce for a dairy-free version.
  • Want a healthier twist? Opt for sugar-free hazelnut spread instead of Nutella.

Step-by-Step Instructions for the Perfect Nutella Swirl Banana Bread

Nutella Swirl Banana Bread

Preparation Method

Follow these easy steps and you’ll have a gorgeous, delicious loaf in under an hour.

  1. Preheat your oven to 350°F (175°C). Grease a 9×5-inch loaf pan or line with parchment.
  2. Mash the bananas in a large bowl until smooth.
  3. Add the eggs, yogurt, and vanilla. Mix until well combined.
  4. In another bowl, whisk together flour, baking soda, cinnamon, and salt.
  5. Stir the dry ingredients into the wet mixture until just combined—do not overmix.
  6. Pour the batter into the prepared loaf pan.
  7. Drizzle warmed Nutella on top of the batter.
  8. Swirl gently using a knife or toothpick to create a marbled pattern.
  9. Bake for 50-60 minutes or until a toothpick inserted in the center comes out clean.
  10. Cool on a wire rack before slicing and serving.

Storage Tips

  • Room temperature: Store in an airtight container for 2–3 days.
  • Refrigerator: Keeps fresh up to 5 days.
  • Freezer: Wrap slices in plastic and store for up to 3 months.

Healthier Swaps for Your Nutella Banana Bread Recipe

Want to make your banana bread even more nourishing? Here are a few ideas:

  • Flour: Swap with oat flour or almond flour for a gluten-free version.
  • Nutella: Choose no-added-sugar spreads or make your own using hazelnuts and cocoa.
  • Oil-free version: Greek yogurt or applesauce keeps it moist without the fat.
  • Add-ins: Mix in flaxseed, chopped walnuts, or dark chocolate chips for an extra health boost.

Serving Suggestions and Pairing Ideas

  • Warm a slice and top with Greek yogurt and a drizzle of honey.
  • Serve with a cup of almond milk latte or herbal tea for a cozy breakfast.
  • Add a scoop of sugar-free vanilla ice cream for a balanced dessert.
  • Toast it lightly and spread with almond butter for a protein-rich snack.

Bonus Tips for Making the Best Banana Bread Every Time

Baking Advice

  • Always use very ripe bananas with brown spots.
  • Don’t overmix the batter; it makes the bread dense.
  • Let it rest before slicing to keep it from crumbling.
  • Use parchment paper to lift it easily from the pan.

FAQ – Nutella Swirl Banana Bread

Can I make Nutella Swirl Banana Bread gluten-free?

Yes! Use a gluten-free all-purpose flour blend or oat flour. Ensure it’s designed for baking to maintain texture.

Is there a sugar-free version of Nutella I can use?

Definitely. Look for hazelnut spreads sweetened with stevia or monk fruit, or make your own.

Can I bake this recipe as muffins instead of a loaf?

Absolutely. Pour batter into a muffin tin and bake for 20-25 minutes at 350°F.

How ripe should the bananas be?

The best bananas are heavily spotted or almost black. They’re easier to mash and naturally sweet.

Printable Recipe Card

Nutella Swirl Banana Bread (No Sugar Added)

  • Prep time: 10 minutes
  • Cook time: 50-60 minutes
  • Total time: ~1 hour
  • Servings: 8 slices

Ingredients:

  • 3 ripe bananas
  • 2 eggs
  • 1/3 cup Greek yogurt
  • 1 tsp vanilla
  • 1 1/2 cups whole wheat flour
  • 1 tsp baking soda
  • 1/2 tsp cinnamon
  • 1/4 tsp salt
  • 1/4 cup Nutella, slightly warmed

Instructions:

  1. Preheat oven and prep pan.
  2. Mix wet and dry ingredients separately.
  3. Combine and pour batter into pan.
  4. Swirl in Nutella.
  5. Bake for 50-60 minutes.
  6. Cool and enjoy!

Conclusion – Your New Favorite Banana Bread Recipe

Now you have everything you need to make a better-for-you banana bread that looks fancy but is totally doable. With its natural sweetness and Nutella magic, this is one recipe you’ll keep returning to. Don’t be surprised if it disappears in minutes!

🍰 The Best Peach Upside-Down Cake for Your Summer Moments

📝 Why Peach Upside-Down Cake Feels Like Home

Have you ever tasted something that instantly brought you back to warm afternoons and sun-drenched kitchens? That’s exactly what this peach upside-down cake delivers. It’s not just a dessert—it’s a trip down memory lane. The moment you flip that golden, caramel-glazed masterpiece onto a plate, you know you’re in for something special. Whether it was your grandmother’s Sunday specialty or something you tried once at a summer picnic, this cake taps into something deeper: comfort, simplicity, and a little slice of sunshine.

If you’re craving a dessert that balances retro charm with irresistible flavor, you’re in the right place. This isn’t just another cake recipe—it’s the one your summer needs.


🍎 Peach Upside-Down Cake: A Retro Classic with a Modern Twist

Peach upside-down cake is a vintage dessert making a huge comeback, and it’s easy to see why. Picture this: buttery sponge cake meets juicy peaches bathed in brown sugar caramel. The moment you flip the cake and reveal that glistening fruit top, you’re creating a dessert worthy of applause.

What Makes It Different?

  • Unlike its cousin, the pineapple version, this one has a mellow, summery vibe.
  • The caramelized sugar blends perfectly with peach juices, forming a syrupy topping.
  • You get a moist, flavorful crumb without needing frosting.

Perfect for summer barbecues, family get-togethers, or lazy brunches—this cake is nostalgia in every bite.


🌟 Top Reasons You Need to Try This Peach Upside-Down Cake

Still wondering if it’s worth baking? Let’s make that decision easier:

  • Juicy & Moist: The peaches bake into the cake, adding moisture and sweetness.
  • Visually Stunning: Those golden fruit slices glisten and impress.
  • Perfect for Summer: Fresh or canned peaches work, making it versatile.
  • No Fancy Tools Required: One pan, one bowl, one whisk. That’s all.
  • Vegan or Gluten-Free? It’s easy to adapt.

Your guests won’t just eat it. They’ll talk about it.


📆 Peach Upside-Down Cake Ingredients – What You’ll Need

Let’s break it down so you can prep with confidence. Here’s a handy table for your kitchen planning:

📄 Ingredient Table

ToppingCake Batter
2 tbsp unsalted butter1/2 cup unsalted butter (soft)
1/3 cup brown sugar2/3 cup granulated sugar
5–6 peach slices (fresh or canned)2 eggs
1 tsp vanilla extract
1 1/4 cups all-purpose flour
1 1/2 tsp baking powder
1/4 tsp salt
1/2 cup whole milk (or almond)

👩‍🍳 How to Make the Perfect Peach Upside-Down Cake

Get ready to create your own showstopper. Follow these simple steps:

Step-by-Step Instructions

  1. Preheat your oven to 175°C (350°F).
  2. Grease a 9-inch round cake pan. Pour in melted butter and sprinkle the brown sugar evenly.
  3. Arrange the peach slices in a spiral or fan pattern over the sugar.
  4. Cream the softened butter with granulated sugar until fluffy.
  5. Add eggs, one at a time. Stir in vanilla extract.
  6. Mix dry ingredients in a separate bowl: flour, baking powder, salt.
  7. Alternate mixing: Add flour mixture and milk to the wet batter in parts.
  8. Pour the batter gently over the peaches. Spread it evenly.
  9. Bake for 35–40 minutes or until a toothpick comes out clean.
  10. Cool 10 minutes, then flip it gently onto a plate.

✅ Quick Checklist

  • [ ] Peaches dry and sliced evenly
  • [ ] Cake batter lump-free
  • [ ] Oven fully preheated
  • [ ] Serve warm with a scoop of vanilla ice cream

💡 Baking Tips for a Flawless Upside-Down Cake

To ensure your cake looks as good as it tastes:

  • Use ripe but firm peaches: Too soft? They’ll fall apart. Too firm? Less juicy.
  • Drain canned peaches thoroughly if using.
  • Grease your pan well to prevent sticking.
  • Don’t skip the cooling time before flipping.
  • Add a twist: A pinch of nutmeg or a splash of bourbon works wonders.

✨ Fun Peach Upside-Down Cake Variations to Customize

You can make this classic your own in countless ways:

  • 🍇 Peach + Berry: Add raspberries or blueberries for a tangy kick.
  • 🍼 Boozy Peach: Mix 1 tbsp of bourbon into your topping.
  • 🌿 Vegan Version: Use vegan butter and flax eggs.
  • 🌾 Gluten-Free: Substitute all-purpose flour with almond flour and GF blend.
  • 🥜 Mini Upside-Down Cakes: Use muffin tins for party-ready servings.

❄️ How to Store and Reheat Peach Upside-Down Cake

Yes, you can make this ahead and enjoy it later!

  • Store: Keep in an airtight container in the fridge for up to 4 days.
  • 🧋 Reheat: Microwave individual slices for 15–20 seconds.
  • ❄️ Freeze: Wrap slices in cling film and store in freezer for up to 2 months.

Serve it warm again with ice cream or whipped cream for a brand-new day of indulgence.


❓ Your Peach Upside-Down Cake Questions Answered

🤔 Can I use canned peaches?

Absolutely. Just drain and dry them well before using to prevent excess moisture.

🤔 How do I prevent the cake from sticking?

Generously grease your pan, use parchment paper if needed, and let it cool before flipping.

🤔 Can I make it a day ahead?

Yes! It actually tastes better the next day. Reheat gently before serving.

🤔 Can I use almond or oat milk instead of regular?

Yes. Both work beautifully in this recipe.


🎈 Ready to Bake Your Peach Upside-Down Cake?

You’ve got the knowledge. You’ve got the ingredients. Now it’s time to make some memories. This peach upside-down cake is more than a dessert—it’s a conversation starter, a smile-bringer, a nostalgic showpiece.

🚀 Your turn! Bake it, love it, and share it. Don’t forget to tag us @HeltRecipes with #PeachUpsideVibes.


Because some desserts aren’t just recipes. They’re stories.

Peach Upside

🥕 Classic Carrot Cake Recipe with Cream Cheese Frosting – A Comfort Dessert That Never Fades

Why Carrot Cake Feels Like Home

There’s something about the scent of cinnamon and nutmeg wafting through your kitchen that feels like a hug from the past. If you’ve ever sat at a family table with a warm slice of Carrot Cake in front of you, topped with a velvety layer of cream cheese frosting, you know that comfort has a flavor. This cake isn’t just dessert – it’s a celebration of memories, warmth, and tradition. And in 2025, it’s making a trendy comeback in brunch menus and mini-layer cake versions.

What Makes Carrot Cake Irresistible?

You might wonder, why does carrot cake never go out of style? It’s the perfect blend of textures and flavors:

  • Moist and tender crumb thanks to freshly grated carrots and oil
  • A balance of sweet, spice, and nutty richness
  • That tangy, rich cream cheese frosting that makes every bite indulgent

Today, you’ll learn how to bake your own foolproof carrot cake with variations you can call your own.

Carrot Cake Ingredients Breakdown – What You Need and Why

Key Cake Ingredients

IngredientPurpose
Grated carrotsNatural sweetness and moisture
All-purpose flourBase structure
Sugar (brown/white)Sweetness and caramel-like flavor
EggsHelps bind and provide structure
OilKeeps the cake moist and tender
Walnuts or pecansAdds crunch and nutty depth
Cinnamon, nutmegWarm, comforting spice notes
Baking powder/sodaEnsures proper rise

Cream Cheese Frosting Ingredients

IngredientPurpose
Cream cheeseRich, tangy base for frosting
ButterCreamy texture and stability
Powdered sugarSweetness and silky texture
Vanilla extractBalances the tanginess with warmth

Step-by-Step Carrot Cake Recipe

Cake Preparation

  1. Preheat your oven to 175°C (350°F). Grease and flour your cake pan.
  2. Whisk together dry ingredients: flour, baking soda, cinnamon, and nutmeg.
  3. In another bowl, beat eggs and sugar until light and fluffy.
  4. Stir in oil, then fold in grated carrots and chopped nuts.
  5. Combine dry and wet ingredients until smooth.
  6. Pour into prepared pan and smooth the top.
  7. Bake for 35–45 minutes or until a toothpick comes out clean.
  8. Cool completely before frosting.

Cream Cheese Frosting Instructions

  • Beat softened cream cheese and butter until creamy.
  • Gradually mix in powdered sugar and vanilla extract.
  • Spread or pipe onto your cooled carrot cake.
  • Top with extra walnuts or orange zest for a decorative finish.

Variations to Try – Make It Your Own

Want to experiment? Here are ways to personalize your carrot cake:

  • Add crushed pineapple for tropical notes
  • Stir in shredded coconut or golden raisins
  • Use almond flour for a gluten-free twist
  • Try mini bundt molds or cupcake tins for brunch-friendly servings
  • Add orange zest or a dash of ground ginger for a fresh zing

Nutritional Info & Storage Tips

Carrot cake is rich, yes, but every slice is worth savoring.

  • Calories per slice: ~350–400 depending on size and frosting
  • Storage: Refrigerate in an airtight container up to 5 days
  • Freezing: Unfrosted cake layers freeze well for up to 3 months
Carrot Cake

Perfect Occasions for Serving Carrot Cake

This cake suits every season and setting:

  • Easter brunch
  • Autumn tea parties
  • Birthdays (especially with layered versions!)
  • Potlucks or holiday dinners
  • Just because you’re craving something cozy

Conclusion – Your Next Go-To Cake Recipe

There are cakes, and then there are cakes that tell stories. Carrot cake is the latter. You now have everything you need to bake this timeless treat from scratch, impress guests, or simply spoil yourself. Once it enters your recipe rotation, don’t be surprised if you get requests to bring it again and again.

Frequently Asked Questions (FAQs) – Carrot Cake Edition

Can I use butter instead of oil?

Yes, but oil provides more moisture. If you want a richer texture and buttery flavor, substitute part or all of the oil with melted butter.

How finely should I grate the carrots?

Use a fine or medium grater. Too large and the carrots might stay crunchy. Too fine and they might disappear into the batter.

Can I make carrot cake ahead of time?

Absolutely. It tastes even better after a day or two as the flavors meld. Just refrigerate it, especially with the cream cheese frosting.

Is carrot cake healthy?

While it does include carrots and nuts, it’s still a dessert. You can make it healthier by reducing sugar or using whole-wheat flour.

✅ Call to Action

Ready to bake? Try this recipe and share your carrot cake creation online with the hashtag #CarrotCakeLove. Got a twist to add? Drop it in the comments or tag us – we love discovering your sweet spins!

Chocolate Chip Cookie Cake: The Ultimate Giant Treat Everyone Loves ✪

Chocolate Chip Cookie Cake

If you’re craving something warm, nostalgic, and completely satisfying, you’re in the right place. The Chocolate Chip Cookie Cake is not just a dessert—it’s a celebration on a plate. Imagine the comfort of a freshly baked cookie combined with the grandeur of a cake. It’s chewy in the middle, slightly crisp on the edges, and overflowing with melty chocolate chips. Whether you’re throwing a birthday party, celebrating a milestone, or simply in need of something sweet, this recipe brings the perfect balance of taste, texture, and joy.

Chocolate Chip Cookie Cake

A Delicious Fusion of Two Classics

You’ve probably had chocolate chip cookies and you’ve definitely eaten cake, but this dessert is where the two worlds collide in the most delightful way. A Chocolate Chip Cookie Cake takes the gooey, buttery goodness of a traditional cookie and turns it into a sliceable cake.

  • Chewy interior like a soft cookie
  • Firm enough to cut clean slices
  • Typically baked in a round or square pan
  • Often topped with frosting or fun decorations

Unlike store-bought versions packed with preservatives, this homemade version is full of flavor and easy to customize.


The Best Dessert for Any Occasion

There are countless reasons why this treat might become your go-to dessert:

  • Perfect for birthdays and special events
  • Simple to make with pantry staples
  • No need to scoop individual cookies
  • Less cleanup compared to traditional cookies
  • Customizable with toppings, fillings, and frostings

This dessert offers the best of both worlds—the nostalgia of cookies and the celebration factor of cake.


Pantry Staples with Maximum Flavor

Before you get baking, make sure you have all the essentials ready. Here’s everything you need to make your very own Chocolate Chip Cookie Cake:

Ingredient Table

IngrédientQuantité
Beurre doux (mou)250 g
Sucre brun200 g
Œufs2
Extrait de vanille1 c. à café
Farine300 g
Levure chimique1 c. à café
Sel1 pincée
Pépites de chocolat200 g

📝 Pro Tip: For deeper flavor, use dark brown sugar and a mix of dark and semi-sweet chocolate chips.


Quick and Easy Prep Instructions

Follow this guide for a flawless result every time:

  1. Preheat your oven to 180°C (350°F).
  2. Cream together the butter and sugar until light and fluffy.
  3. Add the eggs one by one, followed by the vanilla extract.
  4. In a separate bowl, whisk together the flour, baking powder, and salt.
  5. Combine the dry ingredients with the wet ingredients.
  6. Fold in the chocolate chips evenly.
  7. Spread the dough into a greased or lined baking pan.
  8. Bake for 25-30 minutes or until the top is golden.
  9. Cool before slicing into portions.

For an extra indulgent touch, serve warm with a scoop of vanilla ice cream or drizzle with caramel sauce.


From Texture to Taste – What Makes the Difference?

To ensure your cookie cake turns out perfect, keep these baking insights in mind:

  • Avoid overbaking: Pull the cake out once the edges are golden but the center still looks a bit soft.
  • Chill your dough for 15-30 minutes to enhance flavor and reduce spreading.
  • Use parchment paper for easy lifting and clean edges.
  • Mix-ins matter: Try white chocolate chips, chopped nuts, or sprinkles.
  • Decorate with frosting or writing for personalized messages.

Storage and Freezing Instructions

Keep It Fresh Longer

The beauty of this dessert is that it stores well. Here’s how to keep it fresh:

  • Store in an airtight container at room temperature for up to 5 days.
  • Freeze whole or sliced in plastic wrap for up to 2 months.
  • Reheat slices in the microwave for 15 seconds to enjoy a warm, gooey bite.

Nutritional Information (Approximate)

Know What You’re Eating

NutrientPer Slice (1/12)
Calories370
Fat20g
Carbohydrates45g
Sugars25g
Protein4g

Note: Values may vary depending on your ingredient brands.


Serving Suggestions & Variations

Why settle for just chocolate chips when you can elevate your cookie cake in multiple ways?

  • Add a layer of chocolate ganache on top
  • Drizzle with peanut butter or caramel
  • Decorate with frosting borders and sprinkles
  • Slice into fun shapes with cookie cutters
  • Serve with fruit and whipped cream for a lighter option

Yes! Substitute each egg with a flax egg (1 tbsp ground flax + 3 tbsp water) or commercial egg replacers.

A 9-inch round or 8×8 square pan works best. For thinner cookies, go larger.

Don’t overbake it, and store it in an airtight container. A slice of bread in the container can help maintain moisture.

Can I double this recipe?

Absolutely. Just use a larger pan (like 13×9 inches) and adjust the bake time by 5-10 minutes.


When you bake a Chocolate Chip Cookie Cake, you’re not just making dessert. You’re crafting an experience—one that combines rich flavor with homemade warmth. Whether you’re baking for others or treating yourself, this recipe offers a reliable, delicious, and endlessly adaptable go-to.

So what are you waiting for? Gather your ingredients, preheat your oven, and let the baking begin. Your future self will thank you for every chocolatey bite.


📣 Call to Action:

Tried this recipe? Share your cookie cake masterpiece on social media and tag us with #ChocolateChipCookieCake. Want more feel-good dessert ideas? Subscribe to our newsletter and never miss a sweet moment!

Glazed Lemon Loaf Cake – A Moist & Zesty Delight Inspired by American Bakeries

There’s Magic in Every Slice

Have you ever walked into your kitchen on a slow weekend morning, craving something cozy and citrusy, something that makes the house smell like sunshine? That’s exactly where your Glazed Lemon Loaf Cake fits in. Whether you’re preparing brunch for friends or treating yourself to a golden afternoon snack, this moist, lemony loaf with a sweet, tangy glaze delivers comfort and joy in every bite.

Let’s dive into what makes this cake not just a treat but a baking ritual you’ll want to revisit.


Why You’ll Love This Glazed Lemon Loaf Cake

A Balance of Sweet and Tart

  • The natural brightness from freshly squeezed lemon juice and finely grated zest adds the perfect citrusy lift.
  • The glaze, made from powdered sugar and more lemon juice, creates a delightful sweet-and-sour finish.

Moist Texture That Lasts

  • Yogurt and vegetable oil work wonders for creating a soft, tender crumb that stays fresh for days.

Simple Ingredients, Big Results

  • You won’t need any fancy equipment or hard-to-find ingredients.
  • It’s a beginner-friendly recipe with professional-level taste and presentation.

Ingredients for the Best Glazed Lemon Loaf Cake

Here’s what you’ll need to create this flavor-packed loaf:

Cake Ingredients:

IngredientQuantityNotes
All-purpose flour200 gSifted for a lighter crumb
Sugar150 gWhite granulated
Eggs2Room temperature
Yogurt120 mlPlain, unsweetened
Vegetable oil100 mlNeutral oil like canola
Lemon juiceFrom 2 lemonsFreshly squeezed
Lemon zestFrom 2 lemonsFinely grated
Baking powder1 tspFor rise and fluffiness
Salt1 pinchBalances sweetness

Glaze Ingredients:

IngredientQuantity
Powdered sugar100 g
Lemon juice2 tbsp (approx.)

How to Make Glazed Lemon Loaf Cake Step by Step

Preparation & Mixing

  1. Preheat your oven to 180°C (350°F).
  2. In a large mixing bowl, whisk together the eggs and sugar until light and creamy.
  3. Stir in the yogurt, oil, lemon juice, and zest.

Combining Dry & Wet Ingredients

  1. In a separate bowl, combine flour, baking powder, and salt.
  2. Gently fold the dry ingredients into the wet mixture. Don’t overmix—you want a soft, airy texture.

Baking

  1. Pour the batter into a greased or parchment-lined loaf pan.
  2. Bake for 40-45 minutes or until a toothpick inserted in the center comes out clean.
  3. Let the cake cool in the pan for 10 minutes, then transfer to a wire rack to cool completely.

Glazing

  1. Mix powdered sugar with lemon juice until smooth.
  2. Pour over the cooled loaf and allow it to set before slicing.

Recipe Variations and Add-Ons

Lemon Poppy Seed Twist

  • Add 1 tablespoon of poppy seeds to the batter for a classic American cafe flavor.

Extra Moist Version

  • Swap half the yogurt for sour cream to add even more richness.

Gluten-Free Adaptation

  • Replace regular flour with a 1:1 gluten-free baking mix.

Storage Tips and Make-Ahead Advice

  • Room Temperature: Store in an airtight container for up to 4 days.
  • Freezing: Wrap in foil and freeze for up to 2 months. Thaw and glaze just before serving.
  • Make-Ahead: Bake the cake a day in advance and add glaze the next morning for a fresh look.

Pro Baking Tips for Perfect Lemon Loaf

  • Always use fresh lemon juice for the brightest flavor.
  • Use a microplane zester to get the finest zest without the bitter pith.
  • Let the cake cool completely before glazing to avoid a runny mess.
  • Don’t overmix once the flour is added; it affects texture.
  • Use parchment paper to easily lift the cake out of the loaf pan.

FAQ – Glazed Lemon Loaf Cake

Can I use bottled lemon juice instead of fresh?

Fresh is preferred for better aroma and flavor, but bottled can work in a pinch.

What if I don’t have yogurt?

Greek yogurt or sour cream are great substitutes that maintain moisture.

How do I keep my loaf cake from sinking?

Avoid overmixing and don’t open the oven during the first 30 minutes.

Can I make this lemon loaf vegan?

Yes! Use flax eggs and a plant-based yogurt.

Is this recipe good for muffins?

Absolutely! Reduce baking time to 18-22 minutes for lemon muffins.


Time to Bake Your Glazed Lemon Loaf Cake

This cake is more than just a treat—it’s a warm hug in loaf form. Each slice delivers a burst of lemony brightness, balanced by a sweet, glossy glaze. Perfect with a cup of tea, coffee, or shared during your next brunch gathering.

Now it’s your turn.
Grab your lemons, roll up your sleeves, and bring some sunshine into your kitchen. Don’t forget to tag your creations with #LemonLoafLove so others can be inspired by your bake!

Matcha White Chocolate Cake Recipe – A Fusion of Elegance and Flavor

If you’ve ever craved a dessert that feels both luxurious and calming, you’re not alone. There’s something undeniably magical about the smooth, creamy sweetness of white chocolate fused with the earthy, slightly bitter notes of matcha green tea. The Matcha White Chocolate Cake isn’t just a treat — it’s a statement. Whether you’re serving it for a special celebration or treating yourself to a weekend indulgence, this cake offers a unique experience that delights the senses and brings a touch of sophistication to your table.

Why You’ll Love This Matcha Chocolate Cake

You’re probably used to seeing matcha in lattes or smoothies, but this cake takes it to a whole new level. Here’s what makes it stand out:

  • The rich, buttery flavor of white chocolate complements the umami of matcha perfectly.
  • It’s moist, fluffy, and just the right amount of sweet.
  • Visually stunning with its light green hue and glossy ganache.
  • Trending across U.S. bakeries, dessert cafes, and social media food accounts.
  • Easy to bake at home with just a few pantry staples.

Ingredients You’ll Need (with Measurements)

Main Cake Ingredients

IngredientAmountNotes
All-purpose flour1½ cups (180g)Sifted for light texture
Matcha powder2 tbspUse ceremonial-grade for best flavor and color
Baking powder2 tspFresh, for good rise
Salt¼ tspEnhances flavor
Unsalted butter½ cup (113g)Softened
White sugar¾ cup (150g)Granulated
Eggs3 largeRoom temperature
Vanilla extract1 tspBalances flavors
Milk½ cup (120ml)Full-fat or almond milk

White Chocolate Ganache

IngredientAmountPurpose
White chocolate chips1 cup (180g)Use premium quality for flavor
Heavy cream½ cup (120ml)Creates a smooth, pourable ganache

Step-by-Step Instructions for Matcha White Chocolate Cake

Preparing the Cake Base

  1. Preheat your oven to 350°F (175°C). Line an 8-inch cake pan with parchment paper.
  2. In a large bowl, sift together flour, matcha, baking powder, and salt. This helps prevent clumping and gives you a fluffy cake.
  3. In another bowl, cream the butter and sugar until light and airy. Use a hand mixer for the best results.
  4. Add eggs one at a time, mixing well after each addition. Stir in vanilla extract.
  5. Alternate adding the dry mix and milk to your wet mixture, starting and ending with the dry. Mix until just combined.
  6. Pour the batter into your prepared pan and bake for 28 to 32 minutes, or until a toothpick inserted in the center comes out clean.
  7. Allow the cake to cool in the pan for 10 minutes before transferring it to a wire rack.

Making the White Chocolate Ganache

  1. In a small saucepan, heat the cream until it starts to simmer.
  2. Remove from heat and pour over white chocolate chips in a heatproof bowl.
  3. Let it sit for 2 minutes, then stir gently until smooth.
  4. Cool slightly before pouring over your cooled cake.

Tips to Make the Perfect Matcha Cake

  • Sift your matcha to avoid bitter lumps and keep the cake vibrant.
  • Don’t overmix once you combine wet and dry ingredients.
  • Make sure your eggs and butter are at room temperature.
  • Use good-quality white chocolate; it makes a huge difference in flavor.

Variations to Try for Matcha White Chocolate Cake

  • Add a hint of lemon zest for a citrusy touch.
  • Mix in macadamia nuts for crunch.
  • Swap in coconut milk to give a tropical feel.

Vegan or Gluten-Free Options

  • Use a plant-based milk and dairy-free butter substitute.
  • Choose gluten-free all-purpose flour for a one-to-one replacement.
  • Opt for vegan white chocolate, available in many health food stores.

How to Store and Serve Matcha White Chocolate Cake

  • Store at room temperature in an airtight container for up to 3 days.
  • For longer freshness, refrigerate for up to 5 days.
  • Bring it to room temperature before serving to revive the texture.
  • Serve with fresh berries, whipped cream, or an extra drizzle of ganache.

This cake isn’t just delicious, it’s fashionable. If you’re active on food TikTok or Pinterest, you’ve seen matcha everywhere. Here’s why this dessert is blowing up:

  • Fits the wellness trend (matcha is rich in antioxidants).
  • Aesthetic appeal makes it Instagram-worthy.
  • It appeals to fans of both Asian-inspired cuisine and modern fusion baking.
  • Easily customizable for various dietary preferences.

FAQs – Matcha White Chocolate Cake

Can I use culinary matcha instead of ceremonial?

Yes, but ceremonial-grade matcha gives a better color and flavor. Culinary works too, especially in baked recipes.

What can I use instead of heavy cream for ganache?

You can substitute full-fat coconut cream or oat cream for a dairy-free version.

Why did my matcha cake turn brown?

Matcha is heat-sensitive. Bake at a lower temperature or for less time to preserve the green hue.

Can I freeze the cake?

Absolutely. Wrap slices tightly and freeze for up to a month. Thaw at room temp.

Conclusion – Make This Green Dream Yours

There’s a reason Matcha White Chocolate Cake is winning hearts across kitchens and cafes alike. With its unique flavor, soft crumb, and luscious topping, it’s a recipe you’ll want to keep on repeat. Whether you’re celebrating or simply enjoying a quiet afternoon, this cake offers both elegance and comfort. Try it once, and you may find it becomes your new signature bake.

Call to Action

If you try this Matcha White Chocolate Cake recipe, share your creation on Instagram and tag us with #MatchaWhiteChocolateCake. We love seeing your bakes and featuring your photos on our page!

🍋 The Ultimate Lemon Cake Recipe: Zesty, Moist, and Irresistible

🌼 Introduction: The Comfort of Citrus in Every Bite

Imagine the aroma of fresh lemon zest filling your kitchen on a sunny afternoon. That nostalgic, citrusy scent instantly lifts your mood. Now picture slicing into a perfectly moist lemon cake recipe , each bite delivering the ideal balance of sweet and tart. This lemon cake recipe isn’t just about satisfying your sweet tooth; it’s about creating a warm, memorable experience every time you bake.

Whether you’re baking for yourself, hosting a brunch, or preparing a thoughtful homemade gift, this lemon cake recipe is a timeless classic that never fails to impress. Ready to get started? Let’s dive into the details that will make this cake your new go-to.


📏 Ingredients for Lemon Cake Recipe

IngredientQuantity
All-purpose flour2 cups
Baking powder2 teaspoons
Salt1/2 teaspoon
Unsalted butter1/2 cup (softened)
Granulated sugar1 1/4 cups
Eggs3 large
Lemon zest2 tablespoons
Fresh lemon juice1/3 cup
Milk1/2 cup
Vanilla extract1 teaspoon

🍋 For the Glaze

IngredientQuantity
Powdered sugar1 cup
Fresh lemon juice2–3 tablespoons

Tip: Fresh lemon juice adds a natural brightness to the cake. Avoid bottled juice for best results.


👩‍🍳 Step-by-Step Instructions to Make the Best Lemon Cake recipe

Step 1 – Preheat and Prep

  • Preheat your oven to 350°F (175°C).
  • Grease and line your preferred cake pan (loaf or round).

Step 2 – Mix the Dry Ingredients

  • In a bowl, sift together flour, baking powder, and salt.

Step 3 – Cream the Butter & Sugar

  • Beat softened butter and sugar until the mixture is light and fluffy. This helps your cake rise properly.

Step 4 – Add Eggs and Flavor

  • Add the eggs one at a time, mixing well after each addition.
  • Stir in lemon zest, lemon juice, and vanilla extract.

Step 5 – Combine Wet and Dry Ingredients

  • Add the dry ingredients and milk alternately, starting and ending with the flour mixture. Mix just until combined.

Step 6 – Bake

  • Pour the batter into your pan and smooth the top.
  • Bake for 45–55 minutes, or until a toothpick inserted comes out clean.

Step 7 – Glaze It

  • While the cake is cooling, whisk together powdered sugar and lemon juice.
  • Drizzle over the slightly warm cake so the glaze seeps in.

🎈 Variations of Lemon Cake You Should Try

🍇 Lemon Blueberry Cake

  • Gently fold 1 cup of fresh blueberries into the batter before baking.

🎂 Lemon Layer Cake

  • Double the recipe and use a lemon buttercream frosting between the layers.

🌾 Gluten-Free Lemon Cake

  • Use a 1:1 gluten-free flour mix. Add a tablespoon of yogurt for added moisture.

🍰 Mini Lemon Cupcakes

  • Divide batter into lined cupcake tins and bake for 18–22 minutes. Glaze or frost as desired.

🧵 Storage Tips & Make-Ahead Ideas

  • Room Temperature: Store covered for 2–3 days.
  • Refrigerator: Keeps fresh for up to 1 week.
  • Freezer: Wrap slices in foil or parchment, freeze up to 3 months.
  • Make-Ahead Tip: Bake a day in advance and glaze just before serving.

🍧 Why This is the Best Lemon Cake Recipe

  • Balanced sweet-tart flavor
  • Moist and fluffy texture
  • Beginner-friendly steps
  • Ideal for brunches, birthdays, and everyday indulgence

This recipe has been tested by real home bakers, receiving consistent 5-star reviews for both taste and texture.


🤔 Expert Tips for Baking Lemon Cake

  • Zest lemons before you juice them.
  • Bring all ingredients to room temperature before baking.
  • Do not overmix – overworking the batter will make the cake tough.
  • Let the cake cool at least 10 minutes before removing from the pan.

❓ FAQ – Lemon Cake Recipe

Can I use bottled lemon juice instead of fresh?

You can, but fresh lemon juice delivers the best flavor and aroma.

How do I keep my lemon cake moist?

Use the right amount of fat and liquid. Don’t overbake and add the glaze while the cake is still warm.

Can I turn this recipe into cupcakes?

Yes! Adjust the baking time to 18–22 minutes.

Is this lemon cake freezer-friendly?

Definitely. Freeze slices individually for quick treats later.


🌯 Final Thoughts: Brighten Your Day with Homemade Lemon Cake

This lemon cake recipe isn’t just a dessert; it’s an invitation to slow down and savor the moment. Whether you’re hosting guests or treating yourself, the simple blend of lemon, sugar, and love makes this cake stand out every time.

So go ahead—preheat your oven, zest those lemons, and fill your home with sunshine.


📢 Call to Action

Tried this Lemon Cake Recipe? We’d love to hear how it turned out!

👉 Tag your photos with #MyLemonCakeMoments or share your twists in the comments below.

You never know who you’ll inspire with your zesty creation!

The Best Chocolate Cake Recipe – Moist, Rich & Foolproof

There’s something truly comforting about a slice of chocolate cake Recipe. Whether it’s the moist crumb, the decadent flavor, or the nostalgic scent of cocoa in the oven, it often feels like a warm hug on a plate. Maybe you remember the chocolate cakes from your childhood birthdays or the one your grandmother used to make from scratch. Whatever your story is, you’re about to create your own chocolate cake tradition with this rich, delicious, and foolproof recipe.

This guide is not just another cake recipe; it’s a step-by-step experience that ensures you nail it on the first try. Whether you’re baking for a celebration or satisfying a late-night craving, this chocolate cake recipe is your new go-to.

Why This is the Best Homemade Chocolate Cake Recipe

You don’t need professional tools or rare ingredients to make this cake. All you need is:

  • Simple pantry staples
  • A few mixing bowls
  • Your oven
  • A sweet tooth (optional, but highly recommended!)

Here’s what makes this cake stand out:

  • Super Moist: Thanks to the oil and boiling water (or coffee!)
  • Decadent Flavor: Cocoa and vanilla together give you that deep chocolate experience
  • Versatile: Great for birthdays, cupcakes, or even layered cakes
  • Beginner-Friendly: No complex techniques needed

Ingredients You’ll Need for This Chocolate Cake Recipe

To make this classic chocolate cake, gather the following ingredients:

Dry Ingredients

IngredientAmount
All-purpose flour1¾ cups (220g)
Granulated sugar2 cups (400g)
Unsweetened cocoa powder¾ cup (65g)
Baking powder1½ tsp
Baking soda1½ tsp
Salt1 tsp

Wet Ingredients

IngredientAmount
Eggs2 large
Milk1 cup (240ml)
Vegetable oil½ cup (120ml)
Vanilla extract2 tsp
Boiling water or coffee1 cup (240ml)

Step-by-Step Instructions for Moist Chocolate Cake

1. Preparing Your Baking Space

  • Preheat your oven to 350°F (175°C)
  • Grease and flour two 9-inch round cake pans or one 9×13-inch pan
  • Line the bottoms with parchment paper for easy removal

2. Mix the Dry Ingredients

In a large bowl, sift together:

  • Flour
  • Cocoa powder
  • Sugar
  • Baking powder
  • Baking soda
  • Salt

3. Mix the Wet Ingredients

In another bowl:

  • Beat eggs until fluffy
  • Add milk, oil, and vanilla extract
  • Gradually combine wet and dry ingredients

4. Add Hot Liquid

  • Slowly pour in boiling water or hot coffee while mixing gently
  • Your batter will look thin—don’t worry, that’s perfect for a moist cake

5. Bake the Cake

  • Divide the batter into prepared pans
  • Bake for 30–35 minutes or until a toothpick comes out clean
  • Let the cakes cool for 10 minutes in the pan, then transfer to a wire rack

Optional – The Best Chocolate Frosting Recipe

A good cake deserves great frosting. Here’s a quick chocolate buttercream that pairs perfectly:

Chocolate Frosting Ingredients

Chocolate Cake Recipe
IngredientAmount
Unsalted butter1 cup (softened)
Cocoa powder¾ cup
Powdered sugar3–4 cups
Vanilla extract1½ tsp
Milk or cream4–6 tbsp

How to Make It:

  1. Beat butter until creamy
  2. Add cocoa and mix until combined
  3. Gradually beat in powdered sugar, 1 cup at a time
  4. Add milk or cream until desired consistency
  5. Mix in vanilla extract

Chocolate Cake Recipe Variations & Add-Ons

Don’t be afraid to get creative. Here are a few twists to try:

Flavor Ideas

  • Add espresso powder for a mocha cake
  • Mix in orange zest for a citrus-chocolate flavor
  • Try peppermint extract for a holiday version

Dietary Modifications

  • Use flax eggs and almond milk for a vegan version
  • Swap flour with gluten-free 1:1 blend

Storage and Serving Suggestions

  • Room Temperature: Store covered for up to 3 days
  • Refrigerator: Keeps for 5–6 days
  • Freezer: Freeze layers (unfrosted) up to 2 months

Serving Tips

  • Best enjoyed with vanilla ice cream or whipped cream
  • Add fresh berries for a tart balance
  • Warm slices in the microwave for extra indulgence

FAQ – Chocolate Cake Recipe

Can I use cocoa mix instead of unsweetened cocoa powder?

No. Cocoa mix contains sugar and milk, which changes the texture and sweetness.

How do I make the cake more moist?

Don’t overbake it and always use oil or sour cream for moisture.

Can I make this recipe into cupcakes?

Yes, bake at 350°F for 18–20 minutes. Makes about 24 cupcakes.

Is it okay to freeze the cake?

Absolutely. Wrap tightly in plastic and foil. Defrost in the fridge overnight.

What’s the secret to deep chocolate flavor?

Use coffee instead of water to enhance the chocolate notes.

Conclusion – Your New Favorite Chocolate Cake Recipe

You’ve just discovered the only chocolate cake recipe you’ll ever need. It’s easy, rich, and full of bold chocolate flavor. It works for all occasions and is flexible enough for personal twists.

Now it’s your turn to bake it. Share your photos, try new toppings, and make memories around this classic dessert. After all, chocolate cake is more than just food—it’s a slice of joy.


Loved this recipe? Share it on social or save it to Pinterest! Don’t forget to comment below with your results and any fun twists you tried!

Mushroom Cake Recipe – A Savory Twist You’ll Fall in Love With

Discover a New Comfort Food Favorite

Sometimes, you crave something that’s not too sweet, not too spicy, but absolutely satisfying. You want warmth, depth, and the kind of flavor that makes you pause after each bite. This is exactly what you get with a Mushroom Cake Recipe – a savory, comforting dish that might surprise you at first but quickly wins your heart. If you’ve never had cake made with mushrooms, you’re in for an unforgettable treat.

This isn’t your usual dessert. It’s rich with earthy mushrooms, fluffy with eggs, and seasoned with herbs that make every slice smell like a countryside bakery. Whether you’re vegetarian or simply exploring new meal ideas, this mushroom cake will quickly become your go-to comfort food.


What Is a Mushroom Cake Recipe?

A New Take on Savory Baking

A mushroom cake is essentially a savory quick-bread or loaf that’s made with chopped mushrooms, herbs, eggs, and flour. Instead of sugar and vanilla, you mix in garlic, onions, and cheese. The result is something between a quiche and a loaf cake — soft, full of flavor, and utterly satisfying.

Origins and Popularity

While this dish isn’t widely known in mainstream food culture yet, it’s gaining popularity among food bloggers and Pinterest creators, especially in Europe and the U.S. health-conscious communities. It’s easy to make, incredibly versatile, and a smart way to get more veggies into your diet.


Ingredients for the Best Mushroom Cake Recipe

Here’s everything you need to prepare this unique and flavorful dish:

IngredientQuantityNotes
Mushrooms (chopped)2 cupsUse cremini, shiitake, or a mix
Onion (chopped)1 mediumAdds sweetness and aroma
Eggs3Essential for binding
Olive oil2 tbspFor sautéing and flavor
Fresh herbs2 tbspTry parsley, thyme, dill, or oregano
All-purpose flour1 cupAlmond flour can be used for gluten-free
Grated cheese½ cupParmesan, mozzarella, or feta (optional)
Salt & black pepperTo tasteSeason well for depth of flavor

Step-by-Step Instructions to Make Mushroom Cake

Step 1: Prepare the Vegetables

  • Clean and chop your mushrooms.
  • Dice the onions finely.
  • Heat the olive oil in a skillet and sauté mushrooms and onions until they are golden and all moisture is gone.

Step 2: Mix the Wet Ingredients

  • In a large bowl, beat the eggs.
  • Add salt, pepper, and chopped herbs.
  • Stir in the grated cheese (if using).

Step 3: Combine and Fold

  • Add the flour gradually, stirring to avoid lumps.
  • Fold in the cooked mushrooms and onions.
  • Mix gently to distribute evenly.

Step 4: Bake

  • Grease a cake or loaf pan and pour the mixture in.
  • Bake at 350°F (180°C) for about 35–40 minutes.
  • Insert a toothpick in the center; if it comes out clean, it’s ready.

Step 5: Cool and Serve

  • Let the cake rest for 10 minutes before slicing.
  • Serve warm or at room temperature.

Tips and Variations for the Perfect Mushroom Cake

  • Go spicy: Add red chili flakes for a little heat.
  • Make it vegan: Use flax eggs and dairy-free cheese.
  • Add nuts: Walnuts or pecans offer a nice crunch.
  • Use different herbs: Try sage, rosemary, or basil.
  • Turn it into muffins: Great for on-the-go snacks!

When to Serve Mushroom Cake

Brunch Centerpiece

It pairs beautifully with mimosas and a light salad.

Work or School Lunch

It keeps well and tastes great cold or reheated.

Dinner Side Dish

Goes well with soups, stews, or roasted vegetables.

Appetizer for Guests

Cut into cubes and serve with toothpicks and a dip.


Frequently Asked Questions (FAQs) About Mushroom Cake Recipe

Can I use canned mushrooms?

Yes, just be sure to drain and dry them well to avoid excess moisture in your batter.

Is this mushroom cake gluten-free?

If you substitute with almond flour or gluten-free flour blends, absolutely.

How long does it keep?

Stored in an airtight container in the fridge, it lasts 3–4 days. You can freeze it for up to a month.

What do I serve it with?

Try a garlic yogurt dip, simple arugula salad, or even tomato soup.

Can kids eat this?

Definitely. It’s a fun way to sneak more veggies into their meals.


Conclusion: Why You Need to Try This Mushroom Cake Recipe

Let’s face it, we often get stuck in food routines. The same breakfasts, the same dinners. This mushroom cake gives you a reason to break the cycle. It’s simple, hearty, and full of wholesome ingredients you likely already have.

You don’t need to be a professional chef. Just follow the steps, trust your instincts, and bake with joy. Whether it’s your first time or you’re a seasoned home cook, this recipe has something magical to offer. It’s not just food; it’s a new tradition waiting to happen in your kitchen.


Call to Action

Tried this recipe? Share your photos online using #MushroomCakeMagic and tag your foodie friends. If you added your own twist, leave a comment and let others get inspired by your creation. Subscribe to our blog for more unique and delicious recipes that bring joy to your table!

Mushroom Cake Recipe